Spring Woodturning Challenge. Place your entry here

UKworkshop.co.uk

Help Support UKworkshop.co.uk:

This site may earn a commission from merchant affiliate links, including eBay, Amazon, and others.

Grahamshed

Established Member
Joined
14 Apr 2012
Messages
3,066
Reaction score
3
Location
Oxfordish
PLEASE POST YOUR SPRING WOODTURNING CHALLENGE ENTRY HERE

The Spring Challenge was for a Lidded box. Paul Hannaby has kindly agreed to judge this first quarters Challenge and my thanks go to him for that.

The Spring Challenge is open to anyone and everyone.
Rules...
1... The box can be of any size or shape and must be fit for purpose i.e it must be hollow
and big enough to contain something useful.
2... Entries must be new and made specifically for the Challenge.
3... Entries must be made of wood which must be turned on a lathe using woodturning tools.
4... Carving, colouring, pyrography , texturing, segmented turning and piercing are allowed to the box and lid ( probably not all at once ☺) but the judge must be able to see your turning skills! That is what is most important.

Please post three images of your work together with details of the wood used, the tools and methods used to make it and any key dimensions.
Images needed:-

1 showing a general view of your entry with the lid attached.
1 view of the inside of the box with the lid beside it (top view)
1 view of the bottom of the box and the inside of the lid.
A fourth picture may be added (but is not compulsory) if needed to show any other interesting details of your entry.

Image size - please use image size 640 x 480 0.3mp, as in previous challenges

Please upload your pictures and description between 10pm on the 27th March and 10pm on the 29th March.

Please also send me a PM giving me your own opinions of 1st, 2nd and 3rd places amongst the entries (other than your own) between 10pm on 29th March and 10pm on 31st March (for me to compile the entrants’ placings).

Good luck.
 
013.JPG
010.JPG
011.JPG
012.JPG
This is my entry, having looked at Chj wip on segmented turning, I decided to give it a go for the spring challenge, the woods used are walnut and ash and the dimensions are 130mm diameter at its widest tapering in at the top and bottom, and stands 110mm tall. The tools that I used were a squared carbide cutter, a bowl gouge, a 1" square end scraper, a round nosed scraper and a skew chisel. It was sanded through the grits to 320g then cellulose sealer applied and then buffed on the 3 wheel system.
Cheers
Andy
 

Attachments

  • 013.JPG
    013.JPG
    125.9 KB
  • 010.JPG
    010.JPG
    125.7 KB
  • 011.JPG
    011.JPG
    121.8 KB
  • 012.JPG
    012.JPG
    120 KB
Here is my effort in Yew. Diameter 70mm, height is 95mm. Turned using spindle gouge, scrapers, parting tool and a forstner to hog out the waste inside. Finished with shellac inside and shellac & wax outside.
rsz_yew_box1.jpg

rsz_yew_box_inside.jpg

rsz_yew_box_underside.jpg

rsz_yew_box_lid_detail.jpg
 

Attachments

  • rsz_yew_box1.jpg
    rsz_yew_box1.jpg
    145.7 KB
  • rsz_yew_box_inside.jpg
    rsz_yew_box_inside.jpg
    208.3 KB
  • rsz_yew_box_underside.jpg
    rsz_yew_box_underside.jpg
    188.2 KB
  • rsz_yew_box_lid_detail.jpg
    rsz_yew_box_lid_detail.jpg
    204 KB
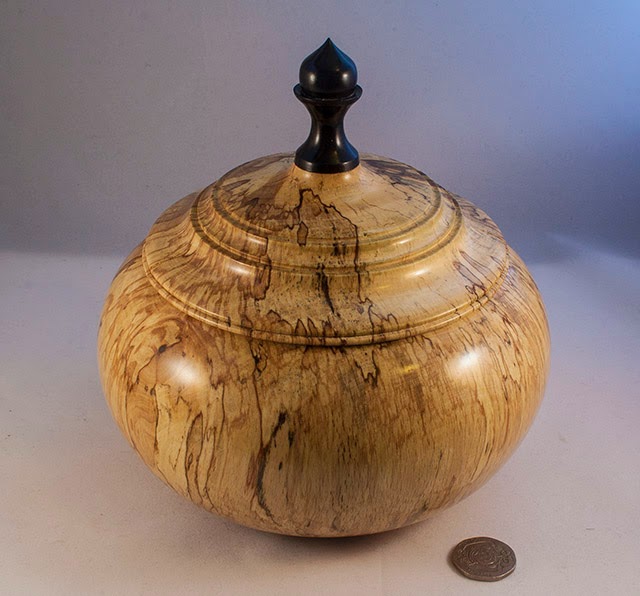
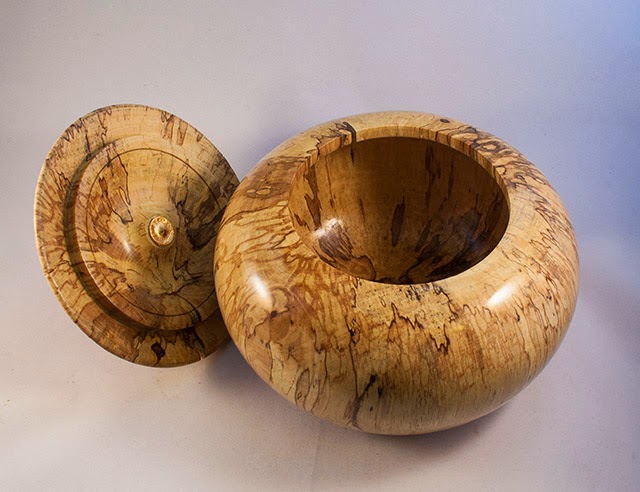
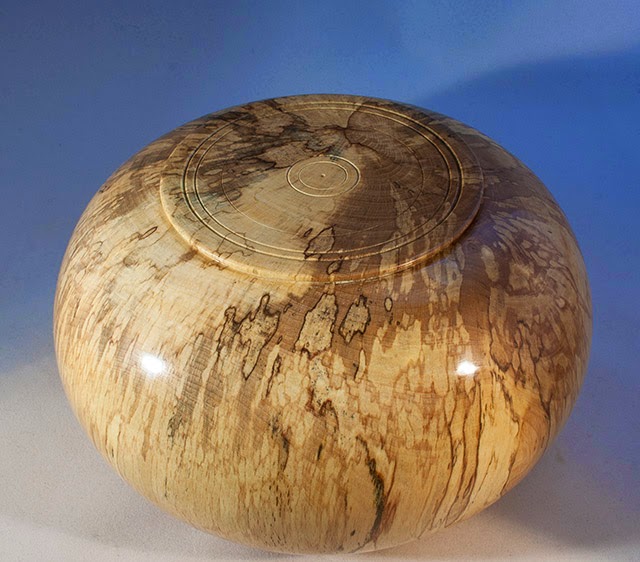
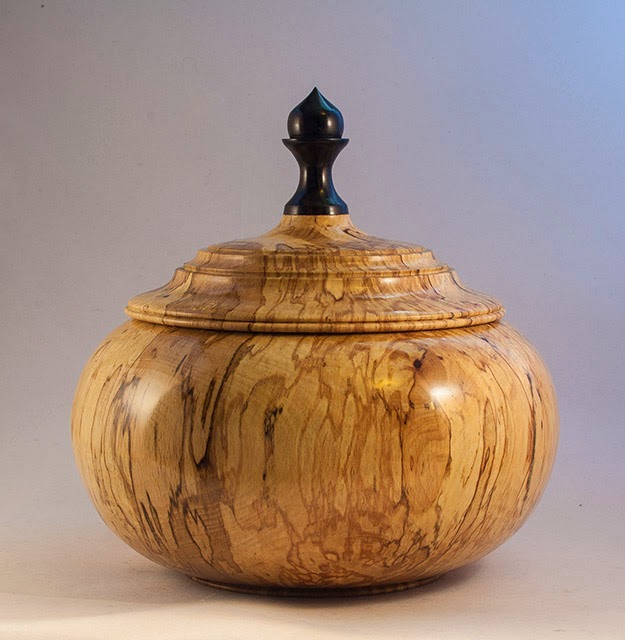
I was pretty late making this as I could not figure out how I wanted to approach the challenge, in the end I decided to go with something much bigger than I originally had in mind as it would be something very different and new for me to do.

Wood is Spalted Beech from a single log, I used a 5/8 bowl gouge for general roughing and shaping plus fine finishing on the outside, (shear cutting) I used a carbide hollower for the interior. 3/8 spindle gouge and a point tool for fine details. The biggest problem was the punky nature of the wood, especially the inside which was very rough and took a lot of finishing, getting crisp transitions on the lid was also something I had to be very careful with, especially when sanding them, so easy to lose the edges then.

The finial is Ebony, again I mad a change here as at first I made a tall thin finial, but decided this looked more balanced and practical.

The box is 6" wide, the 20p is to give a sense of scale.

Finish is Shellac polished to a high gloss both inside and out and includes the base, the soft highlights in the images are due to the light diffusers used for the photography.

Box-1.jpg


Box-open-2.jpg


Box-base-3.jpg


Box-side-1.jpg
 
One last thing for my Mom. 5 kids, 5 woods. Maple, cherry, ash,black walnut,brown oak. I didnt finish the inside, didnt think she would mind. Oiled and buffed up on the One way wheel system.Didnt show all the inside of the lid, there is a sticker from the crematorium there, and it would nt come off.thx
 

Attachments

  • P1020344.JPG
    P1020344.JPG
    149.2 KB
  • P1020346.JPG
    P1020346.JPG
    182.4 KB
  • P1020343.JPG
    P1020343.JPG
    178 KB
I've gone for simple curves with a decorative bead mid belly on a piece of apple. I made this for my Missus for valentines but figured it would serve for the competition too given its now quarterly.

So the spec and procedure is
Apple
circa 5" tall and 3" wide
hollowed with spindle gouge and finished with a French curve scraper.
Corners all knocked off with a skew and outside curves spindle gouge
Lid underside hollowed in chuck and then the top turned once jam chucked onto the finished body. Base tenon removed and underside undercut and cleaned up with another jam chuck.

The finish is Danish Oil. Just a single coat as I didn't want any sheen but just to have the grain come alive.

The jaunty angle lid handle was just a turret turned on the lid and then hand band sawn and cleaned up

Various Feb 1.jpg
Various Feb 2.jpg
Various Feb 3.jpg
 

Attachments

  • Various Feb 1.jpg
    Various Feb 1.jpg
    133 KB
  • Various Feb 2.jpg
    Various Feb 2.jpg
    144.6 KB
  • Various Feb 3.jpg
    Various Feb 3.jpg
    208.3 KB
Here's my 'lidded box' made from Cherry. It's about 130mm high and 75 mm across (can't measure the exact dimensions as it disappeared on Mother's day ...)

After several attempts (first attempt was in Yew, but it didn't look right, second bit of wood had a hidden void, and the third decided it didn't like the look of a skew chisel) this was made round with a roughing gouge, a tenon cut on both ends and then reduced to the final size for the main body. The main body was then separated from the lid with a parting tool and thin pull saw and the inner dome cut with a bowl gouges before finishing with a scraper and a parting tool to make the rings and cut the inner mating surface. The inside was then sanded and finished with sanding sealer before being set aside.

The main body was mounted into the chuck and the main void made with a forstner bit before being increased in size with a hollowing tool. Once it was close to the final dimensions the mating surfece for the lid was slowly cut with a spindle gouge on a very slight slope with the lid being tried numerous times until it just fitted on the start of the slope. The remainder of the lip was then cut to that diameter to ensure a tight fit. Once that drama was done, the inner surfaces were cleaned up with a bowl gouge and scraper and the outside given a bit of shape at the bottom. The lid was then mounted onto the body and very lightly cut down to the finished outer shape with bowl and spindle gouges. once complete all the unfinished surfaces were sanded to 320 grit, sealed with sanding sealer and the body was cut away from the chuck with a very slight shallow in the bottom.

Finally the whole piece was buffed and finished with Carnuba wax, photographed and dispatched north via the Royal Mail to arrive just in time for Mother's Day (which is a whole other story).
 

Attachments

  • Spring_15_seperate.jpg
    Spring_15_seperate.jpg
    107.5 KB
  • Spring_15_bottoms.jpg
    Spring_15_bottoms.jpg
    150.8 KB
  • Spring_15_tops.jpg
    Spring_15_tops.jpg
    142.6 KB
  • Spring_15_whole.jpg
    Spring_15_whole.jpg
    127.4 KB
Back
Top