Trevanion
Greatest Of All Time
The Kity 623 Spindle Moulder is a great, very capable, little light-duty machine and there are quite a lot of these machines out in the wild but despite that, there is very little information to be had about them online. So I thought I would make this thread for both people looking at buying one and people looking to strip down/change the bearings on theirs as it's a right fumble if you're going at it blindly like I did, some prior information would've been a godsend and saved me a couple of hours of figuring out :lol:. My machine was made back in 1988 and it's a great little machine for small jobs where you don't need a powerful moulder to perform it, I would say for the serious hobbyist it's perhaps the perfect spindle moulder, it's very compact and isn't much larger than a router table but has more than enough power to get the job done faster and to a far better quality than a router table. To see what level of complex work can be achieved on one of these little gems please look at this excellent thread over at Woodhaven2 by Meccaroll: www.thewoodhaven2.co.uk/viewtopic.php?f=26&t=2122&sid=a6f1f7bad9e7c63c472f8318e2057527 (Unfortunately the Nazis over at Photobucket have decided to slap a big watermark and blur the photos but you can make out what's going on.)
A quick rundown of the machine:
For a while now I had noticed the bearings on my machine haven't sounded particularly great, but not absolutely terrible yet. But since I have a massive penchant for maintenance I decided to strip the machine down to replace the main shaft bearings and the motor bearings. At first, I thought it would be a fairly simple job and it is when you know how to do it but if you're doing it without knowing how any of it comes apart it is very quite tricky, the machine is very compact so access to anything is very difficult.
Tools and bits you will need:
First things first is to take off the moulder fence and any blocks and spacers fitted, this is fairly straightfoward so I won't go into detail. I thoroughly recommend taking your own photos as you disassemble the machine (And while you disassemble anything else in your life too!) as they're invaluable reminders of how to put stuff back together. When I put this machine back together the first time I didn't reference the photos because it was still "fresh in the mind" and ended up with a bolt and washer left over :x . Had to take it back apart to figure out where I forgot to put them as there is no access once it's back together. You've been warned :wink:
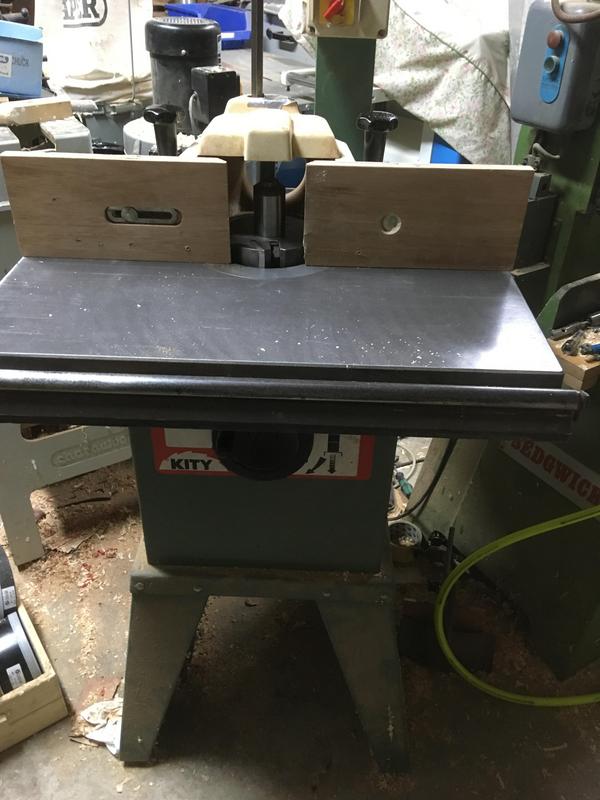
After the bits have been taken off go around the back of the machine and take the back panel off which is held on with four 10mm bolts, one in each corner. Once the back is released it will still be attached to the motor via the cable to the control panel, rest the panel on top of the machine so you can work on it without disconnecting the cable. Next, you need to take the belt off the machine by slackening the motor bracket and moving it forward. After that, take the motor pulley off which is held on with a 10mm bolt underneath the shaft, wind the height of the cutter shaft to its highest position which will give you more clearance to get the pulley off. Take the ratchet with the circa 2" length extension (I used a swivel joint from the set) and put it underneath the pulley and fiddle around until it's on the head of the bolt, with one hand hold the pulley and with the other loosen off the bolt with the ratchet. My hand is slim enough that I could get it under the pulley to loosen off the bolt the rest of the way by hand quickly but it was a squeeze and I imagine not many could do it easily. Once the pulley is off the key should drop off the shaft so DON'T lose it! Put the pulley, the bolt and the key somewhere safe for later.
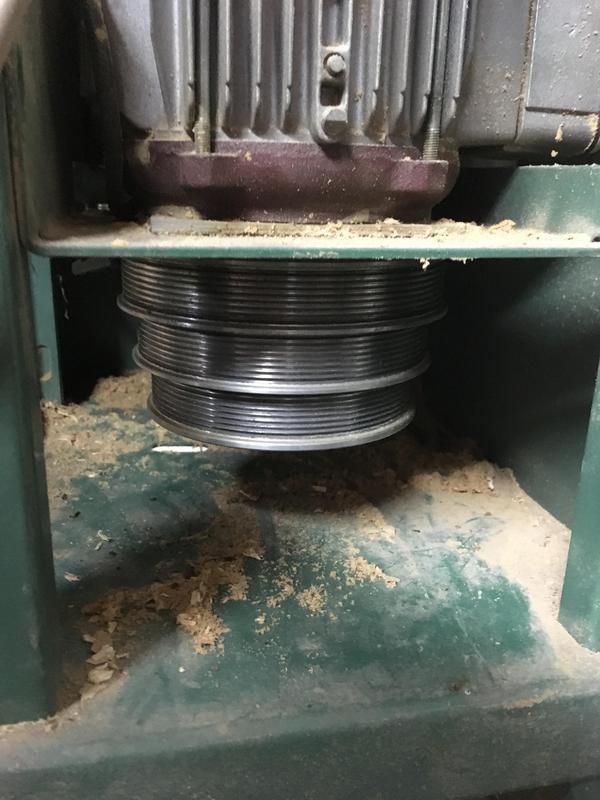
Once the pulley has been stored safely it's time to take the motor off, this is done by taking off four 10mm nuts and washers that hold the motor onto a loose plate. These nylock nuts are only snugged up as they need to allow the motor to move back and forth. At this point it's worth having some kind of container like an icecream tub to keep all the pieces in. Before doing anything else wind the shaft back down to it's lowest point which will allow removing the moulded vent that's on top of the motor, this is held in place by two clips that engage onto either side of the motor fan cover. Careful removing the vent as it's quite old plastic and mine was a little brittle.
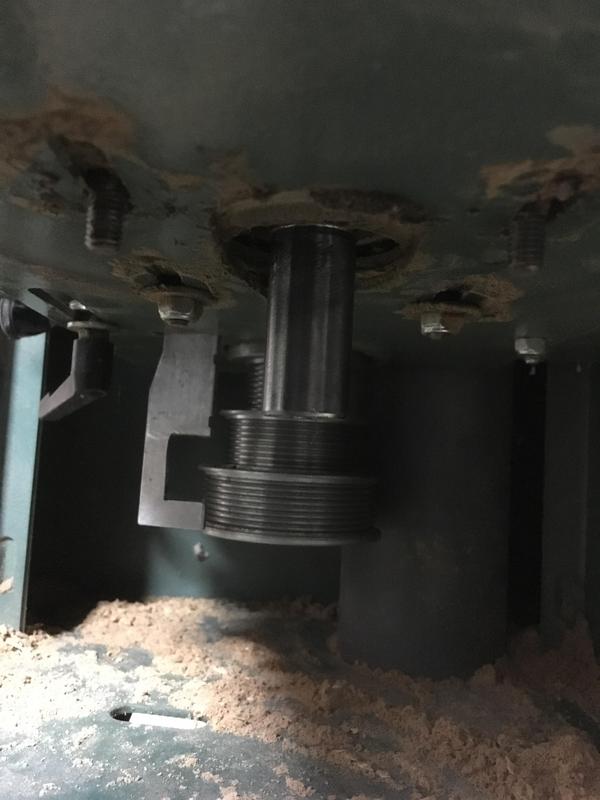
While the motor's slack, disconnect these two connectors to the door switch first, they just pull off without any special equipment. Neutral blue goes on the left connection, Live brown on the right.
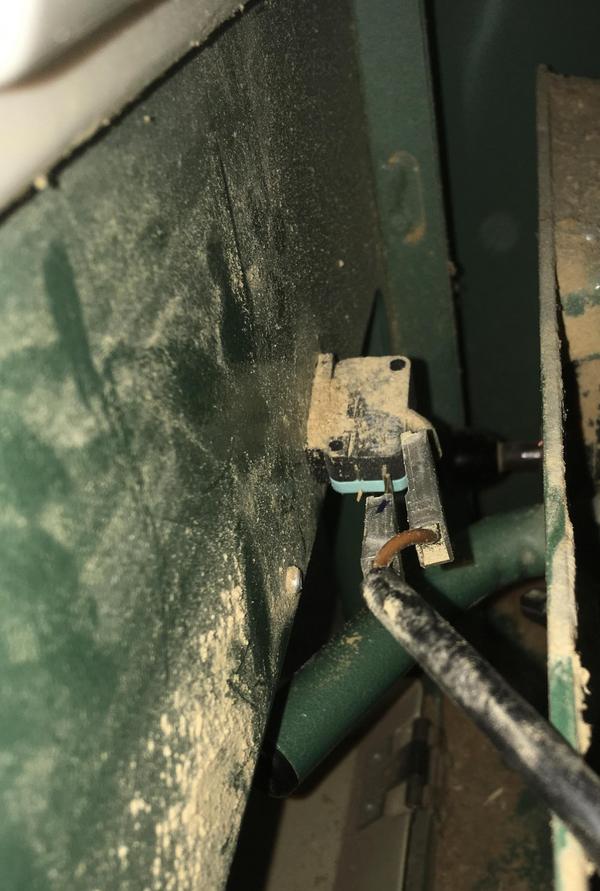
With the cable to the door switch disconnected, you can now turn the motor 90 degrees clockwise to access the wiring terminal box. Don't worry! I'm rubbish with electrics so we'll keep this as simple as possible with as little disconnections as possible. :wink:
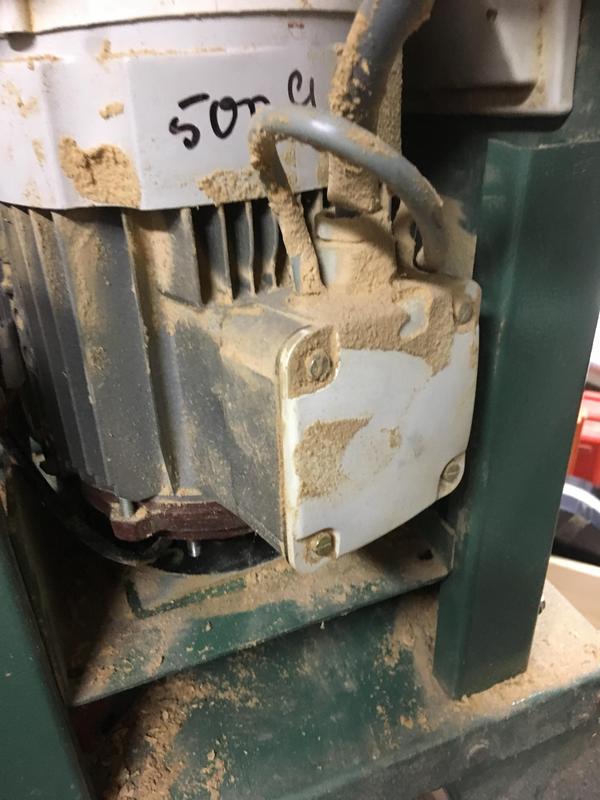
You need to disconnect black wires 1, 2 and 3 (they're labeled on their sheathing) that come out of the thin grey cable from the choc connector block (It's worth labeling the block for ease of putting them back) and then you need to take black wire 4 off the terminal itself which is held on with a 7mm nut which is easiest taken off with a 7mm socket in the fingers but can be done with a spanner etc. Replace the nut back onto the thread once wire 4 is removed so that more wires don't come loose when you're not watching. These wires go into a grey cable which feeds around the machine and into the speed reader, pull the grey cable out of the terminal box so that it is not attached to the motor.
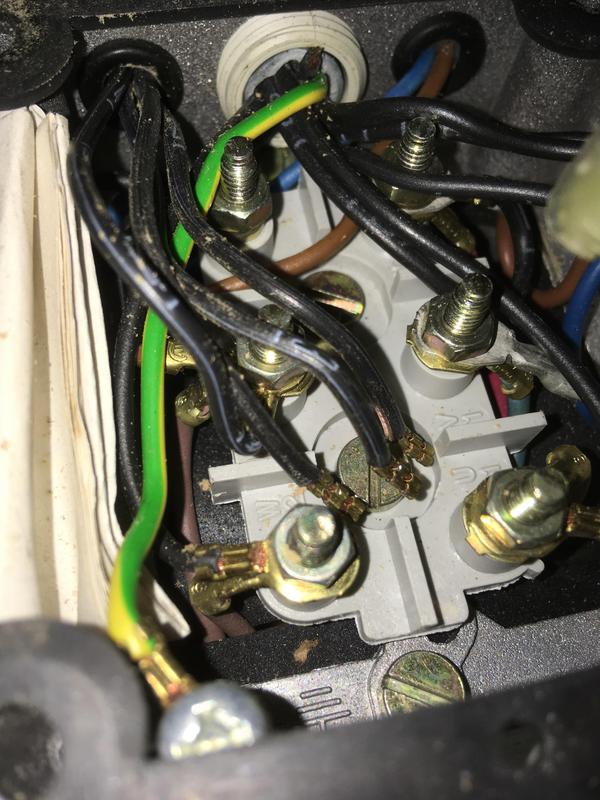
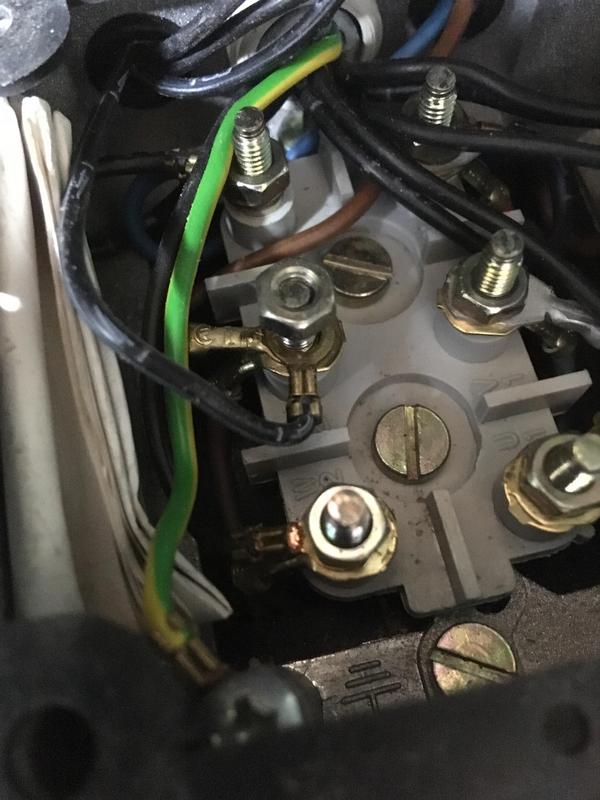
After that take off the capacitor which is held to the frame of the machine with a 13mm nut and shakeproof washer, pictured below with nut and washer removed.
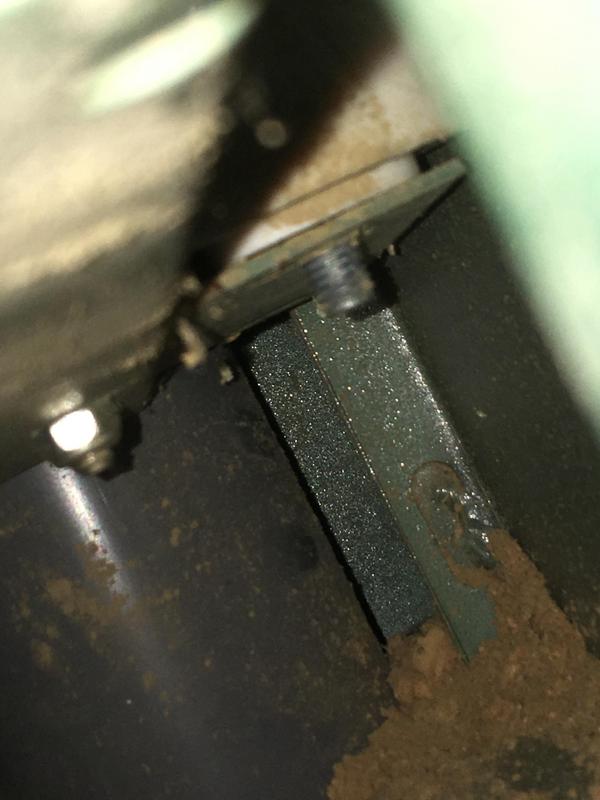
Now the motor is completely free from the machine you can pull it completely out of the machine with the capacitor attached and the motor still attached to the back panel. The motor isn't particularly heavy but it helps to have a hand to shift the motor and back panel onto the bench which can be awkward to carry the two.
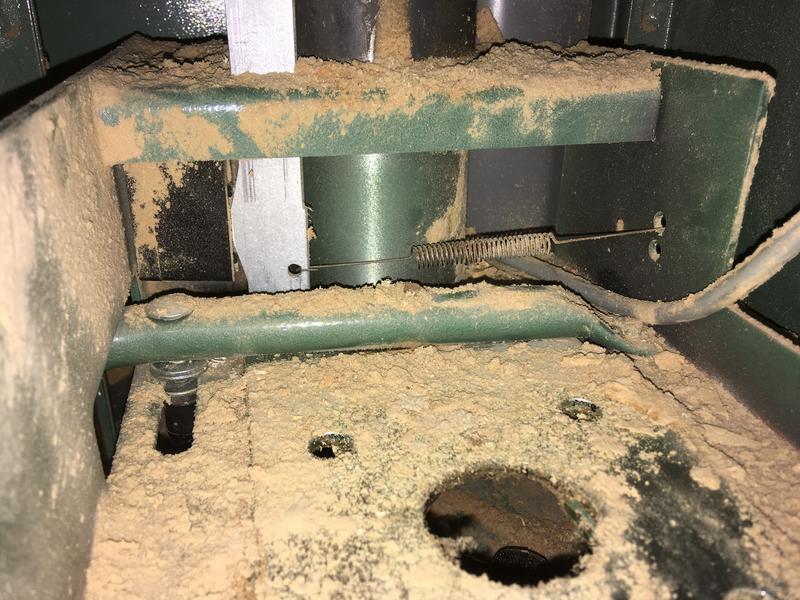
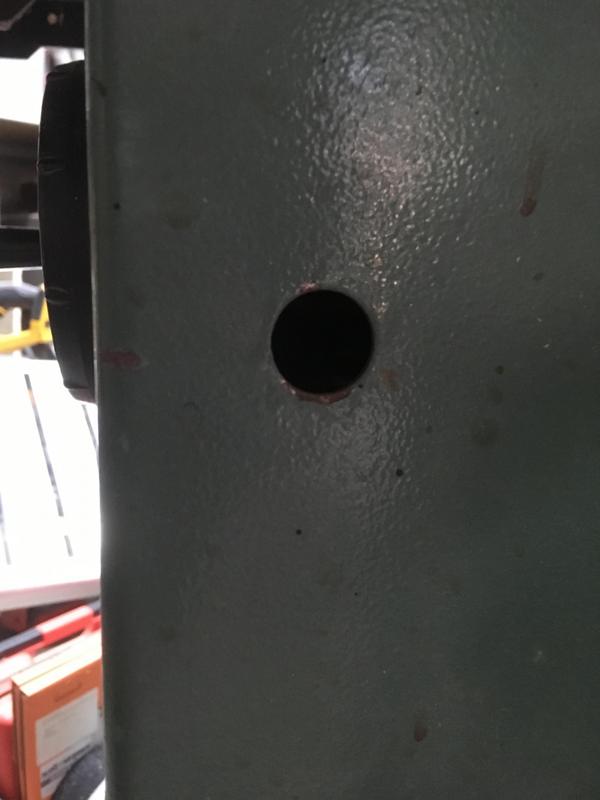
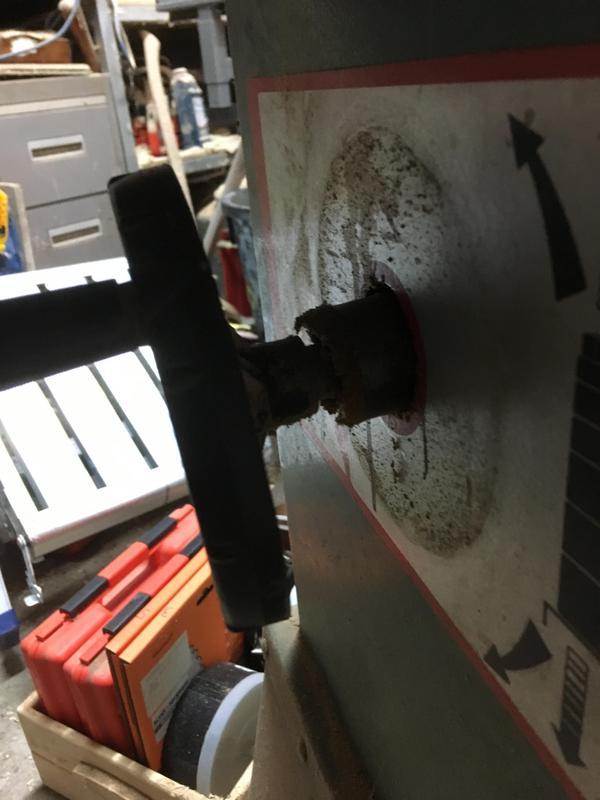
Now you need to take the front handwheel off which involves using a 10mm socket on the end of the 12" extension I mentioned in my list. this extension needs to go through a hole in the right side of the machine and meet up with the 10mm bolt inside. It's a bit of an art to get it located on properly but you can guide it by sticking your hand in and feeling around the back if you're having trouble. You only need to slacken this bolt and not undo it as I discovered after undoing it completely. Once it's slack you can pull the handle straight out the front of the machine.
Take all the 10mm bolts that hold the bed onto the carcass of the machine, there's four on each left and right side of the machine and then there's two hidden away underneath the leveling bar at the front. You don't need to touch the leveling bar so that will help you line up the bed later. Now you should be able to lift up on the bed and take the bed off along with the undercarriage assembly, this isn't particularly heavy but it might be handy to have someone help.
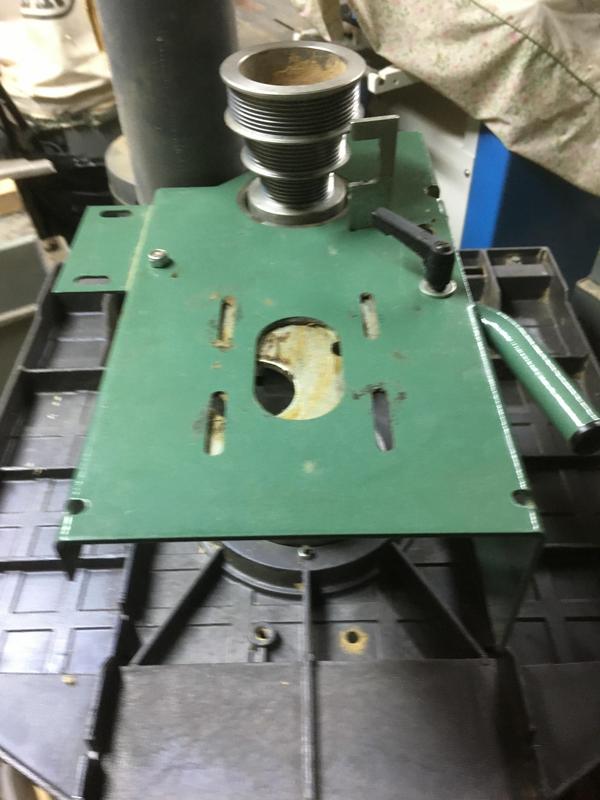
Once the main assembly is out of the machine its fairly straightfoward to take apart from here, (I unfortunately didn't realise this until I was putting it back together so I stripped out the whole machine first before taking the bed off, the way I've dictated here is much easier) The shaft pulley is held on with a 13mm bolt so undo this and there will be another key on the shaft, again, keep these safe. You can also take off the speed reader which the aluminium bar is held in place with a spring and the reader itself with two screws into the body. The motor tension lever and loose plate can also come off which is held in place by a small coach bolt and locking handle and a 10mm nylock nut and bolt.
To get the shaft out you need to take off the bolt which is located in front of where the pulley just came off, once undone you can put the handwheel back into the casting and unwind the shaft to a point and then you'll have to pull the shaft out of the casting. The shaft tube and sheet metal base are a single piece and are inseparable.
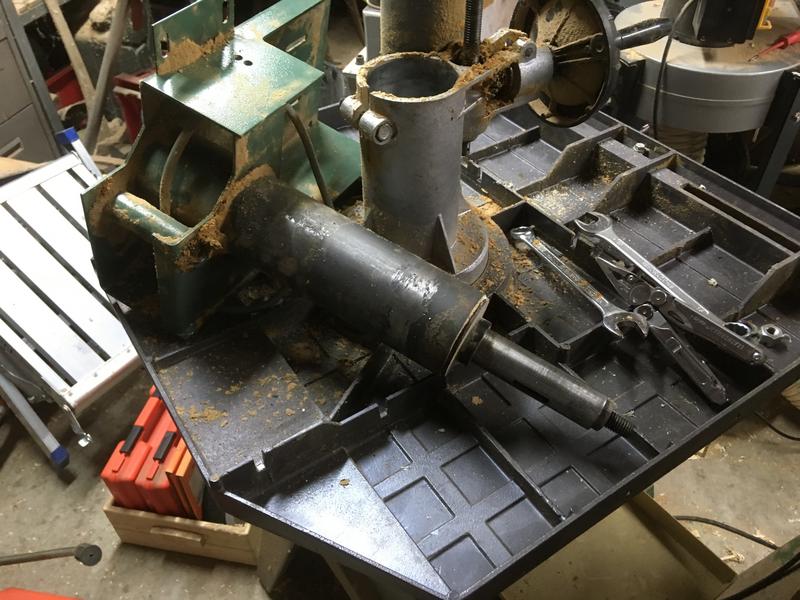
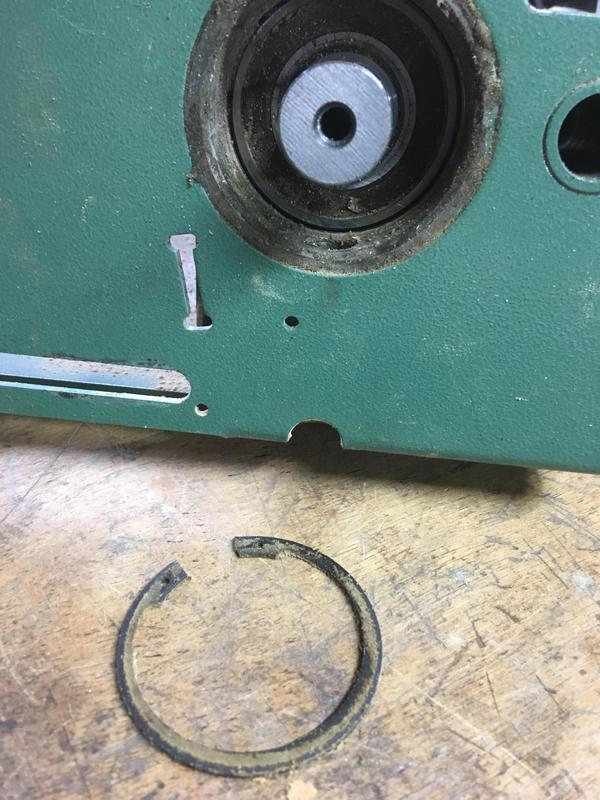
Now that the shaft and base are free we can remove the spindle bearings. This is done by taking a pair of internal circlip pliers and pulling the circlip in the bottom of the shaft out. With a soft faced hammer tap firmly on the bottom of the shaft and that will expose a lip around the base of the shaft at the top where you can pry the base off the shaft.
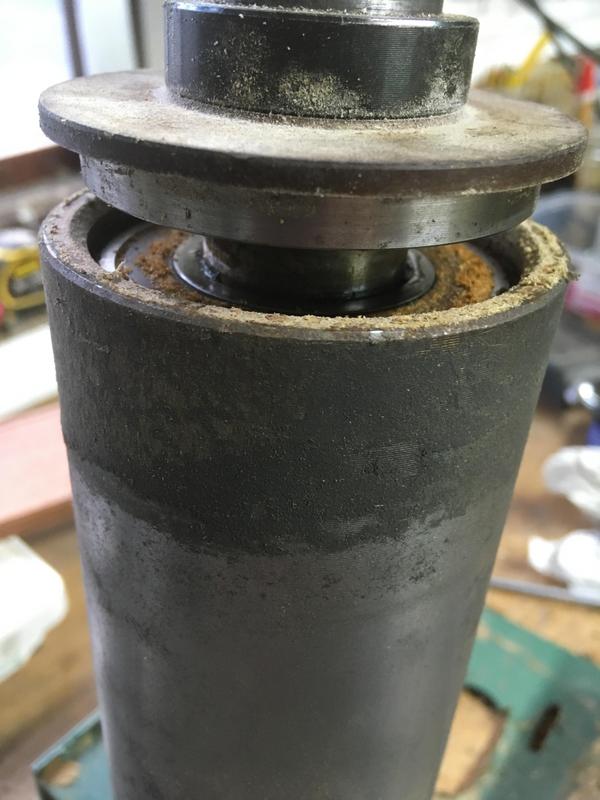
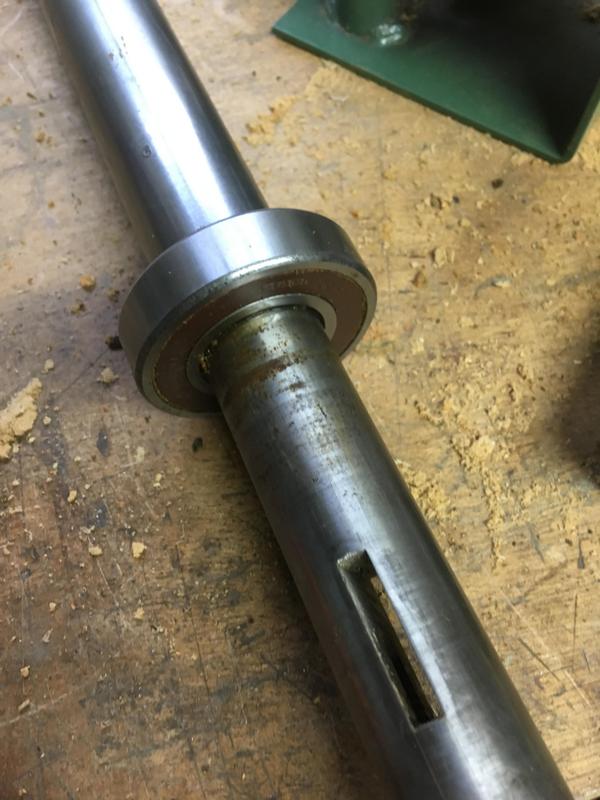
Once the base is removed continue taping the bottom of the shaft until the bottom bearing comes free from its register and the shaft and the top bearing comes out of the column. To get the top bearing off it's register I found it was best to tap on the inner raceway of the bearing while the shaft was in a vice, I didn't have a bearing puller long enough to extend the full shaft length. The bearings that came off were NSK 6206DDU C3 Clearance bearings, I replaced them with SKF 62062RS C3 bearings.
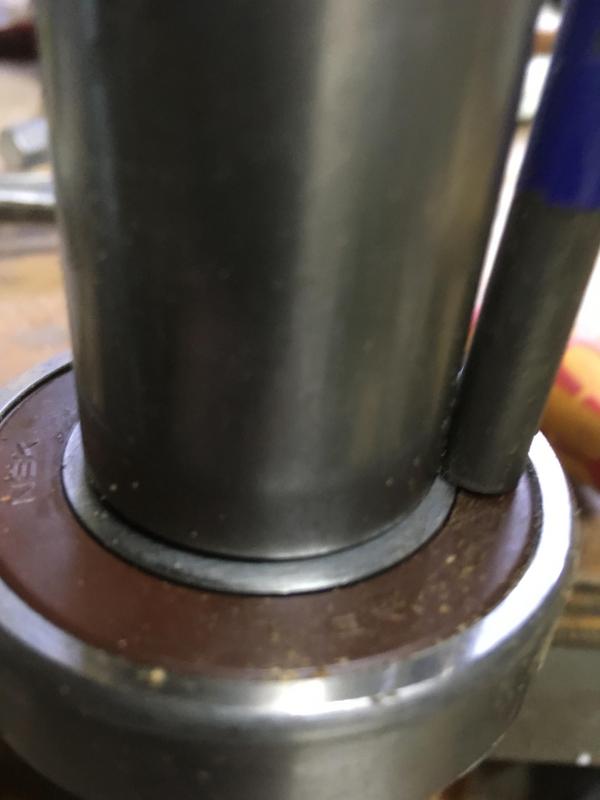
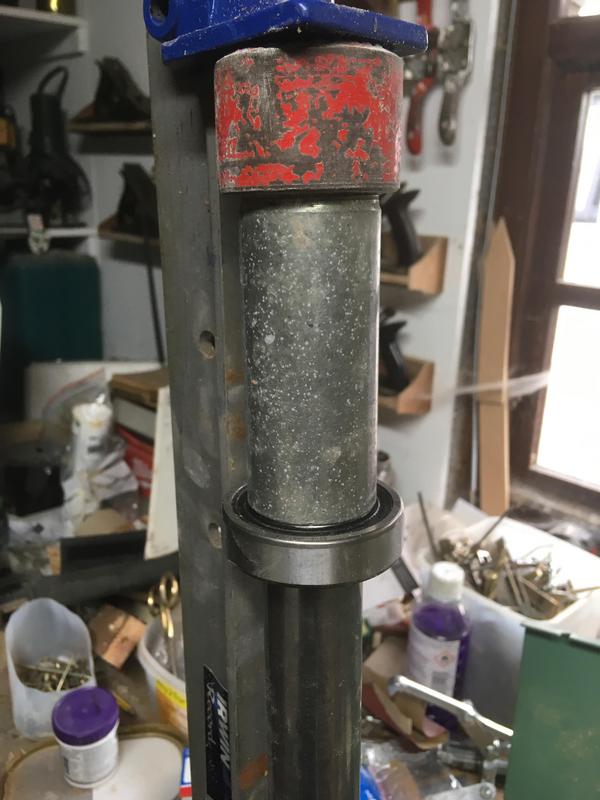
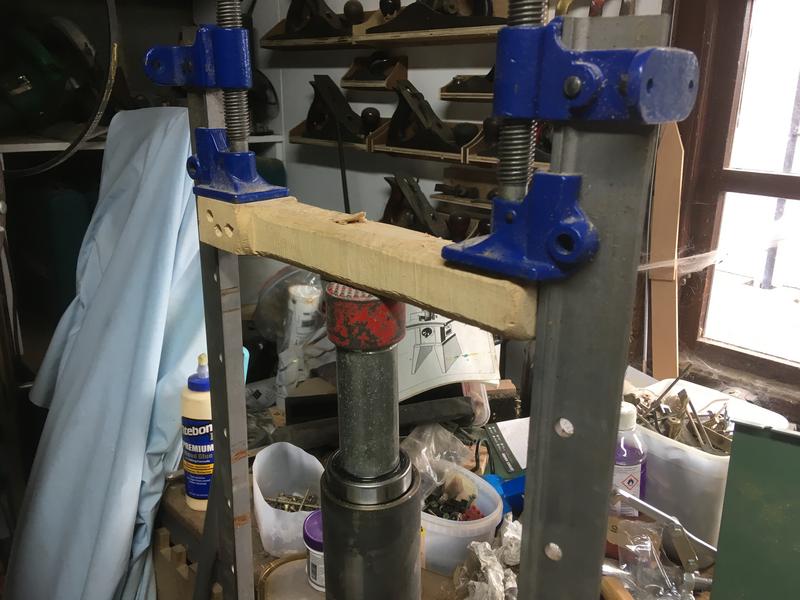
Now the new bearings can be put on, I actually used a Record T-Bar sash clamp as a press to get the bearings on with a 32mm bore piece of tubing. I started with the bottom bearing as this can be held in place with the circlip in the column and the top bearing pressed into place in the column. I used two sash clamps clamped between the vice which was holding the column and a piece of wood extending between them to get the top bearing pressed into place. Once this is done the base of the top of the shaft can be replaced by tapping it back into place and the bearing replacement on the main shaft is complete. The machine can now be put back together the way it was taken apart, up until the motor going back into place if you want to change the motor bearings as well.
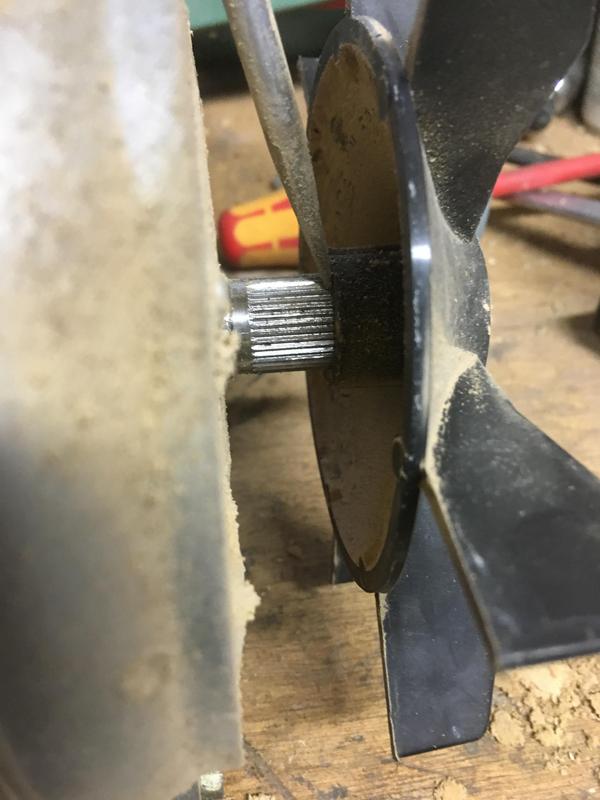
It's fairly straightforward to strip down the motor, take off the rear plastic fan cover which is clipped in place by two pieces sticking out of the motor, just pry between the motor and the fan cover and pop off one side and it should come off. Once that's off you need to take the fan itself off which involves getting a pair of screwdrivers and prising on the base of the fan to pry it off the shaft.
Now you need to undo the four long 8mm screws that hold the two motor ends together which then will allow the backend of the motor to come free and the whole rotor assembly will come out with it along with 2 metal shims and a felt washer.
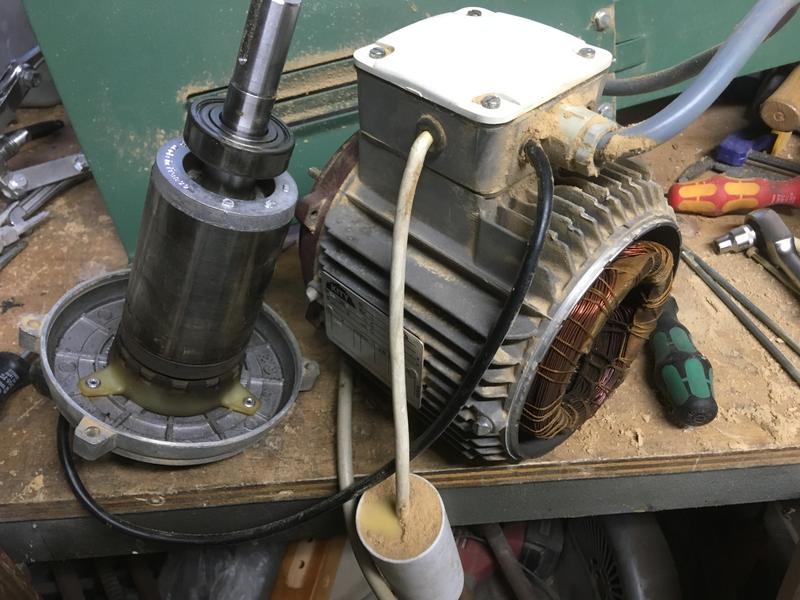
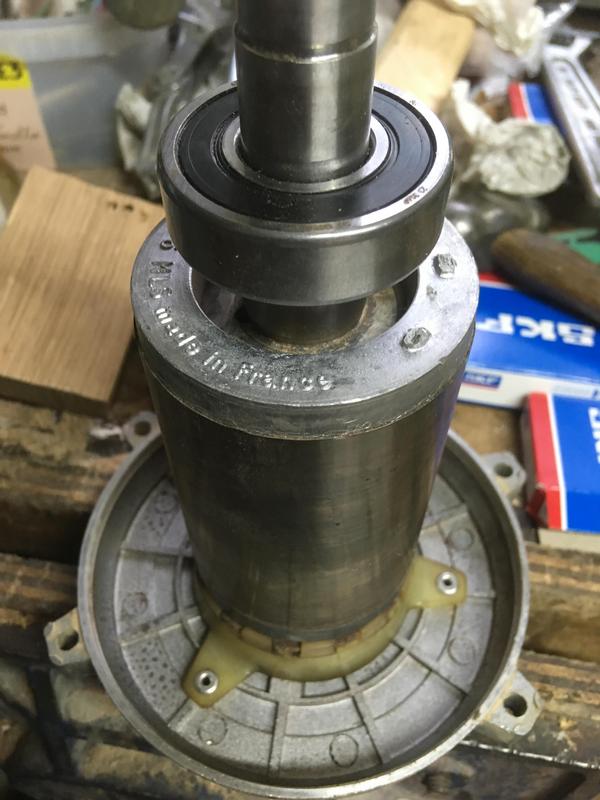
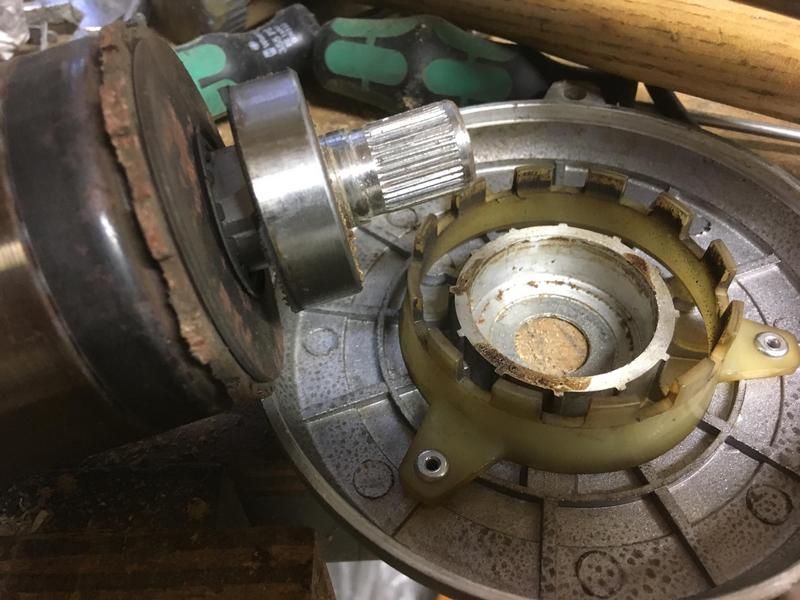
To get the back motor end off you need to hold onto the motor end and hit on the end of the shaft (the end with the serrations for the fan) with a soft face hammer, eventually you will work loose the bearing from the housing and you will end up with just the rotor with the two bearings at each end. You need a bearing puller to get these bearings off as there really isn't any other non-destructive way to remove them. One bearing was a Koyo 6204ZZ and the other a SKF 6203ZZ bearing, it's a little unusual to have two different manufacturers bearings in the same motor. The new bearings can be tapped into place by using a piece of wood against the inner raceway and tapping firmly on it with a hammer working your way around the bearing to keep it moving without skewing it off, you could also press the bearings on if you had something large enough to hold the whole rotor, I didn't. With the bearings replaced you can GENTLY tap the motor end back onto the bearing and replace the rotor assembly back into the motor, screw it back together and the motor bearing replacement is complete.
Now all you have to do it put the motor back into the machine just how you took it out, put all the other bits back together and your machine should be operational once again! It would probably be best to let the machine run with nothing on the shaft for up to an hour just to let the bearings wear in and loosen up a little before using it with cutter blocks.
I really hope this thread helps someone in the future as it would've been an absolute godsend to have it for myself when I was pulling it apart, those damn french people and they're pesky compact machines! :lol: They're great little machines and I thoroughly recommend it to anyone from a serious hobbyist to even a large scale operator for smaller tasks. Once you start spindle moulding you won't go back to a router table! :wink:
A quick rundown of the machine:
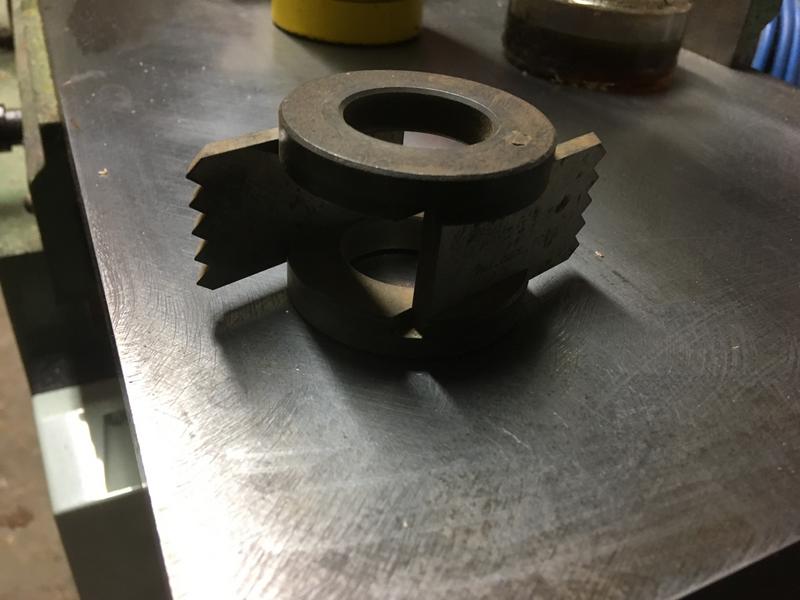
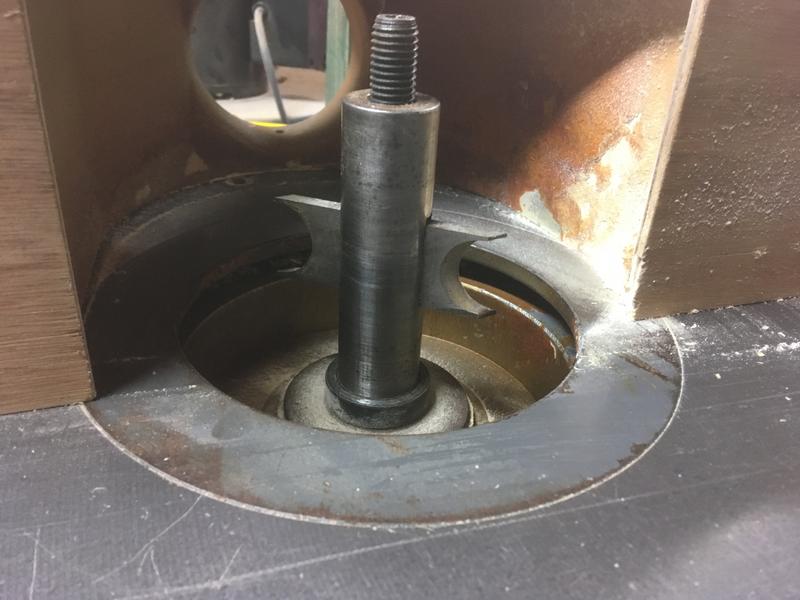
- Standard 30MM spindle with a french head slot (I do not advise using the french head part of the machine, very nasty kickback is very likely with an unexperienced operator due to the scraping, neutral rake nature of the cutter)
- Cast ALLOY table, not cast iron like some people list them as which then people get caught out by buying fancy magnetic feather blocks which don't stick to alloy :lol:. Nothing wrong with alloy either though, just something to keep in mind.
- 1.5KW/2HP Motor which is powerful enough for most minor tasks with a euro block and groovers but don't expect it to run 5KG+ steel blocks with ease, although I have used a heavy 125x60mm steel rebate block in the machine and also a steel Whitehill panel raiser, they just take time to get up to speed but once they're there they work well.
- Will fit tooling up to 180mm in diameter.
- Most examples have a sliding table attachment
- Some have ring-fence attachments
- Three Speeds, 4800RPM, 6400RPM and 8700RPM with 6400RPM basically being the be-all-end-all speed.
- A Manual can be viewed here: https://www.fichier-pdf.fr/2017/01/16/kity-623-notice/kity-623-notice.pdf
For a while now I had noticed the bearings on my machine haven't sounded particularly great, but not absolutely terrible yet. But since I have a massive penchant for maintenance I decided to strip the machine down to replace the main shaft bearings and the motor bearings. At first, I thought it would be a fairly simple job and it is when you know how to do it but if you're doing it without knowing how any of it comes apart it is very quite tricky, the machine is very compact so access to anything is very difficult.
Tools and bits you will need:
- You definitely need a ratchet with 13mm, 10mm, 8mm and 7mm sockets (7mm is optional for taking an electrical connection off)
- Around a 2" length ratchet extension and a 12" ratchet extension.
- 10mm spanner
- Large and small pair of slotted screwdrivers
- Internal circlip pliers
- Bearing puller
- Some form of press is helpful
- Something long with a 30-32mm hole bored into it would be very advantageous
- Two 6206 C3 Clearance (30x62x16mm), One 6204 (20x47x14mm) One 6203 (17x40x12mm) bearings (I went for SKF bearings with 2RS on each one)
First things first is to take off the moulder fence and any blocks and spacers fitted, this is fairly straightfoward so I won't go into detail. I thoroughly recommend taking your own photos as you disassemble the machine (And while you disassemble anything else in your life too!) as they're invaluable reminders of how to put stuff back together. When I put this machine back together the first time I didn't reference the photos because it was still "fresh in the mind" and ended up with a bolt and washer left over :x . Had to take it back apart to figure out where I forgot to put them as there is no access once it's back together. You've been warned :wink:

After the bits have been taken off go around the back of the machine and take the back panel off which is held on with four 10mm bolts, one in each corner. Once the back is released it will still be attached to the motor via the cable to the control panel, rest the panel on top of the machine so you can work on it without disconnecting the cable. Next, you need to take the belt off the machine by slackening the motor bracket and moving it forward. After that, take the motor pulley off which is held on with a 10mm bolt underneath the shaft, wind the height of the cutter shaft to its highest position which will give you more clearance to get the pulley off. Take the ratchet with the circa 2" length extension (I used a swivel joint from the set) and put it underneath the pulley and fiddle around until it's on the head of the bolt, with one hand hold the pulley and with the other loosen off the bolt with the ratchet. My hand is slim enough that I could get it under the pulley to loosen off the bolt the rest of the way by hand quickly but it was a squeeze and I imagine not many could do it easily. Once the pulley is off the key should drop off the shaft so DON'T lose it! Put the pulley, the bolt and the key somewhere safe for later.

Once the pulley has been stored safely it's time to take the motor off, this is done by taking off four 10mm nuts and washers that hold the motor onto a loose plate. These nylock nuts are only snugged up as they need to allow the motor to move back and forth. At this point it's worth having some kind of container like an icecream tub to keep all the pieces in. Before doing anything else wind the shaft back down to it's lowest point which will allow removing the moulded vent that's on top of the motor, this is held in place by two clips that engage onto either side of the motor fan cover. Careful removing the vent as it's quite old plastic and mine was a little brittle.

While the motor's slack, disconnect these two connectors to the door switch first, they just pull off without any special equipment. Neutral blue goes on the left connection, Live brown on the right.

With the cable to the door switch disconnected, you can now turn the motor 90 degrees clockwise to access the wiring terminal box. Don't worry! I'm rubbish with electrics so we'll keep this as simple as possible with as little disconnections as possible. :wink:

You need to disconnect black wires 1, 2 and 3 (they're labeled on their sheathing) that come out of the thin grey cable from the choc connector block (It's worth labeling the block for ease of putting them back) and then you need to take black wire 4 off the terminal itself which is held on with a 7mm nut which is easiest taken off with a 7mm socket in the fingers but can be done with a spanner etc. Replace the nut back onto the thread once wire 4 is removed so that more wires don't come loose when you're not watching. These wires go into a grey cable which feeds around the machine and into the speed reader, pull the grey cable out of the terminal box so that it is not attached to the motor.


After that take off the capacitor which is held to the frame of the machine with a 13mm nut and shakeproof washer, pictured below with nut and washer removed.

Now the motor is completely free from the machine you can pull it completely out of the machine with the capacitor attached and the motor still attached to the back panel. The motor isn't particularly heavy but it helps to have a hand to shift the motor and back panel onto the bench which can be awkward to carry the two.

Now you need to take the front handwheel off which involves using a 10mm socket on the end of the 12" extension I mentioned in my list. this extension needs to go through a hole in the right side of the machine and meet up with the 10mm bolt inside. It's a bit of an art to get it located on properly but you can guide it by sticking your hand in and feeling around the back if you're having trouble. You only need to slacken this bolt and not undo it as I discovered after undoing it completely. Once it's slack you can pull the handle straight out the front of the machine.


Take all the 10mm bolts that hold the bed onto the carcass of the machine, there's four on each left and right side of the machine and then there's two hidden away underneath the leveling bar at the front. You don't need to touch the leveling bar so that will help you line up the bed later. Now you should be able to lift up on the bed and take the bed off along with the undercarriage assembly, this isn't particularly heavy but it might be handy to have someone help.

Once the main assembly is out of the machine its fairly straightfoward to take apart from here, (I unfortunately didn't realise this until I was putting it back together so I stripped out the whole machine first before taking the bed off, the way I've dictated here is much easier) The shaft pulley is held on with a 13mm bolt so undo this and there will be another key on the shaft, again, keep these safe. You can also take off the speed reader which the aluminium bar is held in place with a spring and the reader itself with two screws into the body. The motor tension lever and loose plate can also come off which is held in place by a small coach bolt and locking handle and a 10mm nylock nut and bolt.
To get the shaft out you need to take off the bolt which is located in front of where the pulley just came off, once undone you can put the handwheel back into the casting and unwind the shaft to a point and then you'll have to pull the shaft out of the casting. The shaft tube and sheet metal base are a single piece and are inseparable.

Now that the shaft and base are free we can remove the spindle bearings. This is done by taking a pair of internal circlip pliers and pulling the circlip in the bottom of the shaft out. With a soft faced hammer tap firmly on the bottom of the shaft and that will expose a lip around the base of the shaft at the top where you can pry the base off the shaft.


Once the base is removed continue taping the bottom of the shaft until the bottom bearing comes free from its register and the shaft and the top bearing comes out of the column. To get the top bearing off it's register I found it was best to tap on the inner raceway of the bearing while the shaft was in a vice, I didn't have a bearing puller long enough to extend the full shaft length. The bearings that came off were NSK 6206DDU C3 Clearance bearings, I replaced them with SKF 62062RS C3 bearings.


Now the new bearings can be put on, I actually used a Record T-Bar sash clamp as a press to get the bearings on with a 32mm bore piece of tubing. I started with the bottom bearing as this can be held in place with the circlip in the column and the top bearing pressed into place in the column. I used two sash clamps clamped between the vice which was holding the column and a piece of wood extending between them to get the top bearing pressed into place. Once this is done the base of the top of the shaft can be replaced by tapping it back into place and the bearing replacement on the main shaft is complete. The machine can now be put back together the way it was taken apart, up until the motor going back into place if you want to change the motor bearings as well.


It's fairly straightforward to strip down the motor, take off the rear plastic fan cover which is clipped in place by two pieces sticking out of the motor, just pry between the motor and the fan cover and pop off one side and it should come off. Once that's off you need to take the fan itself off which involves getting a pair of screwdrivers and prising on the base of the fan to pry it off the shaft.

Now you need to undo the four long 8mm screws that hold the two motor ends together which then will allow the backend of the motor to come free and the whole rotor assembly will come out with it along with 2 metal shims and a felt washer.

To get the back motor end off you need to hold onto the motor end and hit on the end of the shaft (the end with the serrations for the fan) with a soft face hammer, eventually you will work loose the bearing from the housing and you will end up with just the rotor with the two bearings at each end. You need a bearing puller to get these bearings off as there really isn't any other non-destructive way to remove them. One bearing was a Koyo 6204ZZ and the other a SKF 6203ZZ bearing, it's a little unusual to have two different manufacturers bearings in the same motor. The new bearings can be tapped into place by using a piece of wood against the inner raceway and tapping firmly on it with a hammer working your way around the bearing to keep it moving without skewing it off, you could also press the bearings on if you had something large enough to hold the whole rotor, I didn't. With the bearings replaced you can GENTLY tap the motor end back onto the bearing and replace the rotor assembly back into the motor, screw it back together and the motor bearing replacement is complete.


Now all you have to do it put the motor back into the machine just how you took it out, put all the other bits back together and your machine should be operational once again!
I really hope this thread helps someone in the future as it would've been an absolute godsend to have it for myself when I was pulling it apart, those damn french people and they're pesky compact machines! :lol: They're great little machines and I thoroughly recommend it to anyone from a serious hobbyist to even a large scale operator for smaller tasks. Once you start spindle moulding you won't go back to a router table! :wink:


