Dad's 60th birthday box - WIP

UKworkshop.co.uk

Help Support UKworkshop.co.uk:

This site may earn a commission from merchant affiliate links, including eBay, Amazon, and others.

Jensmith

Established Member
Joined
19 Aug 2010
Messages
1,029
Reaction score
0
Location
Cheshire
There seems to be plenty of interest in the WIP so here you go. I'll start it off with the first few photos. I made it with the help of Andrew Crawford.

First I had to mark out the wood for the box with a scribe and cut to size. The mitres were cut roughly on the bandsaw and sanded down to size on the big disk sander. Andrew had to do this as H&S means I couldn't use the machine.
P1000826.jpg


While Andrew did that I was marking out and cutting the veneer for the lid.
P1000824_sm.jpg


I also chose the inlay banding. Maple was what I chose.
P1000828.jpg


Test assembly of the box
P1000829.jpg


End of post 1.
 

Attachments

  • P1000824_sm.jpg
    P1000824_sm.jpg
    71 KB
  • P1000826.jpg
    P1000826.jpg
    71.5 KB
  • P1000828.jpg
    P1000828.jpg
    40 KB
  • P1000829.jpg
    P1000829.jpg
    44.9 KB
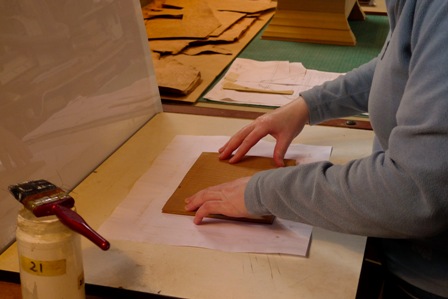
Next part was to veneer the MDF for the lid. Andrew uses a mix of PVA with 10% water and this is spread over the MDF very evenly and then the veneer applied to both sides.

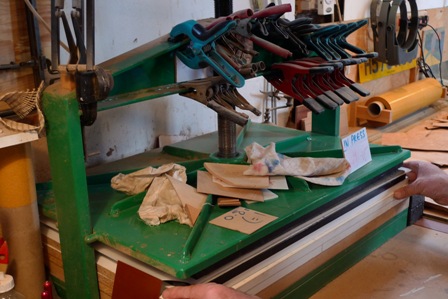
It goes in the big veneer press for an hour.
P1000833.jpg

P1000834.jpg


We checked the box was going together correctly with a trial assembly
P1000839.jpg


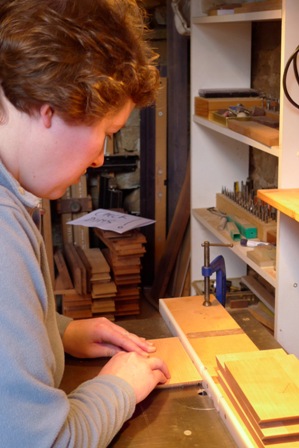
Then cut the grooves for both the lid and the base. Andrew uses downcut spiral cutters for all the processes apart from the bevel on the lid and base.
I'm concentrating hard so as not to mess anything up!
P1000845.jpg


Grooves cut
P1000847.jpg


End of part 2
 

Attachments

  • P1000833.jpg
    P1000833.jpg
    38.7 KB
  • P1000834.jpg
    P1000834.jpg
    57.5 KB
  • P1000839.jpg
    P1000839.jpg
    44.8 KB
  • P1000845.jpg
    P1000845.jpg
    49.5 KB
  • P1000847.jpg
    P1000847.jpg
    33.3 KB
Next installment:

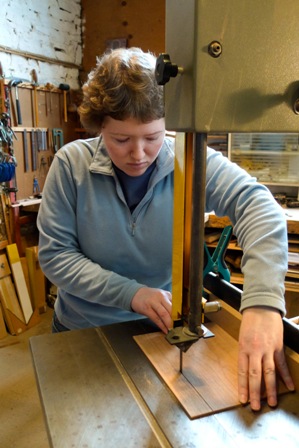
Next job was to prepare the lid and base so the veneer was trimmed off then they were cut to just slightly oversize on the bandsaw with a sacrificial piece underneath, then planed to size. I planed two reference edges first then cut the other two sides on the bandsaw.
The trick Andrew uses is to make most dimensions like this 1mm smaller than the exact measurement as it'll still be big enough but if you're slightly out then it won't stop the box fitting together precisely.
P1000861.jpg

P1000849.jpg


P1000864.jpg


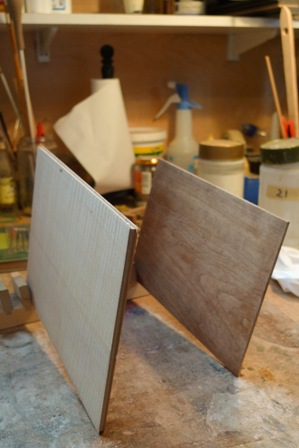
The base was finished with a shellac / french polish / Meths mix he uses and left to dry for 20 mins and the lid was out of the veneer press and left upright until we were ready for it. The base is then given a light sand with wire wool and polished with furniture wax.
P1000858.jpg


P1000882.jpg


I laid out all the box pieces - we had decided on the best bits for the front & back at the start.

P1000860.jpg


Once they were laid out in the correct order I had to put lengths of masking tape on the front side with a couple of inch overhang and then line them up so the mitres overlapped by 1-2mm. This is so when the mitres are closed, the click into place so you know they fit. The masking tape takes up the stretch and keeps the joint solid until the glue cures. Masking tape was rubbed down firmly.

There was a test assembly like this prior to the final go. One thing I learned was the level of precision that goes into a high quality product.

P1000889.jpg


Glue was applied sparingly - PVA with 10% water as before. He has handy little bottles to give a nice bead of glue.
P1000891.jpg


then, finally, we put it together!
P1000893.jpg


Then it was time for lunch while the glue cured :)
P1000895.jpg
 

Attachments

  • P1000849.jpg
    P1000849.jpg
    54.3 KB
  • P1000858.jpg
    P1000858.jpg
    40.5 KB
  • P1000860.jpg
    P1000860.jpg
    37.2 KB
  • P1000861.jpg
    P1000861.jpg
    59.1 KB
  • P1000864.jpg
    P1000864.jpg
    51.3 KB
  • P1000882.jpg
    P1000882.jpg
    48.6 KB
  • P1000889.jpg
    P1000889.jpg
    49.7 KB
  • P1000891.jpg
    P1000891.jpg
    27.4 KB
  • P1000893.jpg
    P1000893.jpg
    45.4 KB
  • P1000895.jpg
    P1000895.jpg
    49 KB
After lunch at the local pub it was time to remove the masking tape and then cut off the lid.

P1000906.jpg


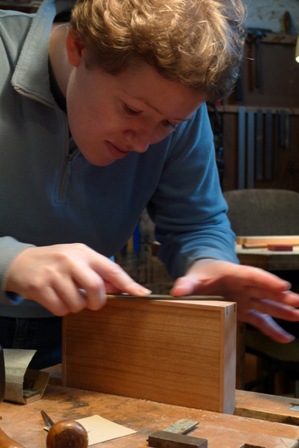
Andrew has a big square of MDF with abrasive on each side. 150 grit and 80 grit I think. Mostly used the 150 grit to remove the bandsaw marks. You have to keep moving the box around so you don't focus on 1 area for too long.
P1000896.jpg


Then the exciting bits started - cut the recess for the inlay banding on the router table - part on the cherry and part over the veneered MDF.
Thickness of the banding was measured first and you make it slightly shallower.
P1000911.jpg


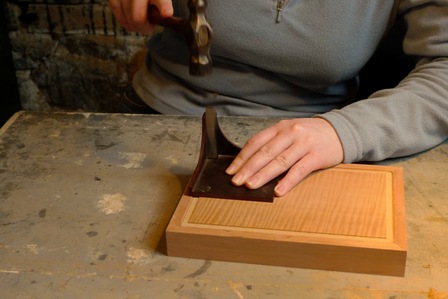
I got to use his corner jig - a very simple but precise and cleverly engineered tool to square off the corners left by the router cutter. One good tap with the hammer and you're done.
P1000917.jpg


Then just carefully remove the waste pieces with a very sharp chisel.
P1000918.jpg


The inlay banding was a real lesson in precision. Andrew is very particular and gets out his head magnifier for quite a few of the processes - this being one of them. I couldn't see the gap in the corner with the naked eye after he showed me how to do the first corner but he could.
He cut the mitres roughly then sands them to length on a small disk sander. He uses a jig but always checks it to make sure it's right. They're just clamped onto the table.
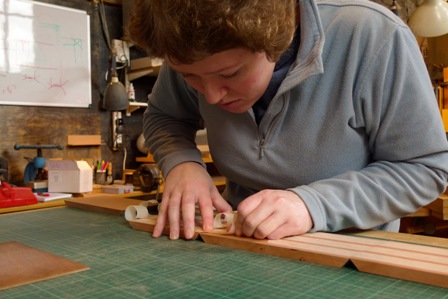
You do one corner at a time using 2 lengths - one stuck down with masking tape as a reference while you glue the other and work your way round the 4 corners.
P1000929.jpg

P1000934.jpg


The lid was then scraped to get it all flush and fairly smooth.
P1000940.jpg
 

Attachments

  • P1000906.jpg
    P1000906.jpg
    43.7 KB
  • P1000896.jpg
    P1000896.jpg
    49 KB
  • P1000911.jpg
    P1000911.jpg
    47.4 KB
  • P1000917.jpg
    P1000917.jpg
    41.5 KB
  • P1000918.jpg
    P1000918.jpg
    44.8 KB
  • P1000929.jpg
    P1000929.jpg
    37.4 KB
  • P1000934.jpg
    P1000934.jpg
    38.6 KB
  • P1000940.jpg
    P1000940.jpg
    43.1 KB
Final installment:

Box at the end of day 1 with meths to show up the veneer:
P1000941.jpg


The idea had been that I would go home and finish the box myself. After much deliberation and realising what was still involved we decided to go back for a second day to finish it off. The splines were my main sticking point both in not having a router table suitable for the job or the exact knowledge of how to do it.

Used a cutter to bevel the top and bottom edges of the box. The bottom so it leaves a shadow.
P1000957.jpg


Sanding the edges to remove the fluff. There's a trick to that too.

P1000965.jpg


The tray for the inside was the next job but the processes are the same as for the box.
The splines for the mitres were done after that, the tray first then the box and I was quite nervous about doing them. It took 2 passes with the router for each cut as they were quite deep so making sure the box didn't move was critical. Luckily they all cut perfectly. Job done.

P1000997.jpg


Andrew had made up the veneer for the splines on the first day. Here I'm cutting them to size - triangles.
P1010005.jpg


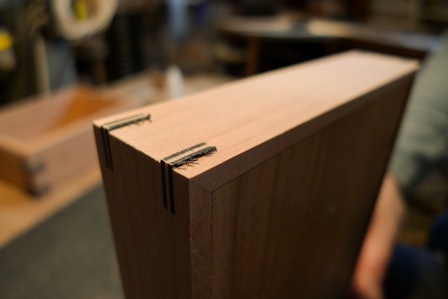
Then I just checked them for fit, squeezed in a flat pliers if necessary, glued and put in place, pushing down firmly into the slot.
P1010018.jpg

P1010020.jpg

P1010023.jpg


Box nearly finished:
P1010026.jpg
 

Attachments

  • P1000957.jpg
    P1000957.jpg
    38.1 KB
  • P1000941.jpg
    P1000941.jpg
    41.3 KB
  • P1000997.jpg
    P1000997.jpg
    46.1 KB
  • P1000965.jpg
    P1000965.jpg
    43.6 KB
  • P1010005.jpg
    P1010005.jpg
    40.1 KB
  • P1010018.jpg
    P1010018.jpg
    40.8 KB
  • P1010020.jpg
    P1010020.jpg
    41.8 KB
  • P1010023.jpg
    P1010023.jpg
    27.8 KB
  • P1010026.jpg
    P1010026.jpg
    39.1 KB
Ok, there's a 10 image limit so this is the final bit!

The splines were sanded off flush which took quite a while and then the tray which had a partition, had brass pins inserted. These are tapped in 3/4 of the way then cut off and filed flush.
P1010028.jpg

P1010032.jpg

P1010033.jpg


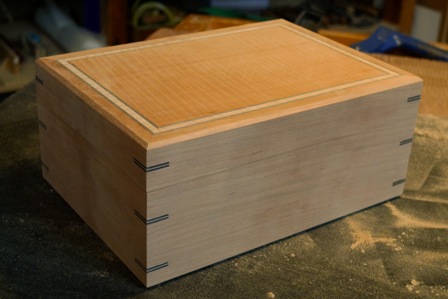
and that was the end of day 2. I came home and did the sanding to the box down to 400 grit, finished it with 3 coats of danish oil which showed up the odd scratch #-o, some of which occurred during the 3 days it took to oil it.
It was then lined with dark blue leather. You cut pieces of 200g card to size for each bit of the box, stick the leather onto it with double sided tape and fold over the top edge of the leather. When you stick in the pieces it looks as though it's all one lining. They are just stuck in with a bit of copydex.

And there you have it - my Dad's box.
Box.jpg

Box open.jpg


I hope you enjoyed the WIP.
Jennifer,
 

Attachments

  • P1010028.jpg
    P1010028.jpg
    34.7 KB
  • P1010032.jpg
    P1010032.jpg
    46.6 KB
  • P1010033.jpg
    P1010033.jpg
    41.7 KB
  • Box open.jpg
    Box open.jpg
    60.2 KB
  • Box.jpg
    Box.jpg
    67.8 KB
=D> =D> =D>

If I were your dad I would be a very happy proud man, I hope he see's the wip you have posted, and how you obviously
enjoyed making it for him. well done


Davon
 
Davon":2pzmvg5g said:
=D> =D> =D>

If I were your dad I would be a very happy proud man, I hope he see's the wip you have posted, and how you obviously
enjoyed making it for him. well done

Davon

Thanks Davon - his other present was a photo album with all the photos and I wrote brief notes for each.

Thanks Paul. That's not even all the photos! :)
 
Jennifer, excellent and well written and thanks for taking the time to post it all.
 
I'll second those sentiments, enjoyable viewing and read to finish off my day, well done Jen.
 
Paul Chapman":14jsmv1b said:
Great WIP thread, Jennifer 8) What a lot of work :shock:

Cheers :wink:

Paul

Great WIP shots Jen. There's always a lot of work in doing something like this...just imagine how much more there'd be if Andrew wanted you to sectret mitre dovetail the corners...as I had to do with my first box which I made under supervision about 1974, with boxwood inlaid lines set in with a scratch stock and a moulded top, also cut with the ss -

It's cheating btw to cut the lid off with a bs :lol: (just kidding) - Rob
 
Wow, I've not even seen that before Rob.

Andrew normally just does a lap/ rabbet joint in his boxes for teaching but I didn't want end grain showing so I asked to do mitres.

Did make it a lit more work but it was worth it.
 
Back
Top