A couple of weeks back The Tiddles was asking about cabinet construction in this thread and I said I would take a few pics of a job I had comming up.
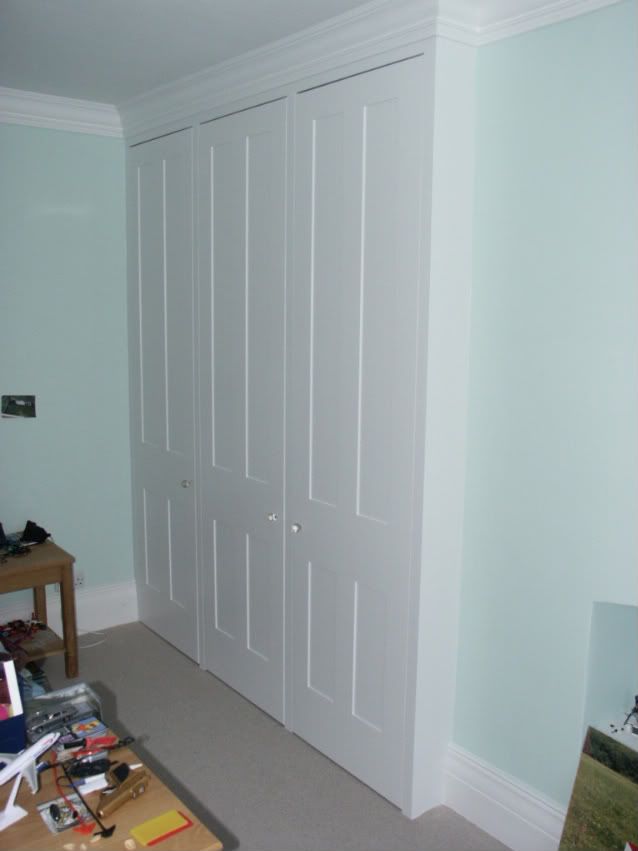
Its just a small wardrobe/storage cupboard in a spare room so nothing fancy, just MDF for painting and white melamine carcases.
I'd done some other work in this room previously and then left it for the painter to decorate, this is the space that the wardrobes will go into. Unfortunatly the painter was still working in the hallway so a lot of his stuff was still in the room so I couldn't move the old chest of draws out the way.

First job was to level up and fix the base, this was just regularised 3x2, the front to back members are positioned to come under the carcase sides. Once level it was fixed with angle brackets and an MDF facia fitted. Due to the client wanting a higher hanging space than originally planned I had to bring the front out another 150mm, so much for stopping the skirting short to save scribing/cutting. There was only about 8mm of slope on the floor so not too much hastle, the bathroom which is next along the corridor needed 30mm or so to get a level floor.

The carcases were then made up face down on a bit of spare carpet underlay and then stood into position on the plinth. The two outside ones have been roughly positioned in this picture.

You may just be able to see some 50mm wide strips of MDF screwed to the sides of the carcases. These are shown better in the next shot, they project beyond the front of the carcase by about 10mm and act as a spline to locate the faceframe. This can be seen to the left with a suitable 6mm slot cut with a wobble saw in the spindle. FF and doors are from 22mm MR MDF, the FF is 46mm wide (left over width on the side ones for scribing)

The middle carcase was then assembled and fitted. All three carcases were then finally positioned, joined together and fixed to the walls, rafters and plinth, most screws behind hinge plates the others fitted with plastic caps.
Faceframes were then fitted, as its just painted MDF they were screwed through the front and filled with two part filler. Unfortunatly I was not so lucky with the sloping ceiling which was a bit bowed, should not show once its all painted white :wink:

That just left the job of shooting the door bottoms that had been left over length and then hanging them, final gapping will be done after the painter has finished with them.

Jason
Its just a small wardrobe/storage cupboard in a spare room so nothing fancy, just MDF for painting and white melamine carcases.
I'd done some other work in this room previously and then left it for the painter to decorate, this is the space that the wardrobes will go into. Unfortunatly the painter was still working in the hallway so a lot of his stuff was still in the room so I couldn't move the old chest of draws out the way.

First job was to level up and fix the base, this was just regularised 3x2, the front to back members are positioned to come under the carcase sides. Once level it was fixed with angle brackets and an MDF facia fitted. Due to the client wanting a higher hanging space than originally planned I had to bring the front out another 150mm, so much for stopping the skirting short to save scribing/cutting. There was only about 8mm of slope on the floor so not too much hastle, the bathroom which is next along the corridor needed 30mm or so to get a level floor.

The carcases were then made up face down on a bit of spare carpet underlay and then stood into position on the plinth. The two outside ones have been roughly positioned in this picture.

You may just be able to see some 50mm wide strips of MDF screwed to the sides of the carcases. These are shown better in the next shot, they project beyond the front of the carcase by about 10mm and act as a spline to locate the faceframe. This can be seen to the left with a suitable 6mm slot cut with a wobble saw in the spindle. FF and doors are from 22mm MR MDF, the FF is 46mm wide (left over width on the side ones for scribing)

The middle carcase was then assembled and fitted. All three carcases were then finally positioned, joined together and fixed to the walls, rafters and plinth, most screws behind hinge plates the others fitted with plastic caps.
Faceframes were then fitted, as its just painted MDF they were screwed through the front and filled with two part filler. Unfortunatly I was not so lucky with the sloping ceiling which was a bit bowed, should not show once its all painted white :wink:

That just left the job of shooting the door bottoms that had been left over length and then hanging them, final gapping will be done after the painter has finished with them.

Jason


