We’ve been in need of a new bookcase for ages, so what better use for my supply of English Oak. I had meant to keep a full record with piccies but they are a bit spasmodic. Basic concept was for a 2 drawer base with traditional bookcase top in the same style as an existing unit we had bought about 15 years ago before I had either the time or the self confidence to tackle such a project.
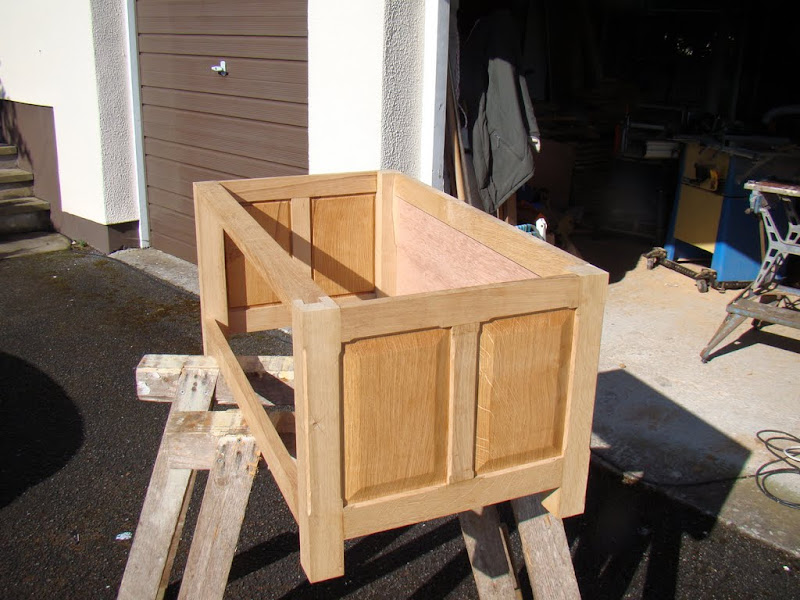
The base was very similar to the blanket box I built for my daughter last winter so building method was exactly the same up until the first “dry fit”. 18mm loose panels set in to a frame built with loose tenons.
The 2 drawers were run up in the traditional way with half blind dovetails. I decided on side hung runners and having run 3 sides through the router table to cut the recess in the drawer sides the phone went. Having told the guy trying to sell me shares in a “boiler house” sting where he could stuff them I came back and ran the final side through, but having had my train of thought interrupted I ran it through from the wrong side and the cutter exited through the drawer front rather than the rear! Aaaagghhh. Here’s the damage to the drawer front.
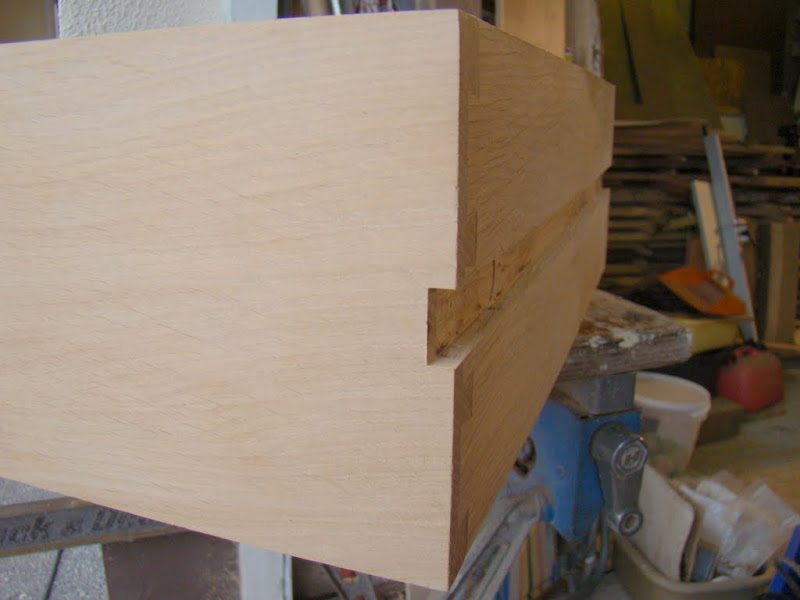
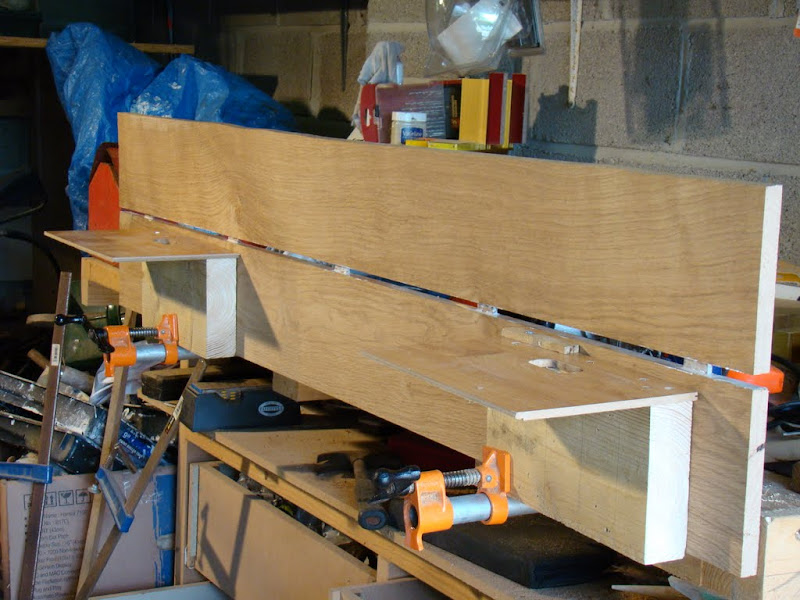
I can’t bear the thought of junking it. I’ll patch a piece in later. Time to move on to the sides. The pieces of oak that were partially prepared earlier for the sides have moved too much for it to be taken out across the whole piece and still leave it thick enough.. B*****! I rip them down the middle and take the wind out on the p/t and then rejoin them using loose stub tenons.
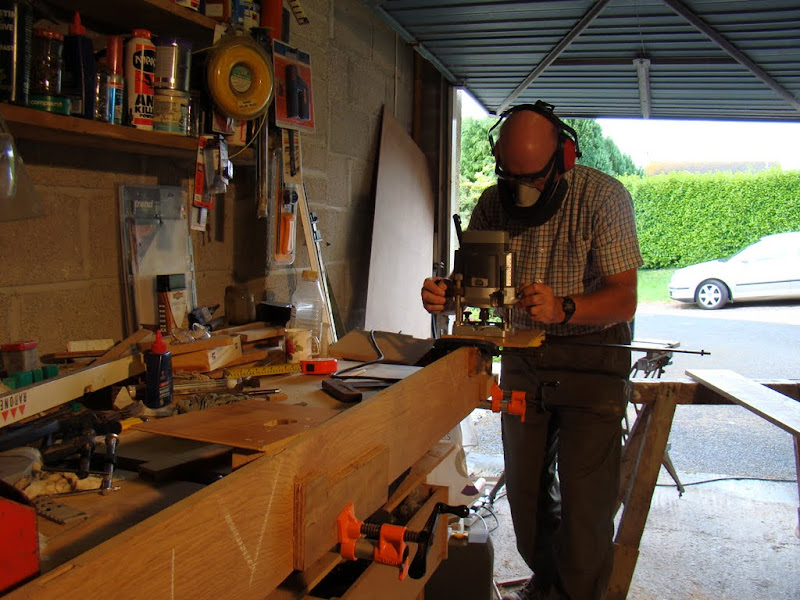
Quick glue up using the long pair of pipe clamps in my new fangled workbench before taking it indoors to clamp up in the warm.
The top will be joined to the sides using dovetails. As these will not show I thought that they would be a good project to try out the dovetailing facility on the Incra Router fence attached to my router table. I meant to do a full photo record - but you know how it is! Best advice I can offer is :-
1. Watch the Incra DVD several times and then play around with some pieces of scrap to confirm that you really have got your head around it.
2. Prepare your work pieces as accurate as a very accurate thing. Ends in particular must be precisely at 90 deg and with no cupping in the workpiece.
3. Be brave!
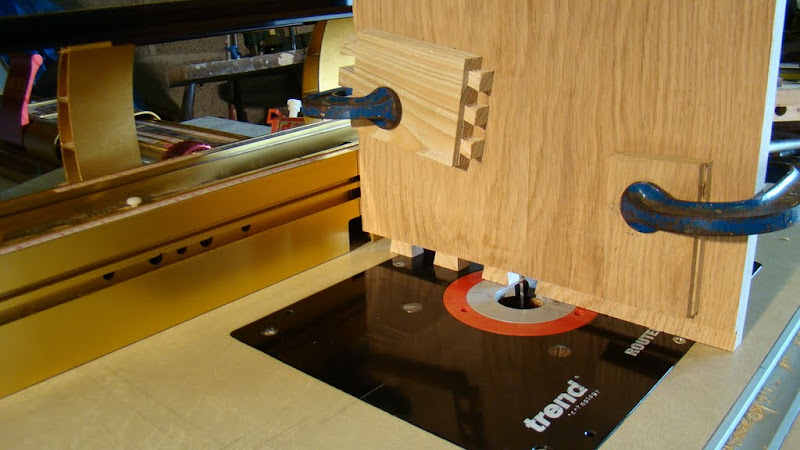
Here are the pins being cut.
Followed by the tails in what are half blind dovetails.
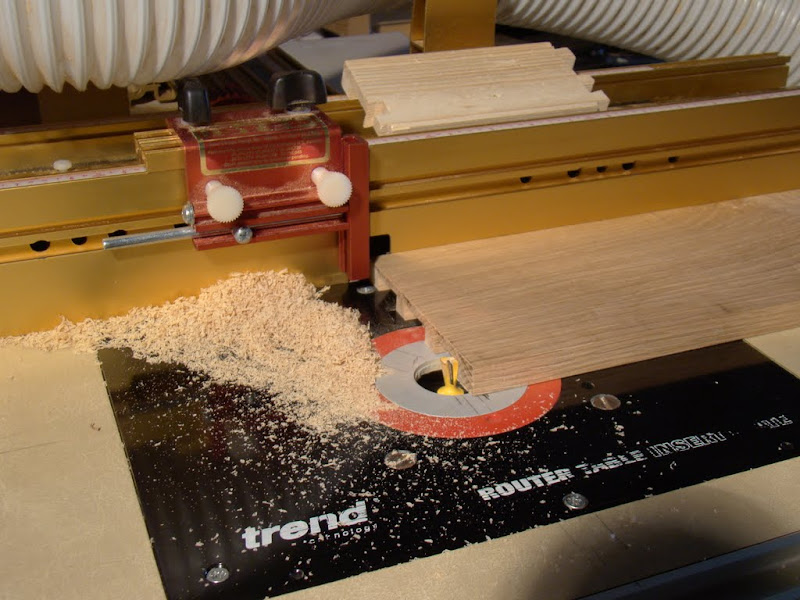
Measuring is done on a pattern insert in the top of the Incra. They are divided into “A” and “B” cuts, colour coded red and blue and with each pin/tail numbered. Once set up you just move from one “A” cut to the next, followed by the same on the adjoining piece in which you go from one “B” cut to the next.
I forgot to take a photo of the end result, but it was no better than OK-ish. Acceptable for a hidden joint but not for a feature joint. I think I need more practice, plus they were large pieces to move through the jig. For feature joints I would be happier cutting them by hand.
Next I needed to decide on how to make up the back. I looked at some oak veneered ply but it was garbage. What I really wanted was to make it look like tongue and groove, but without the weight or extravagant use of precious oak that this would require. The obvious answer was to make my own veneers, but I had neither cut nor used veneers before - and neither did I have (or had ever used) a bandsaw or vacuum press - so many thanks to Rob (Woodbloke) for a very informative session in his workshop showing me how to do it. It was a very expensive trip though, as I came away and ordered a Veritas low angle jack plane and a Startrite 352E. Ouch! Perhaps I could economise by using clamps and cauls to apply the pressure to the veneers.
A few trials on small pieces were enough to convince me that whilst OK for small pieces, it would not be easy to do with a piece 60 ins x 30 ins - but I just couldn’t justify spending over £600 on a Bag Press. After lots of hunting around I settled on a system from East Coast Fibreglass Supplies. The people there are very friendly and helpful, and provided much valuable advice on putting together a budget system without any "hard sell". They provided a 50 micron poly tube and some malleable doublesided sealing tape. The concept is that you seal one end of the tube, and then once the work piece is inside, using the same tape you seal up the other end, simply wrapping a piece of the sealing tape around the tube from the vacuum pump. Once the glue has set, you just cut of the end of the vacuum bag, and so the bag gradually gets smaller with use - but at only £3.95 per metre for a 1500 mm wide bag, it’s no big issue. I bought a bag 3 metres long so given that you lose about 2 – 3 cms each time you use it, it will be some time until it is too small for even quite large projects. A complete kit of a 3metre bag 1500 mm wide, a 2 metre bag 600 mm wide, breather fabric, tape and 2 stage vacuum pump set me back another £275. Gulp - this had better work!
I decided that my first attempt with the vacuum bag would be to veneer the rear of the back, thus providing a balancing veneer as well as a valuable training exercise. Overall I was happy with the result. Here is the back under vacuum. I used cascamite to prolong the working time. The veneers were about 4 x 160cms long by 20 cms wide on a 6 mm ply base.
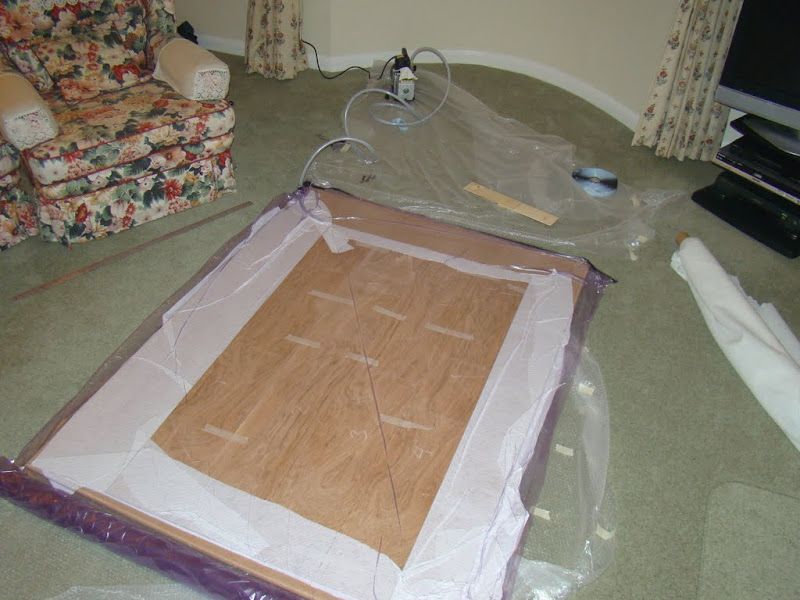
Notice the careful use of breather fabric. And just imagine how cascamite squeeze out sticks to it like s*** to a blanket! Another valuable lesson learnt.
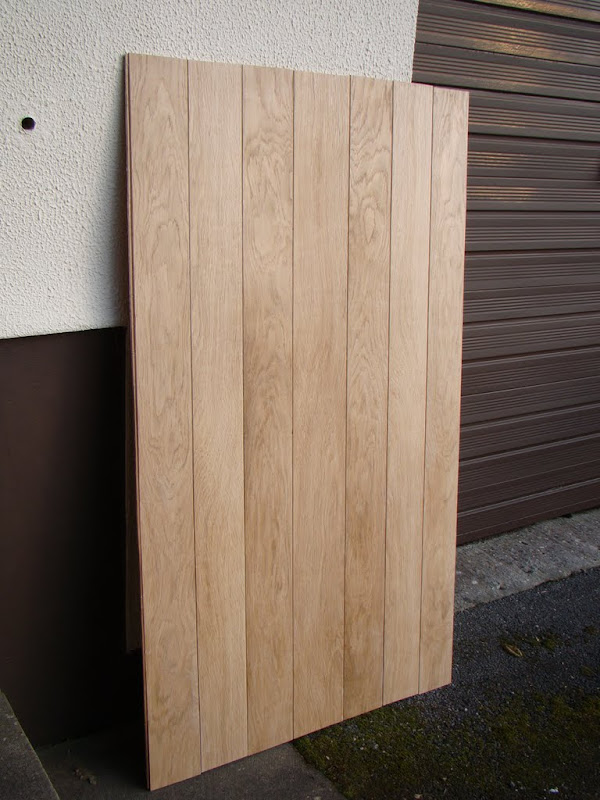
Next I turned to the front. 7 x 3mm veneers, each about 100mm wide. To mimic a t&g effect I took a 2mm bevel off each edge. Having learned the hard way, this time I wrapped the edges in plastic to keep any squeeze out off the breather fabric.
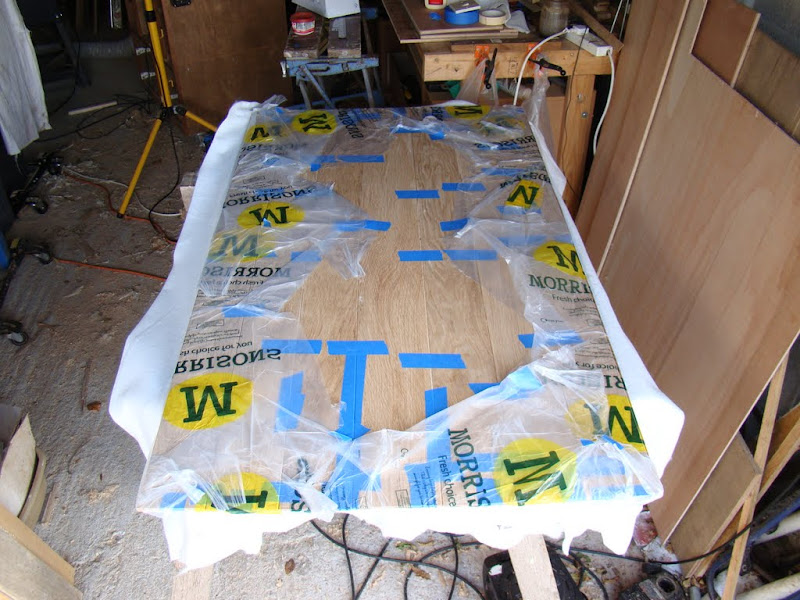
Then wrap the breather around it .....
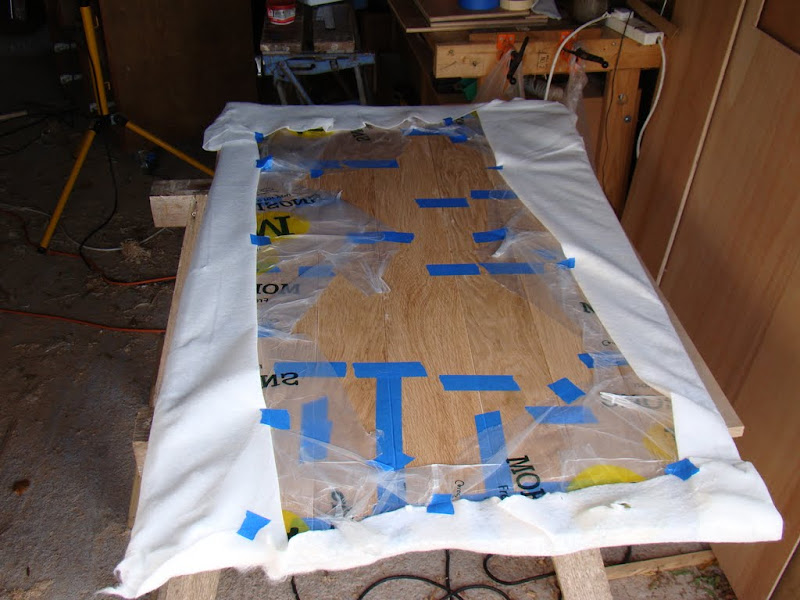
... and press.
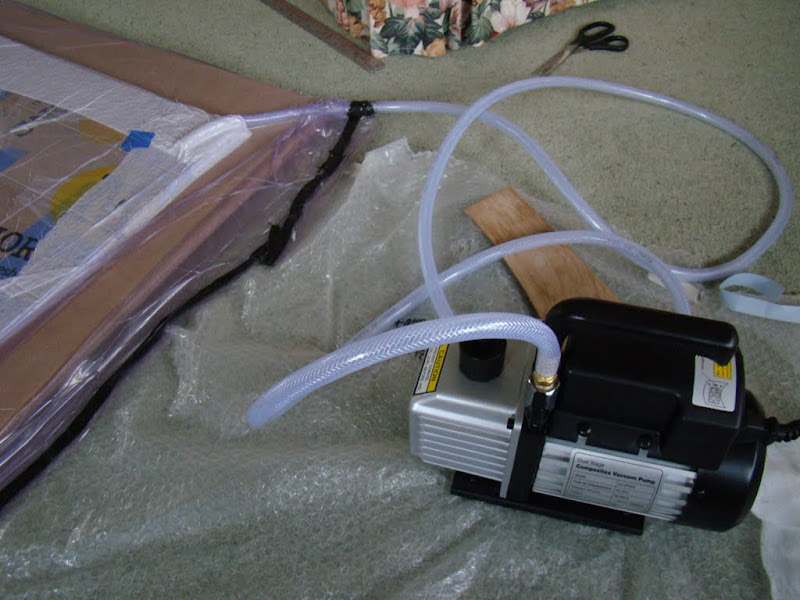
End result seems quite satisfactory and achieves the effect I was looking for.
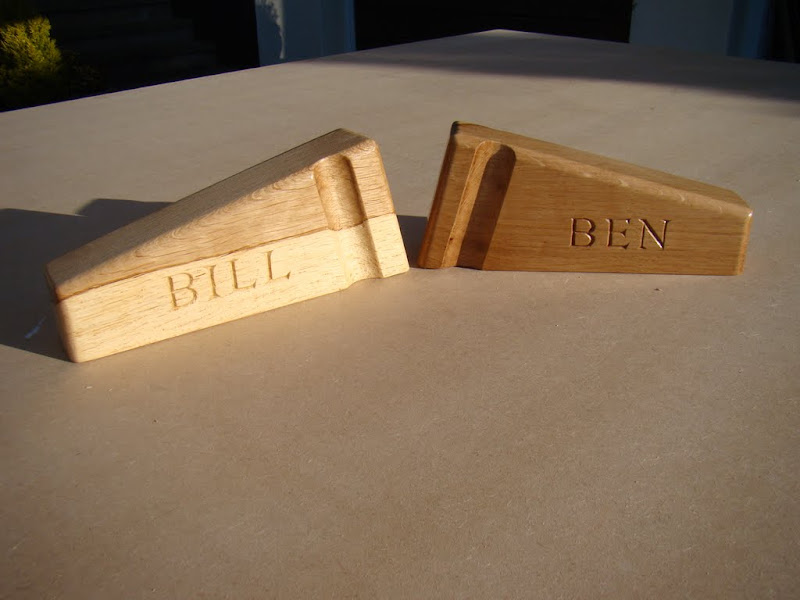
Now a small diversion! I wanted to include a small carving on the top, and as my Mum wanted a couple of wedges to hold open her patio doors in the summer,so I cut some from Oak offcuts and named them. The initial names of “Tweedledum and Tweedledee” morphed into “Bill and Ben” when it came to carving the letters! It did warm me up a bit tho’ to relearn how to use a carving gouge.
What I wanted to achieve along the top of the bookcase was a simple carving. Having only ever carved letters and a simple chip carving motif on a blanket box before, I was not sure where to start. I settled on a pair of oak leaves (it is after all in English Oak) and acorns. After a bit of trawling around on the net, I came across a great “how to” article at the Woodworkers Institute.com. I simplified the design by copying one of these.
My first inclination was to carve it directly in to the top piece, but when I played around with a piece of scrap I quickly learned that without the appropriate curved chisels for under cutting, I would not be able to undercut the leaves. You will already have observed that I have “invested” in a lot of new tools during this job and curved carving chisels for undercutting is a slope too far. Also I was not convinced I could do it to an acceptable standard and didn’t want to trash a lovely piece of quarter sawn oak put aside for the purpose, so decided to do the carving separately and then recess it in to the top if I was satisfied with the result.
I started by tracing the design onto a separate piece of oak and then clearing around it with the router. The more intricate parts were drilled and cleaned out with a chisel and knife.
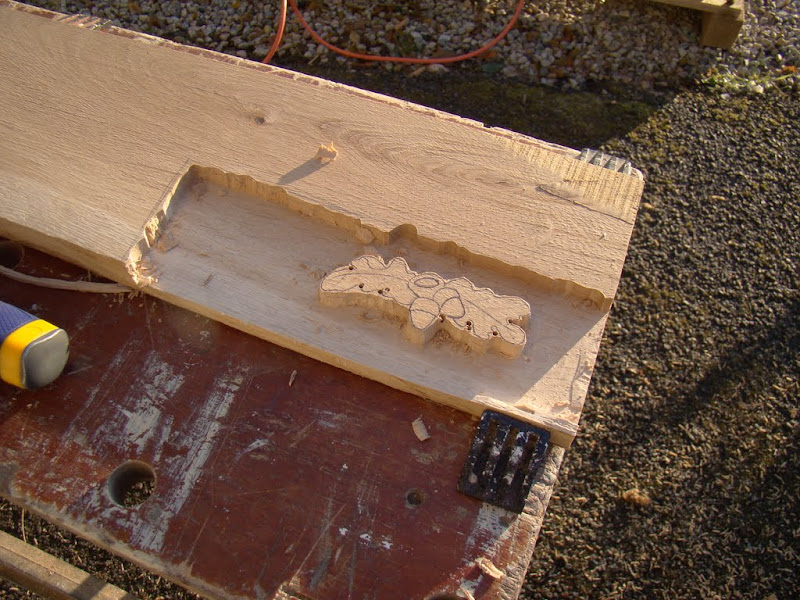
Next I made a start on the acorns and sloped the leaves down to the base of the acorns, and being careful to avoid cutting off the up curl at the top of the left leaf.
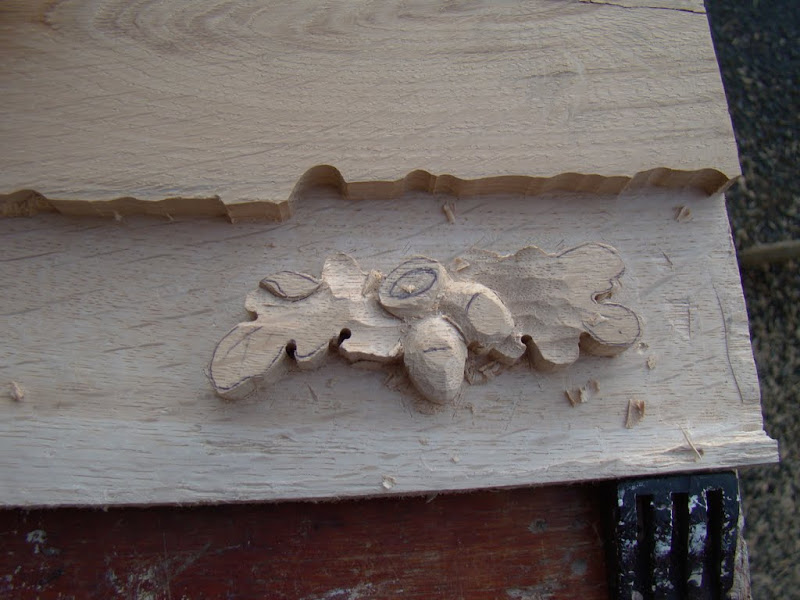
Then remove more off the top of the leaf to leave the acorns higher than the surround, and slope the leaves down to the tips.
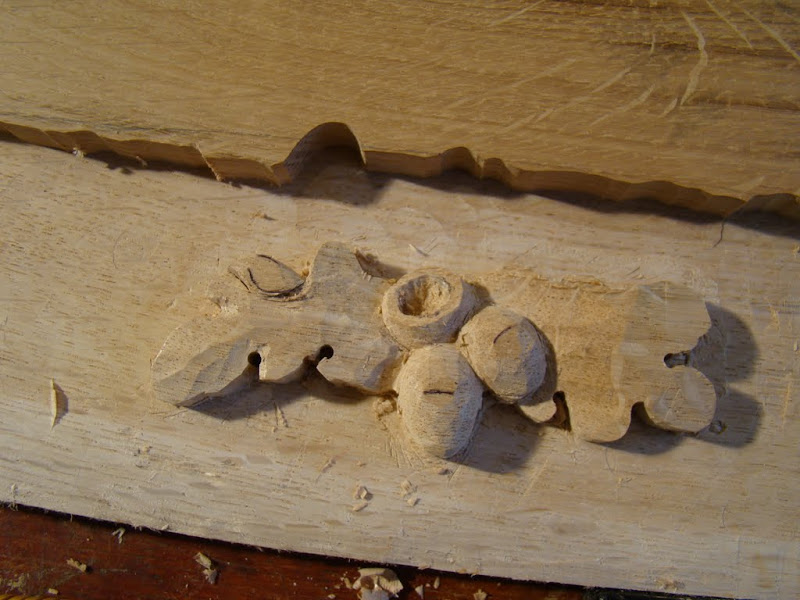
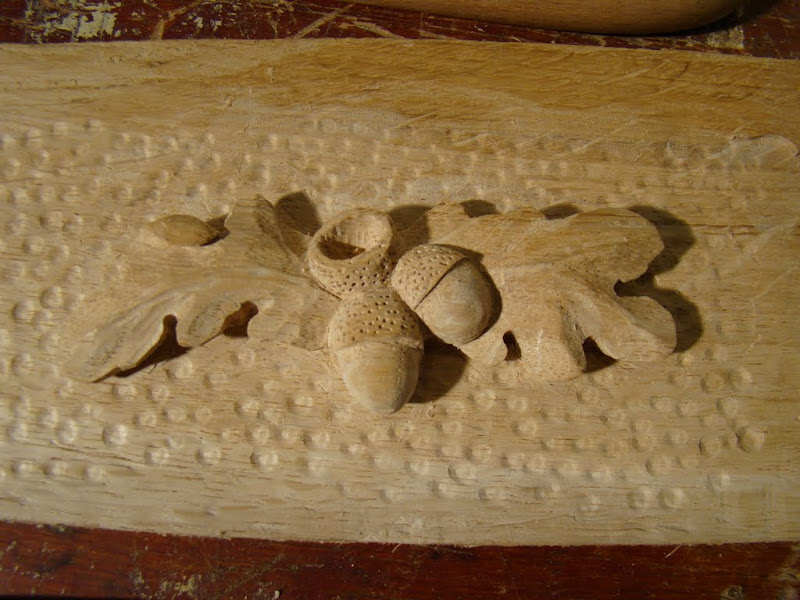
Finally pick out a central vein in each leaf, undercut them gently, and finish off the acorn cups with a gentle tap with a tack, and the back ground with a blunted 6” nail.
 .
.
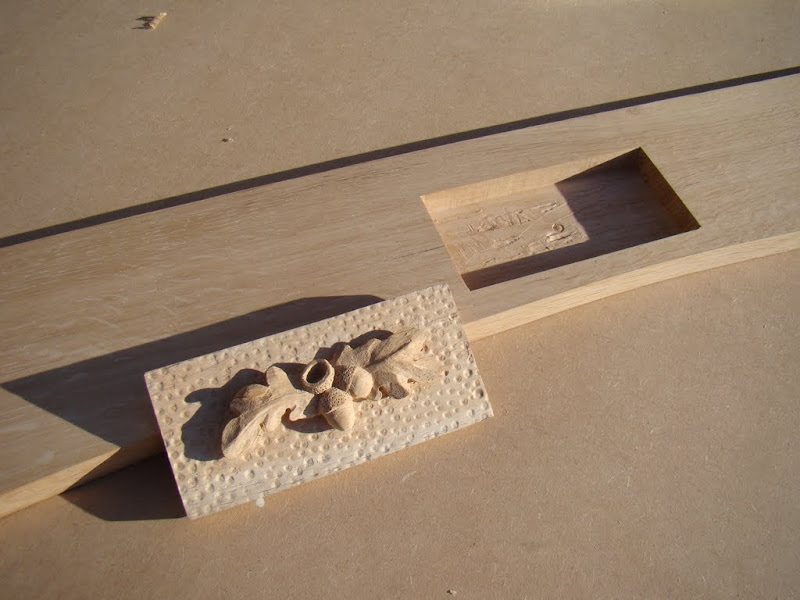
Finally, let it into the top by routing out a recess for it.
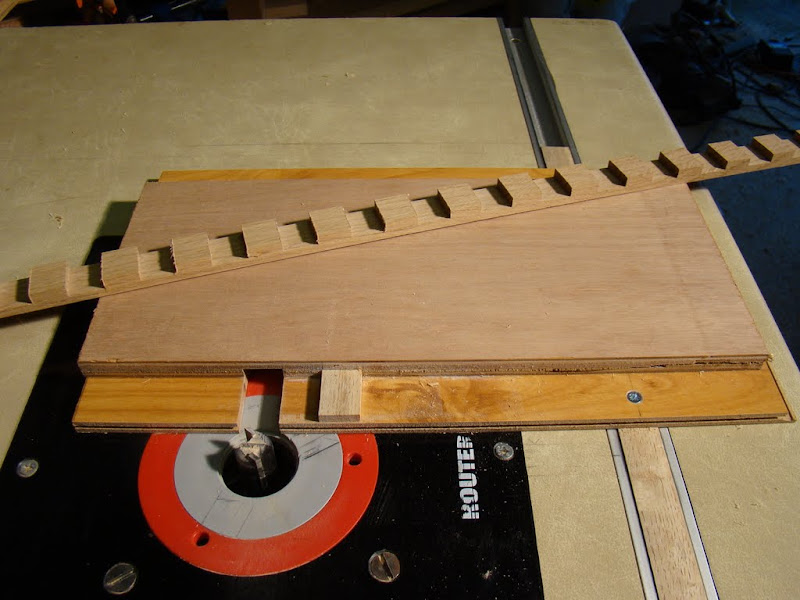
Now to run up a simple jig to cut some dentil moulding.
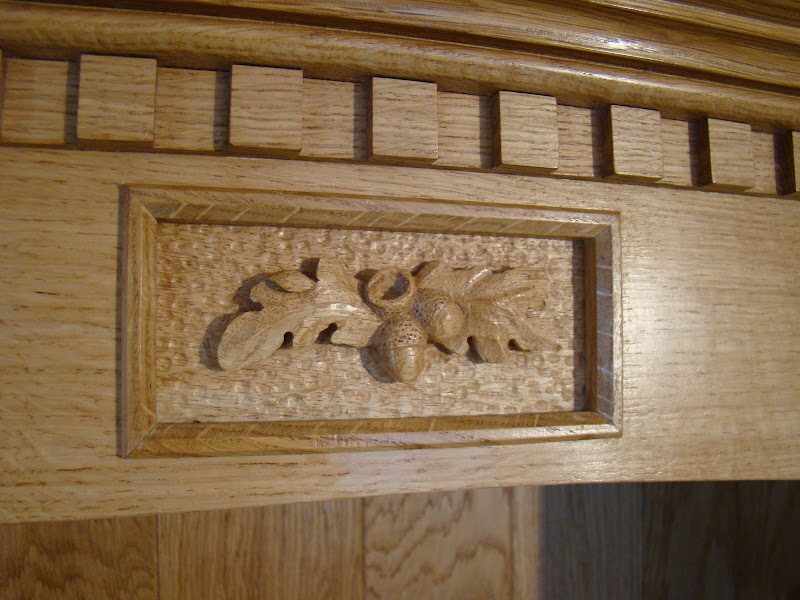
Attach the dentil moulding and run up some simple framing bead on the router table to finish off the oak leaf carving recess.
Above this I fitted some Oak Cornice. Whilst I had fully intended to try and make my own, a casual enquiry at our local bespoke kitchen workshop uncovered a piece of left over Oak Cornice exactly the right length for which they only wanted £10, so I weakened - it was a “no brainer”. It’s attached with brass screws so if I ever want to make my own it can easily be replaced.
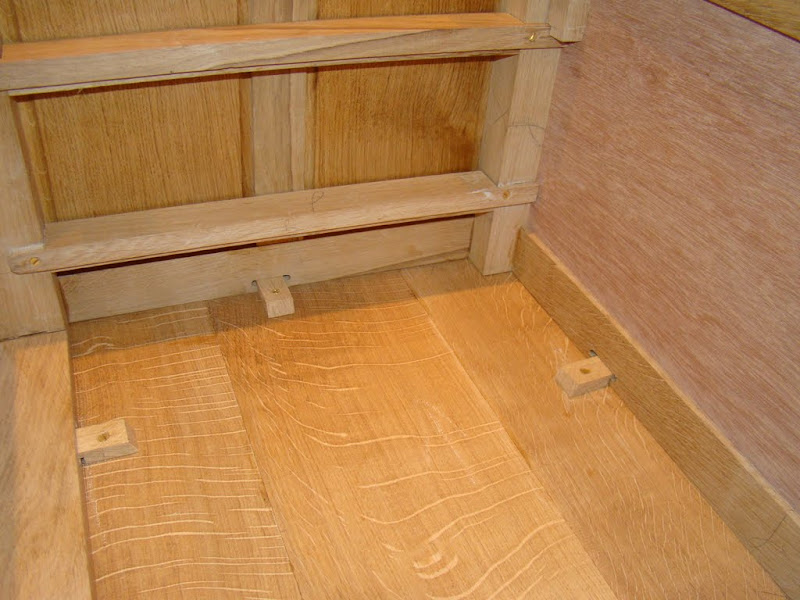
Finally cut some slots in the top of the base for some loose tenons to locate the sides of the top, and attach it using buttons.
And then patch up the draw front that was b******* up by the boiler house scam phone call.
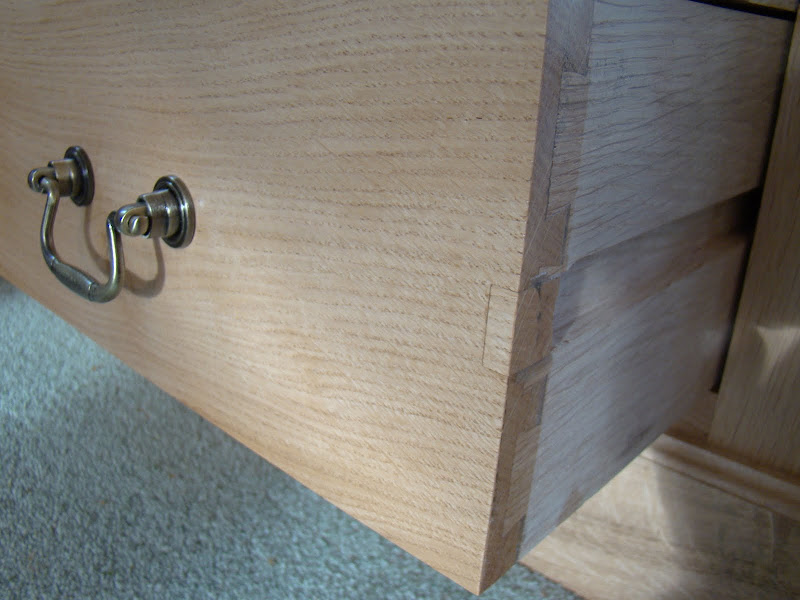
Finish is two coats og Osmo PolyX oil, denibbed with a single pass of well worn 240 grit, with 3 coats of Liberon furniture wax on top.
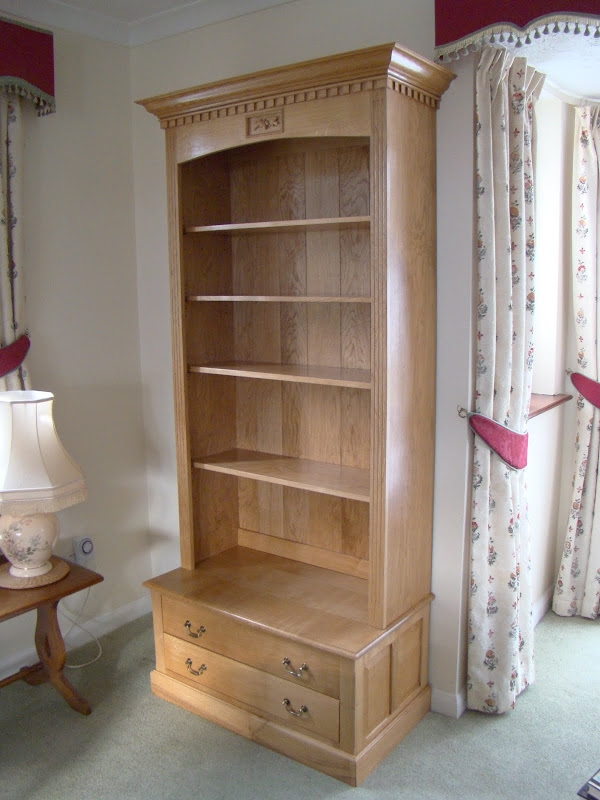
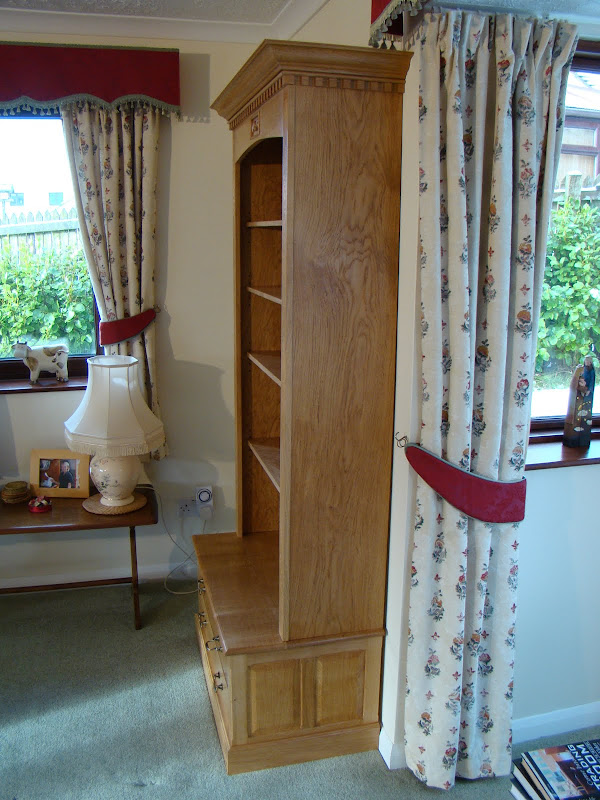
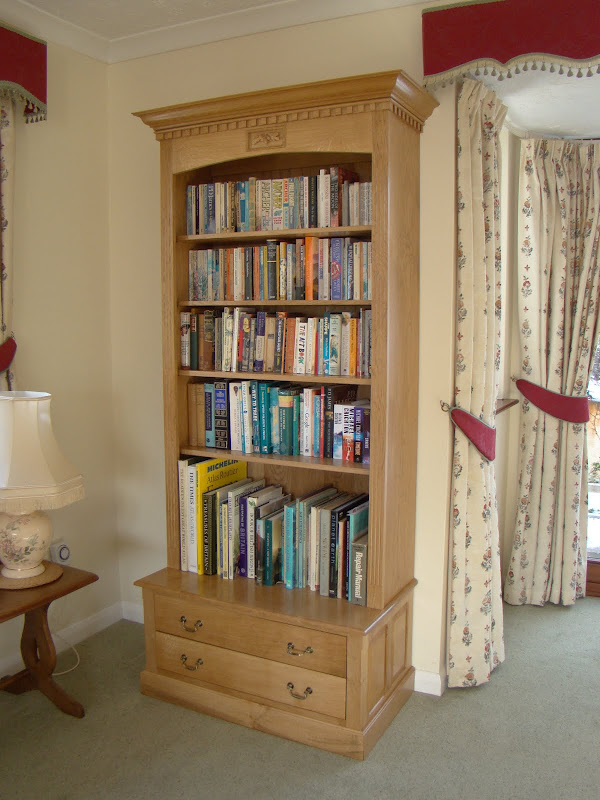
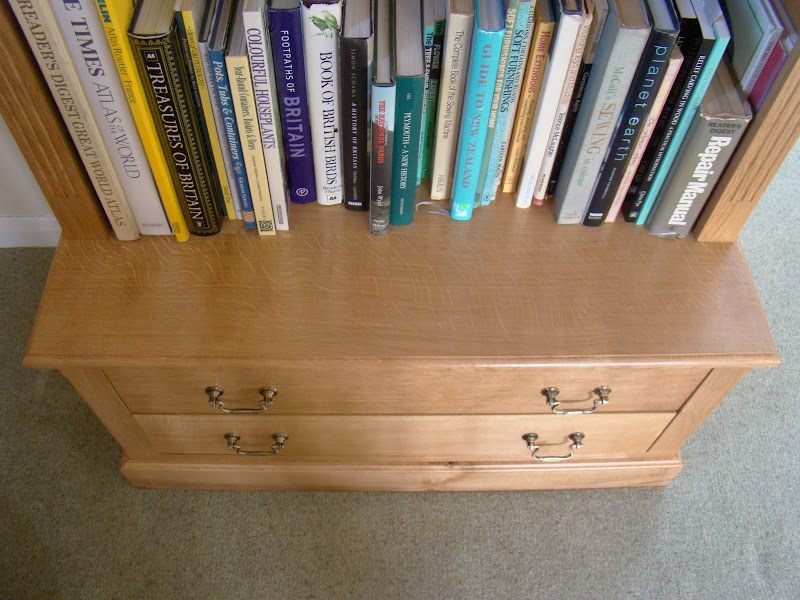
Overall, foul ups not withstanding, I’m happy with the result. So is the LOML who commented that a matching unit the other side of the bay would look nice! I’ve earned my bandsaw, vacuum press and Veritas LA Jack Plane. :roll: :-k
I also learned a huge amount from this project with first use of a band saw and vacuum press. The bandsaw has rapidly become my weapon of first choice for many cuts now. It was also the first time I’ve done any veneering, and a 60” x 30” panel was a baptism of fire. It was the first time I had cut dovetails on the Incra and it’s also the first time for doing a full 3D carving rather than a 2d chip carving or incised letters.
Anyway, if you've got this far, thanks for reading. Any comments welcome.
The base was very similar to the blanket box I built for my daughter last winter so building method was exactly the same up until the first “dry fit”. 18mm loose panels set in to a frame built with loose tenons.

The 2 drawers were run up in the traditional way with half blind dovetails. I decided on side hung runners and having run 3 sides through the router table to cut the recess in the drawer sides the phone went. Having told the guy trying to sell me shares in a “boiler house” sting where he could stuff them I came back and ran the final side through, but having had my train of thought interrupted I ran it through from the wrong side and the cutter exited through the drawer front rather than the rear! Aaaagghhh. Here’s the damage to the drawer front.

I can’t bear the thought of junking it. I’ll patch a piece in later. Time to move on to the sides. The pieces of oak that were partially prepared earlier for the sides have moved too much for it to be taken out across the whole piece and still leave it thick enough.. B*****! I rip them down the middle and take the wind out on the p/t and then rejoin them using loose stub tenons.

Quick glue up using the long pair of pipe clamps in my new fangled workbench before taking it indoors to clamp up in the warm.

The top will be joined to the sides using dovetails. As these will not show I thought that they would be a good project to try out the dovetailing facility on the Incra Router fence attached to my router table. I meant to do a full photo record - but you know how it is! Best advice I can offer is :-
1. Watch the Incra DVD several times and then play around with some pieces of scrap to confirm that you really have got your head around it.
2. Prepare your work pieces as accurate as a very accurate thing. Ends in particular must be precisely at 90 deg and with no cupping in the workpiece.
3. Be brave!
Here are the pins being cut.

Followed by the tails in what are half blind dovetails.

Measuring is done on a pattern insert in the top of the Incra. They are divided into “A” and “B” cuts, colour coded red and blue and with each pin/tail numbered. Once set up you just move from one “A” cut to the next, followed by the same on the adjoining piece in which you go from one “B” cut to the next.
I forgot to take a photo of the end result, but it was no better than OK-ish. Acceptable for a hidden joint but not for a feature joint. I think I need more practice, plus they were large pieces to move through the jig. For feature joints I would be happier cutting them by hand.
Next I needed to decide on how to make up the back. I looked at some oak veneered ply but it was garbage. What I really wanted was to make it look like tongue and groove, but without the weight or extravagant use of precious oak that this would require. The obvious answer was to make my own veneers, but I had neither cut nor used veneers before - and neither did I have (or had ever used) a bandsaw or vacuum press - so many thanks to Rob (Woodbloke) for a very informative session in his workshop showing me how to do it. It was a very expensive trip though, as I came away and ordered a Veritas low angle jack plane and a Startrite 352E. Ouch! Perhaps I could economise by using clamps and cauls to apply the pressure to the veneers.
A few trials on small pieces were enough to convince me that whilst OK for small pieces, it would not be easy to do with a piece 60 ins x 30 ins - but I just couldn’t justify spending over £600 on a Bag Press. After lots of hunting around I settled on a system from East Coast Fibreglass Supplies. The people there are very friendly and helpful, and provided much valuable advice on putting together a budget system without any "hard sell". They provided a 50 micron poly tube and some malleable doublesided sealing tape. The concept is that you seal one end of the tube, and then once the work piece is inside, using the same tape you seal up the other end, simply wrapping a piece of the sealing tape around the tube from the vacuum pump. Once the glue has set, you just cut of the end of the vacuum bag, and so the bag gradually gets smaller with use - but at only £3.95 per metre for a 1500 mm wide bag, it’s no big issue. I bought a bag 3 metres long so given that you lose about 2 – 3 cms each time you use it, it will be some time until it is too small for even quite large projects. A complete kit of a 3metre bag 1500 mm wide, a 2 metre bag 600 mm wide, breather fabric, tape and 2 stage vacuum pump set me back another £275. Gulp - this had better work!
I decided that my first attempt with the vacuum bag would be to veneer the rear of the back, thus providing a balancing veneer as well as a valuable training exercise. Overall I was happy with the result. Here is the back under vacuum. I used cascamite to prolong the working time. The veneers were about 4 x 160cms long by 20 cms wide on a 6 mm ply base.

Notice the careful use of breather fabric. And just imagine how cascamite squeeze out sticks to it like s*** to a blanket! Another valuable lesson learnt.
Next I turned to the front. 7 x 3mm veneers, each about 100mm wide. To mimic a t&g effect I took a 2mm bevel off each edge. Having learned the hard way, this time I wrapped the edges in plastic to keep any squeeze out off the breather fabric.

Then wrap the breather around it .....

... and press.

End result seems quite satisfactory and achieves the effect I was looking for.

Now a small diversion! I wanted to include a small carving on the top, and as my Mum wanted a couple of wedges to hold open her patio doors in the summer,so I cut some from Oak offcuts and named them. The initial names of “Tweedledum and Tweedledee” morphed into “Bill and Ben” when it came to carving the letters! It did warm me up a bit tho’ to relearn how to use a carving gouge.

What I wanted to achieve along the top of the bookcase was a simple carving. Having only ever carved letters and a simple chip carving motif on a blanket box before, I was not sure where to start. I settled on a pair of oak leaves (it is after all in English Oak) and acorns. After a bit of trawling around on the net, I came across a great “how to” article at the Woodworkers Institute.com. I simplified the design by copying one of these.
My first inclination was to carve it directly in to the top piece, but when I played around with a piece of scrap I quickly learned that without the appropriate curved chisels for under cutting, I would not be able to undercut the leaves. You will already have observed that I have “invested” in a lot of new tools during this job and curved carving chisels for undercutting is a slope too far. Also I was not convinced I could do it to an acceptable standard and didn’t want to trash a lovely piece of quarter sawn oak put aside for the purpose, so decided to do the carving separately and then recess it in to the top if I was satisfied with the result.
I started by tracing the design onto a separate piece of oak and then clearing around it with the router. The more intricate parts were drilled and cleaned out with a chisel and knife.

Next I made a start on the acorns and sloped the leaves down to the base of the acorns, and being careful to avoid cutting off the up curl at the top of the left leaf.

Then remove more off the top of the leaf to leave the acorns higher than the surround, and slope the leaves down to the tips.

Finally pick out a central vein in each leaf, undercut them gently, and finish off the acorn cups with a gentle tap with a tack, and the back ground with a blunted 6” nail.

Finally, let it into the top by routing out a recess for it.

Now to run up a simple jig to cut some dentil moulding.

Attach the dentil moulding and run up some simple framing bead on the router table to finish off the oak leaf carving recess.

Above this I fitted some Oak Cornice. Whilst I had fully intended to try and make my own, a casual enquiry at our local bespoke kitchen workshop uncovered a piece of left over Oak Cornice exactly the right length for which they only wanted £10, so I weakened - it was a “no brainer”. It’s attached with brass screws so if I ever want to make my own it can easily be replaced.
Finally cut some slots in the top of the base for some loose tenons to locate the sides of the top, and attach it using buttons.

And then patch up the draw front that was b******* up by the boiler house scam phone call.

Finish is two coats og Osmo PolyX oil, denibbed with a single pass of well worn 240 grit, with 3 coats of Liberon furniture wax on top.


Overall, foul ups not withstanding, I’m happy with the result. So is the LOML who commented that a matching unit the other side of the bay would look nice! I’ve earned my bandsaw, vacuum press and Veritas LA Jack Plane. :roll: :-k
I also learned a huge amount from this project with first use of a band saw and vacuum press. The bandsaw has rapidly become my weapon of first choice for many cuts now. It was also the first time I’ve done any veneering, and a 60” x 30” panel was a baptism of fire. It was the first time I had cut dovetails on the Incra and it’s also the first time for doing a full 3D carving rather than a 2d chip carving or incised letters.
Anyway, if you've got this far, thanks for reading. Any comments welcome.


