April Challenge 4 Eggcups
This months Challenge is to produce 4 Eggcups Eggxactly the same.
Our Judge for April will be George ( Thanks George ) and to keep this a cheap month I will ask George NOT to include timber used as a element of Judging,
I will ask George to comment on the top 5 placed entry's ( as requested )
All down to
1 Producing 4 identical Eggcups
2 Design
3 Tool control
4 Finish
Rules
Any wood type
Any design
Please make 4 eggcups to fit a Medium sized Chicken egg
No Easter eggs, No Cream eggs, No sparrow eggs, omelets Etc
Same format as previous months
NO Critique or comments on any work until May Please, After the Judging and results.
Please state item size, width and height and wood type if known and a little about how you made it and what finish you used ( this helps the judge )
The Judges decision is final.
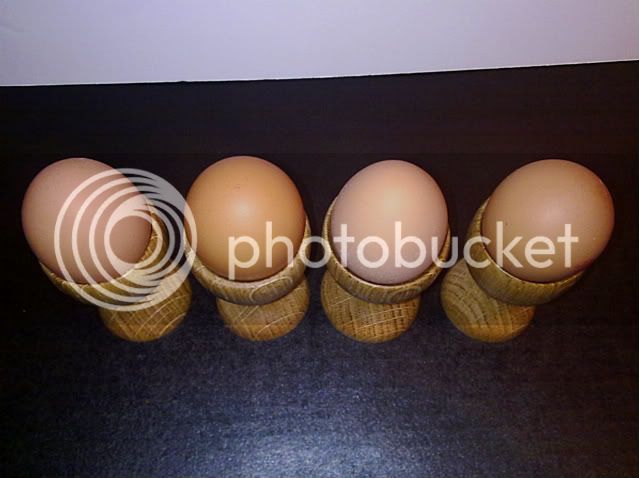
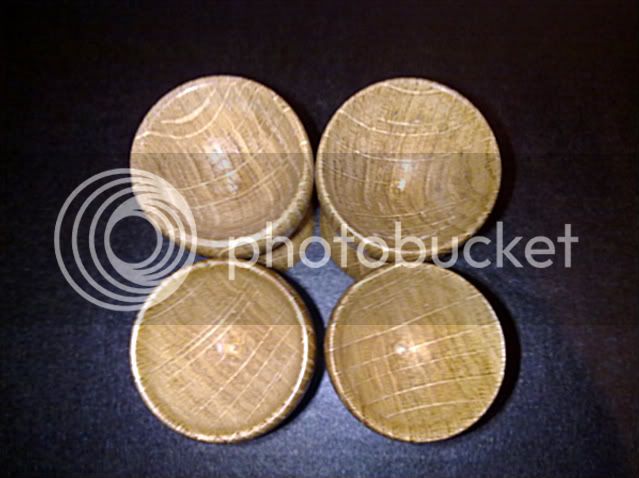
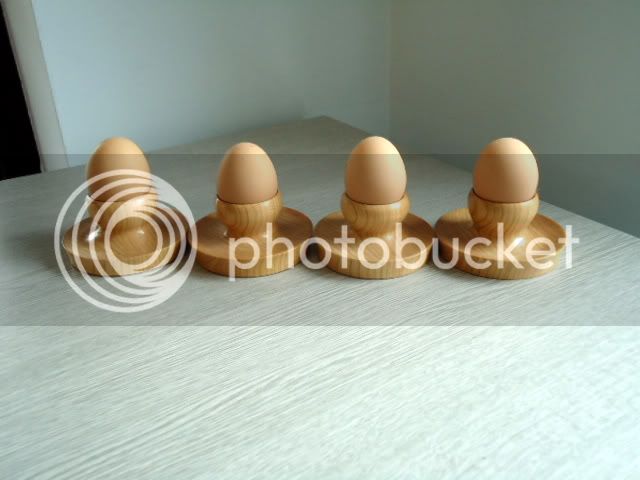
Please post 3 images of your work
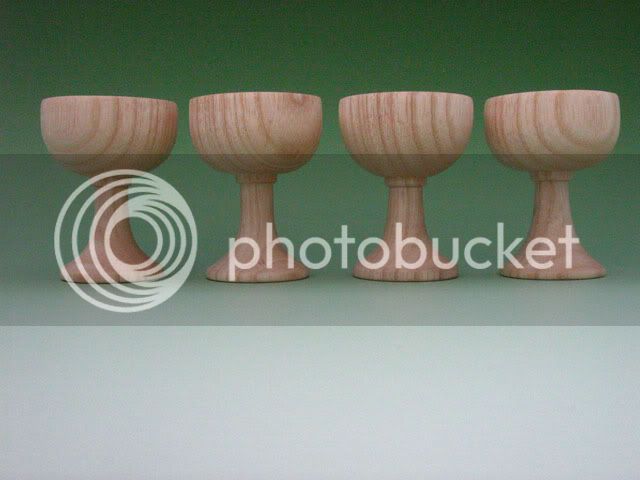
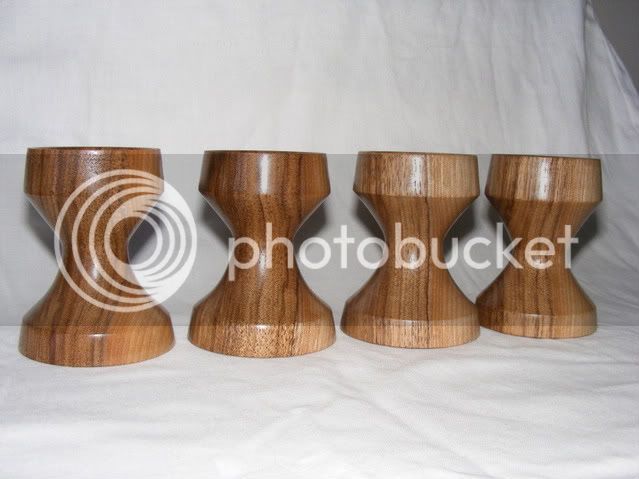
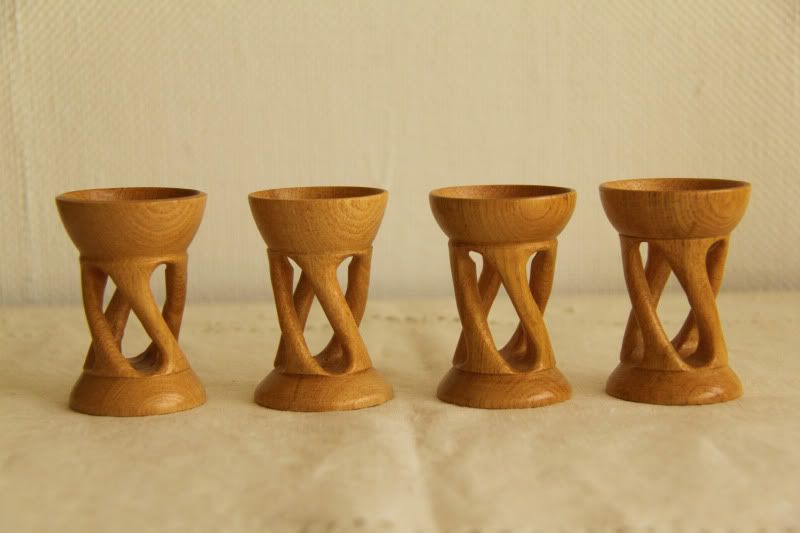
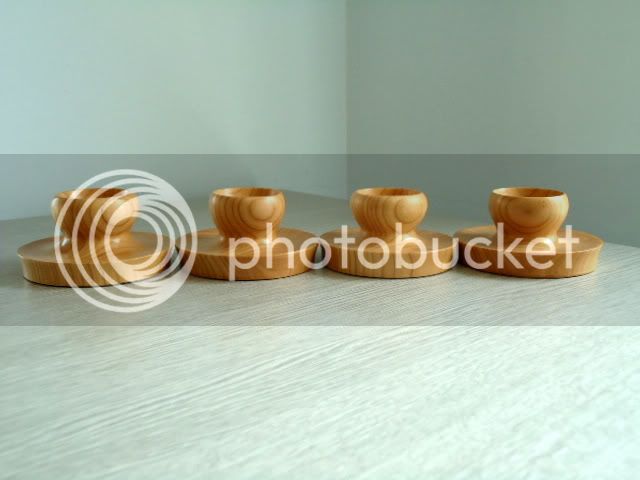
1 side profile ( 4 eggcups in a line )
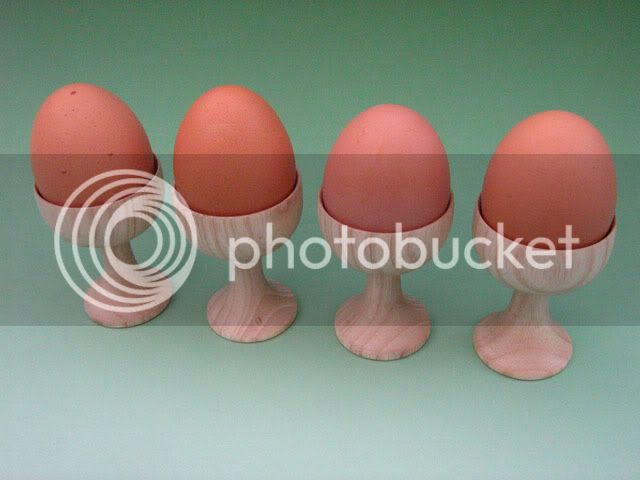
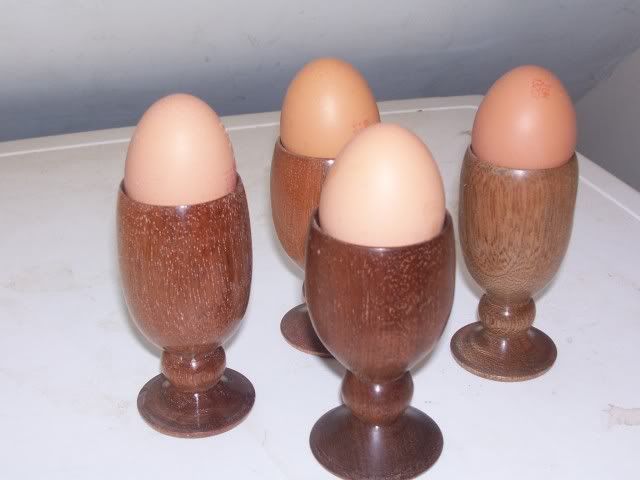
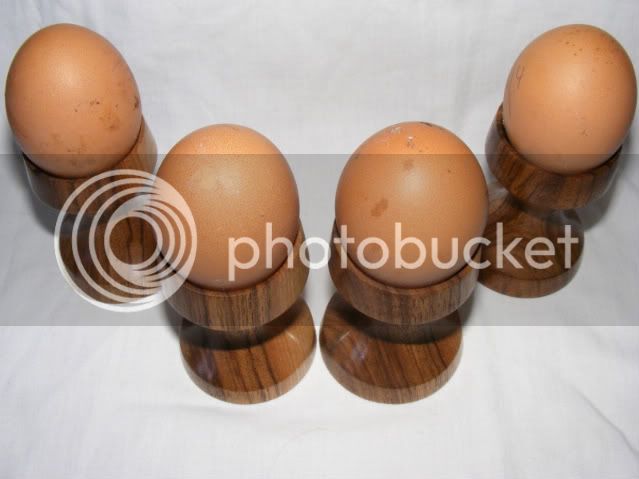
1 showing the top detail with 4 eggs in place
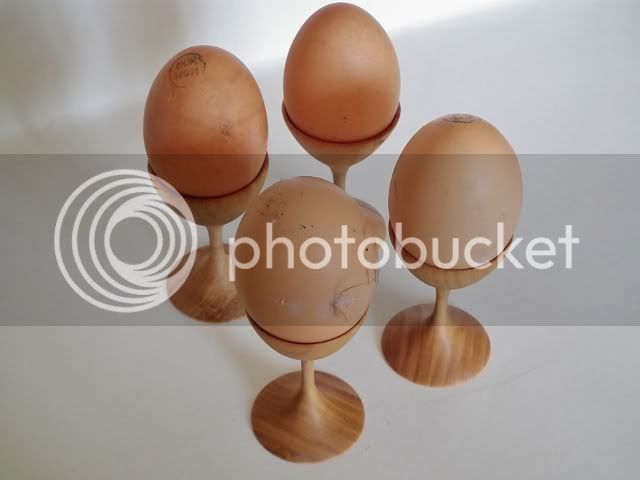
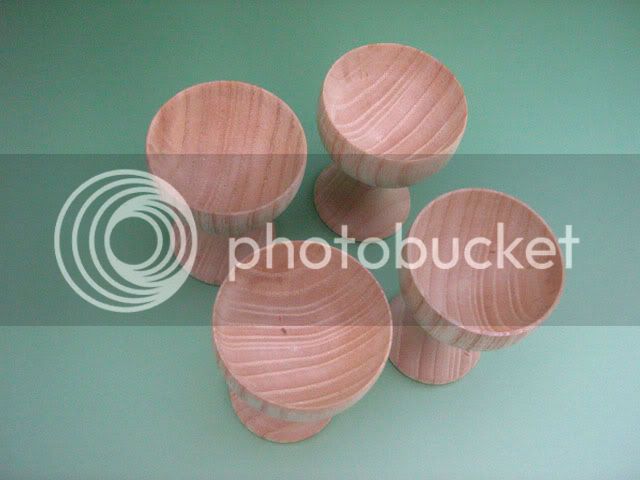
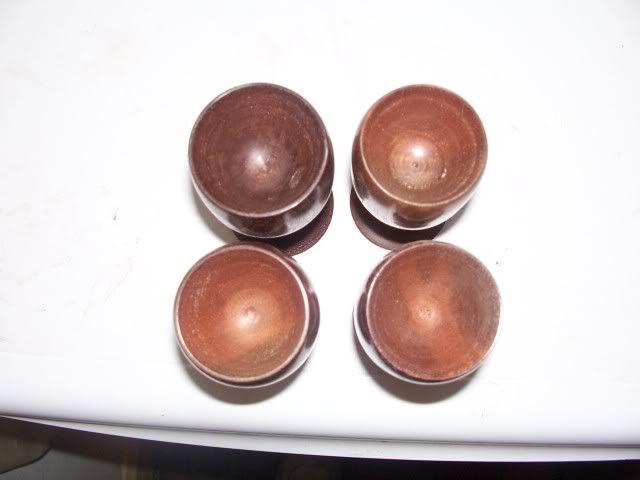
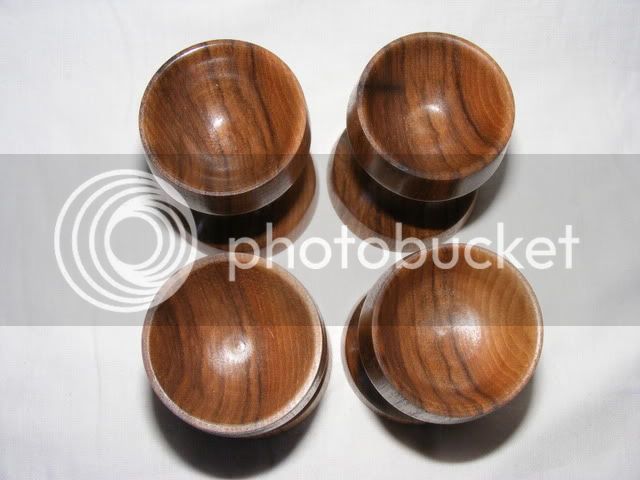
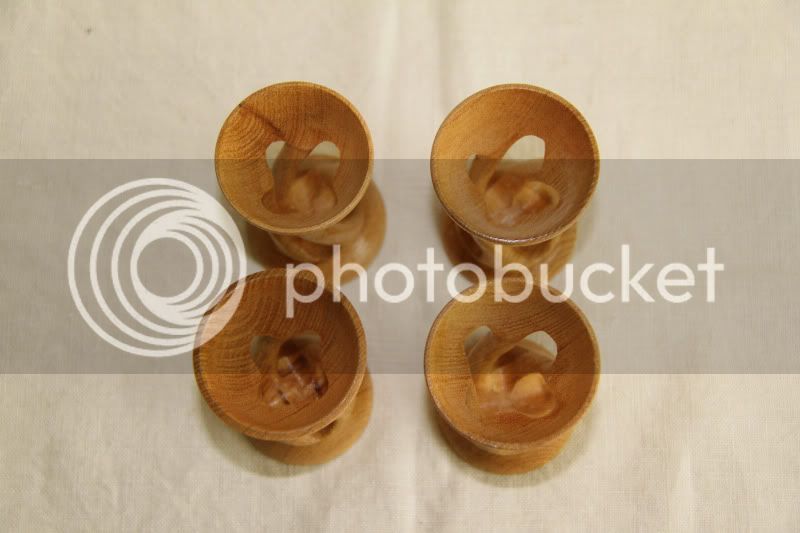
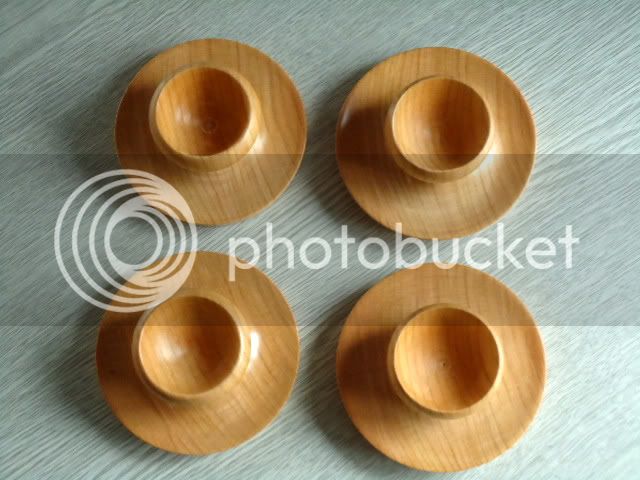
1 looking down with 2 rows of 2 eggcups ( In a block ).
Image size please use image size 640 x 480 0.3 mp, same as January ,February and March .
Please notify me your entry’s are ready by 10 pm on the 25th April after this time the thread will be locked
Entry’s to be uploaded from 10pm on 25th up until 10pm on the 27th April after this time the thread will be locked for Judging
Results will be given on or before 31st April
Good luck to everyone, Time to get Cracking :mrgreen:
Any questions please ask in the discussion thread
This months Challenge is to produce 4 Eggcups Eggxactly the same.
Our Judge for April will be George ( Thanks George ) and to keep this a cheap month I will ask George NOT to include timber used as a element of Judging,
I will ask George to comment on the top 5 placed entry's ( as requested )
All down to
1 Producing 4 identical Eggcups
2 Design
3 Tool control
4 Finish
Rules
Any wood type
Any design
Please make 4 eggcups to fit a Medium sized Chicken egg
No Easter eggs, No Cream eggs, No sparrow eggs, omelets Etc
Same format as previous months
NO Critique or comments on any work until May Please, After the Judging and results.
Please state item size, width and height and wood type if known and a little about how you made it and what finish you used ( this helps the judge )
The Judges decision is final.
Please post 3 images of your work
1 side profile ( 4 eggcups in a line )
1 showing the top detail with 4 eggs in place
1 looking down with 2 rows of 2 eggcups ( In a block ).
Image size please use image size 640 x 480 0.3 mp, same as January ,February and March .
Please notify me your entry’s are ready by 10 pm on the 25th April after this time the thread will be locked
Entry’s to be uploaded from 10pm on 25th up until 10pm on the 27th April after this time the thread will be locked for Judging
Results will be given on or before 31st April
Good luck to everyone, Time to get Cracking :mrgreen:
Any questions please ask in the discussion thread


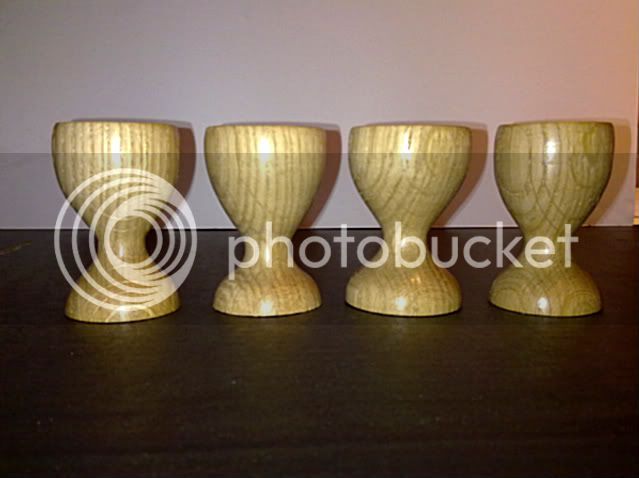


 ) afraid i didnt try anything fancy, found it difficult enough to try and match even basic shapes, great challenge but not sure if i am at the copy turning stage just yet