Building a 71 type router plane (which is also a 271)
I decided to try to make a router plane after finding a few occasions when I could have used one and seeing some home made examples online.
I’m strictly a hobby woodworker, working in a small garage space and I often find myself working late in the evening when the neighbours would not appreciate a screaming router (and the associated extraction) disturbing the peace and quiet.
Most of the designs I saw seemed very simple, an eye bolt shaped to hold a blade made out of an allen key. However I also read that a fine height adjuster and a depth stop made a router plane much easier to use. I could agree with this, when I started out in woodworking I had a couple of old wooden planes from my dad and a Stanley 5 ½ Jack. I could never get the hang of adjusting a blade without a screw adjuster, my taps always ended up with either no cut at all or trying to take off huge shavings. A cheap block plane was the same, junked once I bought a 9 ½ with a fine adjuster.
So I wanted a design which could use blades made from old Allen keys - I had a bunch of old imperial keys, unused for at least 15 years. I wanted different sized blades, fine height adjustment and a depth stop and all for little cost. I had seen some designs which used Lee-Nielsen blades in a home made frame but I didn’t want to buy anything if possible.
My tool budget is definitely frugal, my power tools tend to be Lidl specials or B&Q clearance. I drool over Festool in catalogues but their products are so far outside my price range that I don’t even know how to pronounce Festool, I’ve never heard it spoken. One of the Festool empty plastic Systainer toolboxes costs more than I paid for a lot of my power tools.
Looking round the garage for materials I found a 12mm square bar I’d once bought in B&Q for some long forgotten purpose. I should say that this design uses only common materials available in any DIY store. My metal working skills are very basic. I used a hacksaw, files, a centre punch and some taps. I used a mortice gauge to scratch a centre line mark on the bar for drilling and a mitre box to guide the hacksaw.
To explain how the design evolved I proposed to build a metal frame to hold the blade and blade adjustment. This module could then be mounted on a large base with handles like a 71 or a much smaller base like a 271. Since the blade holding module could be easily transferred from one base to another it would be easy to switch from open to closed throat or to make a base with a fence.
The first design idea (not the final one) was as below.

Initial Concepts
The basic idea was two metal bars front and back sandwiching the blade, two tapped holes (white circles) to secure the module to the base. A tapped through hole (red circle) to secure the blade and another tapped stopped hole (yellow circle) for a height adjuster.
The key to using different blades was to be the arrowed spacer blocks, different sizes of these for different allen keys.
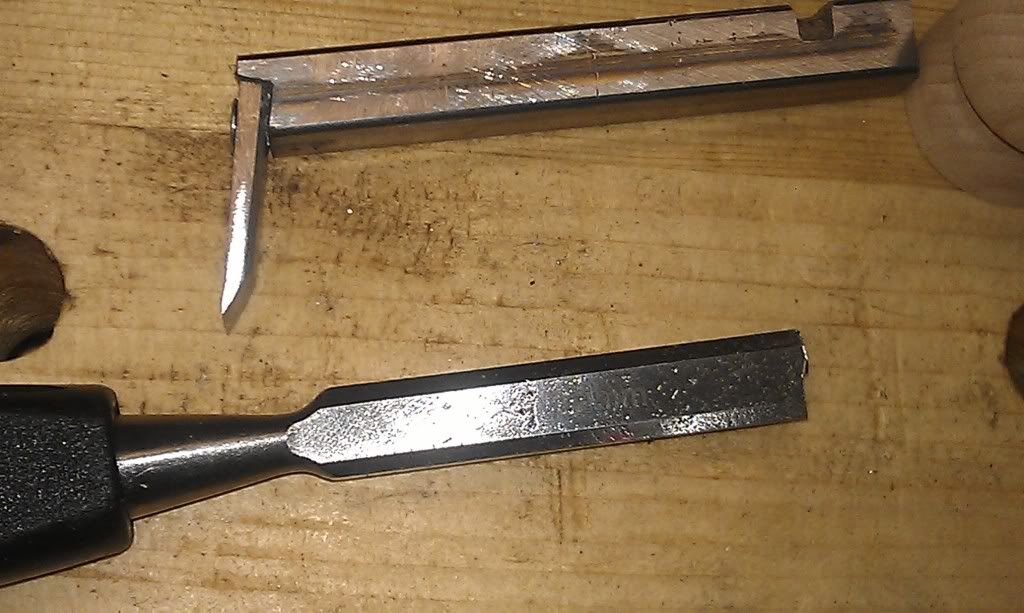
I’d already experimented with making a blade from an allen key, grinding it on a belt sander and cutting a slot for a height adjusting flanged nut. Tip, a hacksaw is useless for hardened tool steel but a tile saw will cut it easily.

Initial concepts 2. Blades roughly ground to size and a depth adjusting slot cut with a tile saw.
This design didn’t work. The middle spacer blocks would have to be cut much more accurately than I could manage with a hacksaw and mitre box. Using a file for shaping the blocks to fit the sides was tedious, that’s why I ground a flat up the whole length of the large Allen key, to try to make the process easier second time round.
Also the design required the height adjuster to be central, ie above the blade securing screw, to be able to handle the differently sized blades. It would have been tight to accommodate both in a 12 mm deep bar.
I’d almost written off the project until while browsing through B&Q I discovered they stock 12mm square tube. This prompted a redesign.
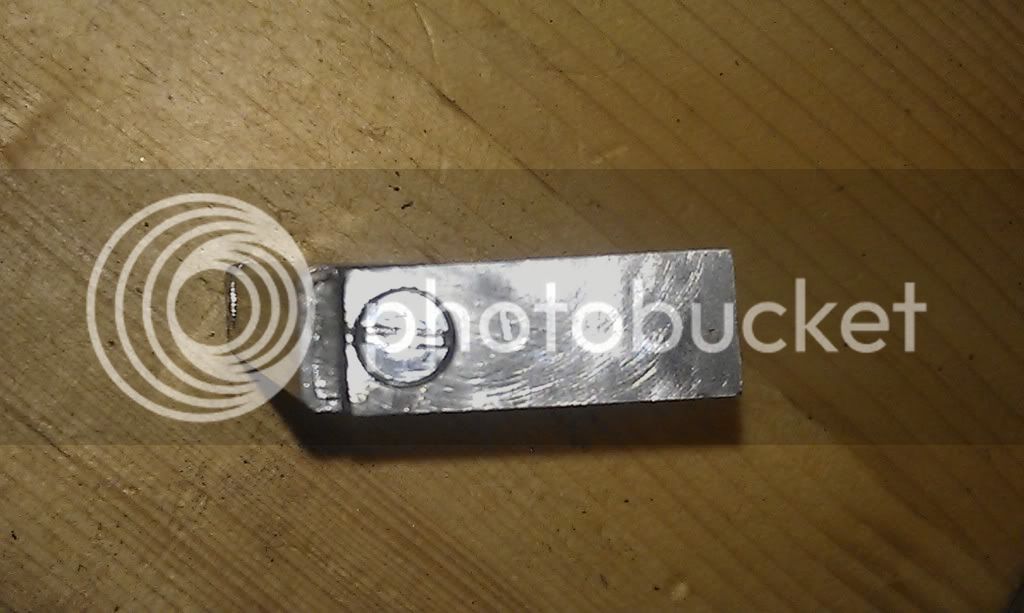
The Allen key blades are now held in the square tube giving identical sized bodies. The 3/8 Allen key was a perfect sliding fit inside the tube so I just stuck it in with epoxy. I didn’t think the epoxy glue would have the strength or rigidity on its own for the smaller key so it was packed out front to back with a piece of an old metal bracket. Once the initial fixing was set I stuck a bit of masking tape to seal the tube at the blade end and filled up the voids with glue. I stuck a small nail down into the epoxy at the top of the smaller key so that my height adjuster slot would be cutting into metal internally as well as the tube walls.

Redesign
A square blade holder meant the spacers between the front and rear bars can now just be easily cut. They need one square end but I was able to cut with a hacksaw and square it up with a file, unlike the first design the length isn’t critical. A couple of thicknesses of Al foil (just visible between the front bar and middle spacers) gave sufficient clearance for a sliding fit for the 12mm square blade holder tube.
Marking out is simple, the only critical alignments are the front to back holes. I drilled the front bar (using the mortice gauge to get an approx centre line on the bar) and used this clamped to the rear bar to mark it. One middle spacer is clamped and drilled roughly 6mm from the centre and then one of the blades used to align the other middle spacer piece.
One of the middle spacers has the through hole slightly widened with a file. At first assembly this allows it to be slid against one of the blades before tightening to ensure a snug sliding fit side to side.
I did wonder if one screw each side front to back would be sufficient to stop the middle spacer bars swivelling, however it works perfectly when tightened.
A surprisingly hard task was making a depth adjusting nut. Buying a flnged nut was impossible, plenty of suppliers on the internet but I couldn’t find one for very small quantities, ie one. I tried sticking washers on flattened T-nuts and threaded inserts but it was difficult to get the flange square to the thread and epoxy alone wasn’t strong enough on such a small glue area.
Next design (which might have worked) was to drill a square M6 nut at the corners with aa 1.5mm drill, drill corresponding holes in a washer through this. Use two panel pins to glue washer to nut, clip the pins and use another two panel pins to hold on some sort of knob.

Flanged nut first attempt

Flanged nut first attempt assembly
However I wasn’t happy with a depth adjuster the thickness of one washer. I felt it might distort if I tried to turn it without releasing the blade clamping screw.
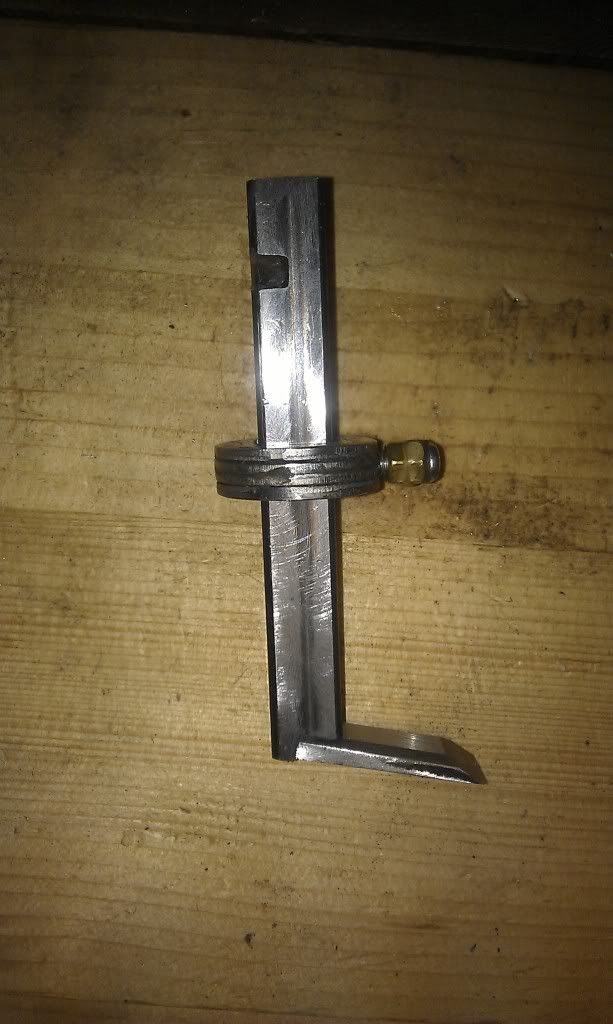
The next design was very simple, take three M5 25mm repair washers and clamp them on an M5 bolt with epoxy between them (but clear of the thread). This provides a large enough glue area to be confident they won’t shear and the 5mm hole is the perfect size for tapping an M6 thread. The resulting approx. 5mm thick nut is easy to turn, I found I didn’t have to knurl the edge at all.

Height adjuster mark 2
I cut the slots in the blades while waiting for the glue to set, using a tile saw (I used a Draper 737 300mm Tungsten Carbide blade, fits any hacksaw frame. Yes, I’m so cheap I do my own tiling ) to define the top and bottom edges and then grinding out the middle with a Dremel type clone (mine’s a Clarke).

Checking slot depth
It’s essential that the thread in the height adjustment knob is square to the top and bottom. I clamped in on the drill stand base, using a 5mm drill bit in the chuck to make sure it was centred. Replaced the drill bit and hand turned the M6 tap to start it off square.

Tapping the height adjuster

Ready to assemble
A rough plywood base for a first trial. The square blade lends itself to a simple clamp depth stop. A small clamp will serve as a temporary stop until I make something to size.

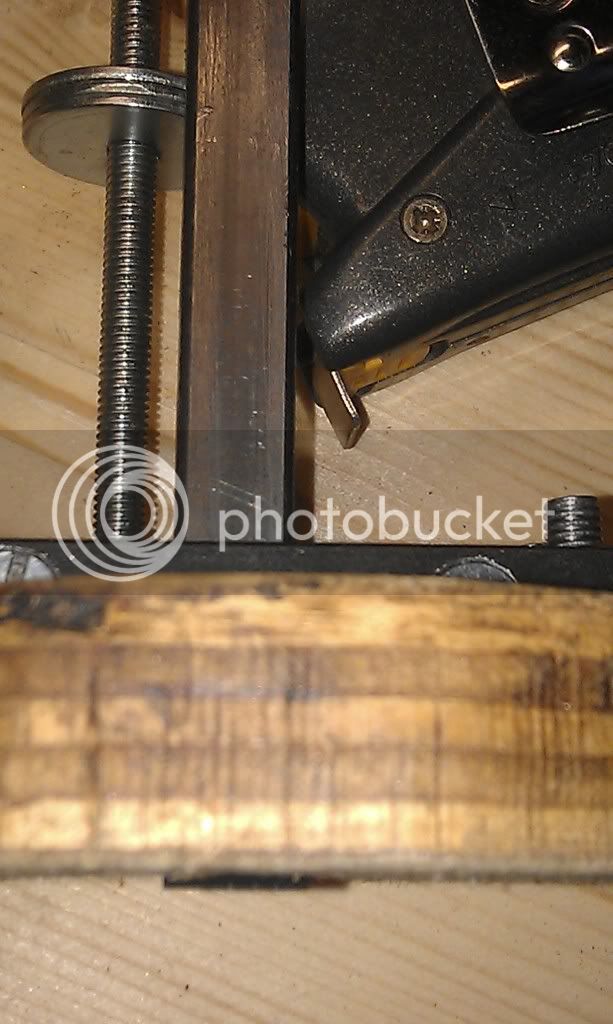
Height adjuster close up.
Backlash in the height adjuster is about ¾ of a turn on one blade, slightly more on the other.
The post has to be unscrewed during blade changing.
For confined space work the post can be unscrewed and the module used without fine height adjustment to lower the total height of the unit.
The footprint of the plane could be little more than the metal blade holding module.

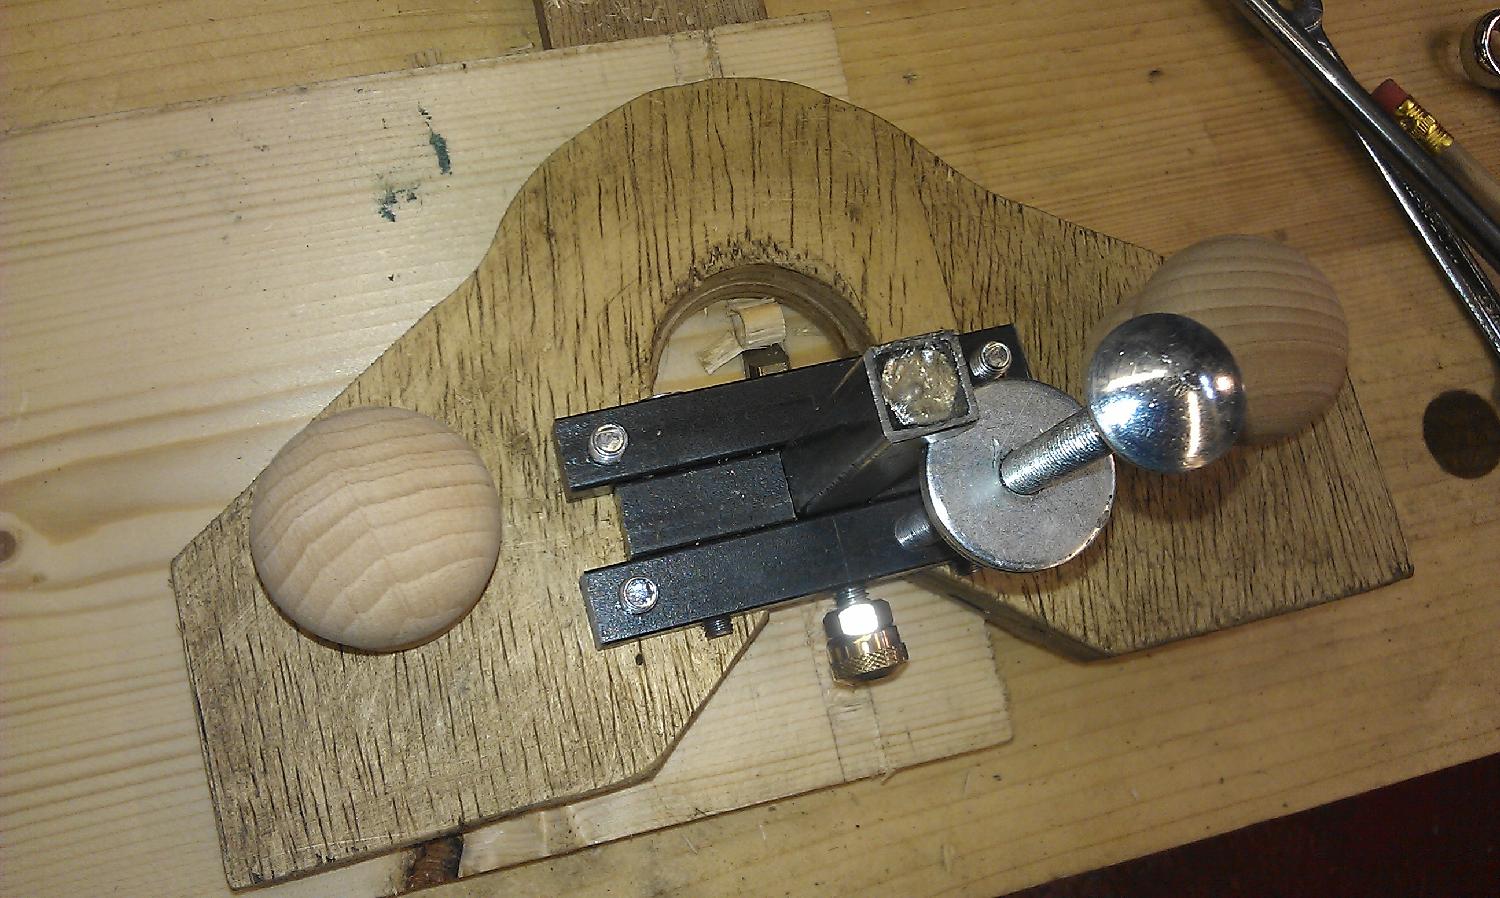
Assembled
The two M6 screws seem adequate to secure the module to any base. However the short front bar with no vertical base fixing screws is a remnant from the first design where it would have been removable to allow the use of different sized cutters. There’s no reason why it couldn’t be wider and have additional fixing points.

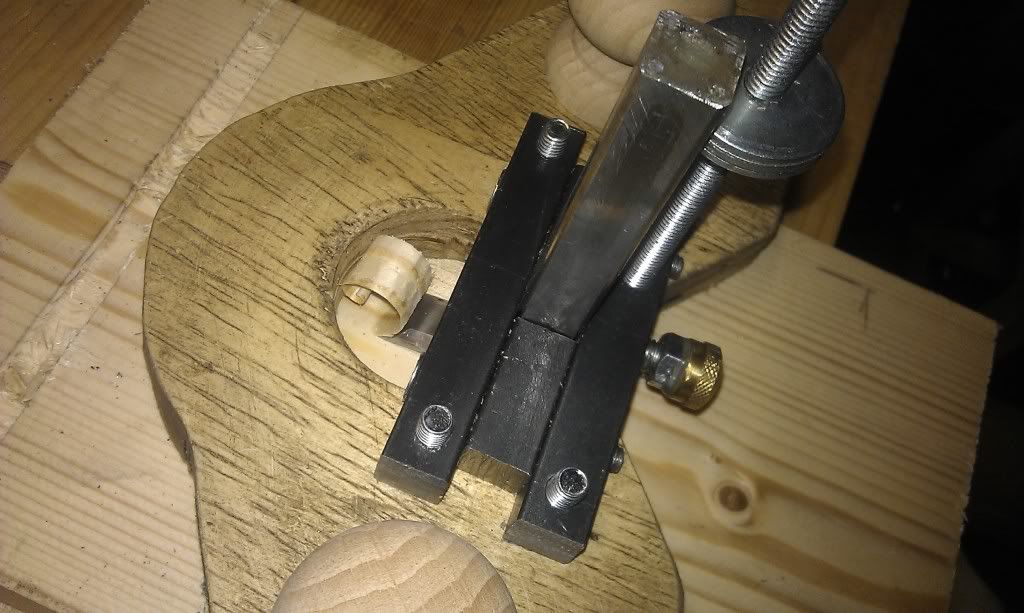
First shaving
The very first shaving, cross grain in pine. The fine height adjustment worked a treat.
Now to look for some decent wood to make a couple of nice polished bases.
All the photos I took during the build (more than are referenced here) are at
http://s1058.photobucket.com/albums/t404/jimhannas/71build/
I decided to try to make a router plane after finding a few occasions when I could have used one and seeing some home made examples online.
I’m strictly a hobby woodworker, working in a small garage space and I often find myself working late in the evening when the neighbours would not appreciate a screaming router (and the associated extraction) disturbing the peace and quiet.
Most of the designs I saw seemed very simple, an eye bolt shaped to hold a blade made out of an allen key. However I also read that a fine height adjuster and a depth stop made a router plane much easier to use. I could agree with this, when I started out in woodworking I had a couple of old wooden planes from my dad and a Stanley 5 ½ Jack. I could never get the hang of adjusting a blade without a screw adjuster, my taps always ended up with either no cut at all or trying to take off huge shavings. A cheap block plane was the same, junked once I bought a 9 ½ with a fine adjuster.
So I wanted a design which could use blades made from old Allen keys - I had a bunch of old imperial keys, unused for at least 15 years. I wanted different sized blades, fine height adjustment and a depth stop and all for little cost. I had seen some designs which used Lee-Nielsen blades in a home made frame but I didn’t want to buy anything if possible.
My tool budget is definitely frugal, my power tools tend to be Lidl specials or B&Q clearance. I drool over Festool in catalogues but their products are so far outside my price range that I don’t even know how to pronounce Festool, I’ve never heard it spoken. One of the Festool empty plastic Systainer toolboxes costs more than I paid for a lot of my power tools.
Looking round the garage for materials I found a 12mm square bar I’d once bought in B&Q for some long forgotten purpose. I should say that this design uses only common materials available in any DIY store. My metal working skills are very basic. I used a hacksaw, files, a centre punch and some taps. I used a mortice gauge to scratch a centre line mark on the bar for drilling and a mitre box to guide the hacksaw.
To explain how the design evolved I proposed to build a metal frame to hold the blade and blade adjustment. This module could then be mounted on a large base with handles like a 71 or a much smaller base like a 271. Since the blade holding module could be easily transferred from one base to another it would be easy to switch from open to closed throat or to make a base with a fence.
The first design idea (not the final one) was as below.

Initial Concepts
The basic idea was two metal bars front and back sandwiching the blade, two tapped holes (white circles) to secure the module to the base. A tapped through hole (red circle) to secure the blade and another tapped stopped hole (yellow circle) for a height adjuster.
The key to using different blades was to be the arrowed spacer blocks, different sizes of these for different allen keys.
I’d already experimented with making a blade from an allen key, grinding it on a belt sander and cutting a slot for a height adjusting flanged nut. Tip, a hacksaw is useless for hardened tool steel but a tile saw will cut it easily.

Initial concepts 2. Blades roughly ground to size and a depth adjusting slot cut with a tile saw.
This design didn’t work. The middle spacer blocks would have to be cut much more accurately than I could manage with a hacksaw and mitre box. Using a file for shaping the blocks to fit the sides was tedious, that’s why I ground a flat up the whole length of the large Allen key, to try to make the process easier second time round.
Also the design required the height adjuster to be central, ie above the blade securing screw, to be able to handle the differently sized blades. It would have been tight to accommodate both in a 12 mm deep bar.
I’d almost written off the project until while browsing through B&Q I discovered they stock 12mm square tube. This prompted a redesign.
The Allen key blades are now held in the square tube giving identical sized bodies. The 3/8 Allen key was a perfect sliding fit inside the tube so I just stuck it in with epoxy. I didn’t think the epoxy glue would have the strength or rigidity on its own for the smaller key so it was packed out front to back with a piece of an old metal bracket. Once the initial fixing was set I stuck a bit of masking tape to seal the tube at the blade end and filled up the voids with glue. I stuck a small nail down into the epoxy at the top of the smaller key so that my height adjuster slot would be cutting into metal internally as well as the tube walls.

Redesign
A square blade holder meant the spacers between the front and rear bars can now just be easily cut. They need one square end but I was able to cut with a hacksaw and square it up with a file, unlike the first design the length isn’t critical. A couple of thicknesses of Al foil (just visible between the front bar and middle spacers) gave sufficient clearance for a sliding fit for the 12mm square blade holder tube.
Marking out is simple, the only critical alignments are the front to back holes. I drilled the front bar (using the mortice gauge to get an approx centre line on the bar) and used this clamped to the rear bar to mark it. One middle spacer is clamped and drilled roughly 6mm from the centre and then one of the blades used to align the other middle spacer piece.
One of the middle spacers has the through hole slightly widened with a file. At first assembly this allows it to be slid against one of the blades before tightening to ensure a snug sliding fit side to side.
I did wonder if one screw each side front to back would be sufficient to stop the middle spacer bars swivelling, however it works perfectly when tightened.
A surprisingly hard task was making a depth adjusting nut. Buying a flnged nut was impossible, plenty of suppliers on the internet but I couldn’t find one for very small quantities, ie one. I tried sticking washers on flattened T-nuts and threaded inserts but it was difficult to get the flange square to the thread and epoxy alone wasn’t strong enough on such a small glue area.
Next design (which might have worked) was to drill a square M6 nut at the corners with aa 1.5mm drill, drill corresponding holes in a washer through this. Use two panel pins to glue washer to nut, clip the pins and use another two panel pins to hold on some sort of knob.

Flanged nut first attempt

Flanged nut first attempt assembly
However I wasn’t happy with a depth adjuster the thickness of one washer. I felt it might distort if I tried to turn it without releasing the blade clamping screw.
The next design was very simple, take three M5 25mm repair washers and clamp them on an M5 bolt with epoxy between them (but clear of the thread). This provides a large enough glue area to be confident they won’t shear and the 5mm hole is the perfect size for tapping an M6 thread. The resulting approx. 5mm thick nut is easy to turn, I found I didn’t have to knurl the edge at all.

Height adjuster mark 2
I cut the slots in the blades while waiting for the glue to set, using a tile saw (I used a Draper 737 300mm Tungsten Carbide blade, fits any hacksaw frame. Yes, I’m so cheap I do my own tiling

Checking slot depth
It’s essential that the thread in the height adjustment knob is square to the top and bottom. I clamped in on the drill stand base, using a 5mm drill bit in the chuck to make sure it was centred. Replaced the drill bit and hand turned the M6 tap to start it off square.

Tapping the height adjuster

Ready to assemble
A rough plywood base for a first trial. The square blade lends itself to a simple clamp depth stop. A small clamp will serve as a temporary stop until I make something to size.

Height adjuster close up.
Backlash in the height adjuster is about ¾ of a turn on one blade, slightly more on the other.
The post has to be unscrewed during blade changing.
For confined space work the post can be unscrewed and the module used without fine height adjustment to lower the total height of the unit.
The footprint of the plane could be little more than the metal blade holding module.

Assembled
The two M6 screws seem adequate to secure the module to any base. However the short front bar with no vertical base fixing screws is a remnant from the first design where it would have been removable to allow the use of different sized cutters. There’s no reason why it couldn’t be wider and have additional fixing points.

First shaving
The very first shaving, cross grain in pine. The fine height adjustment worked a treat.
Now to look for some decent wood to make a couple of nice polished bases.
All the photos I took during the build (more than are referenced here) are at
http://s1058.photobucket.com/albums/t404/jimhannas/71build/


