Poor man's Joint Master?

UKworkshop.co.uk

Help Support UKworkshop.co.uk:

This site may earn a commission from merchant affiliate links, including eBay, Amazon, and others.

Sportique

Established Member
Joined
1 Jul 2009
Messages
559
Reaction score
0
Location
Fife Scotland
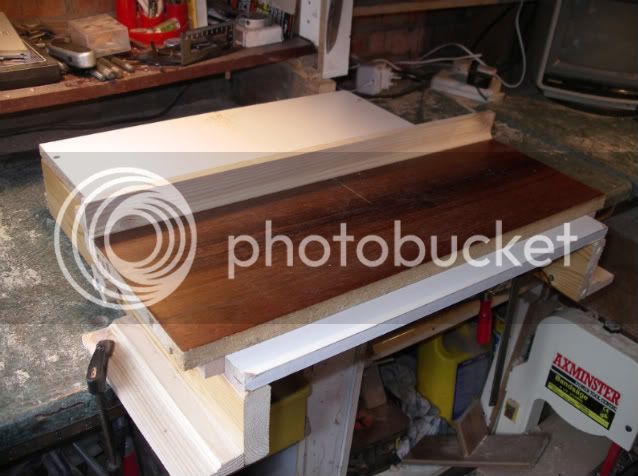
Thanks to Mailee for introducing me to Bridge City in an earlier post - seeing the Joint Master Pro set me to thinking "what-if ....?"

Well I enjoy engineering challenges (in a very simple way!) and although my version does not have a tilting blade - maybe that will come? - it does work very well.

This is certainly not everyone's cuppa tea - the tool/jig has serious size limitations - and without a tilting blade will only make vertical cuts - but I am sure it will be very useful in box making and other similar scale items. The cuts are easy, QUIET, clean and square. I am suprised how little effort is needed for one-push cuts.

I was fortunate in having a spare Japanese thin-kerf, pull-cut blade.

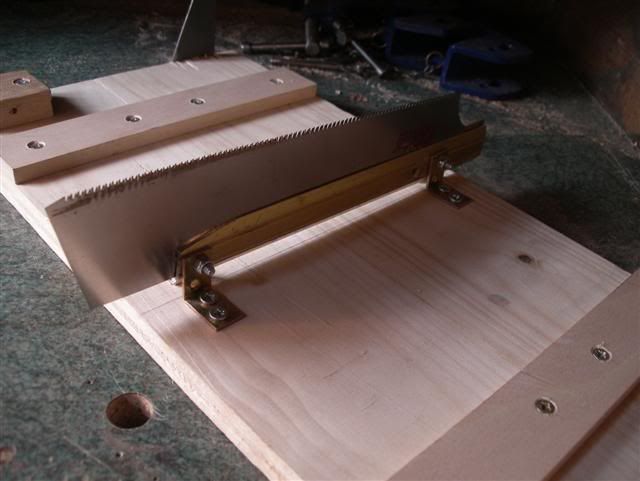
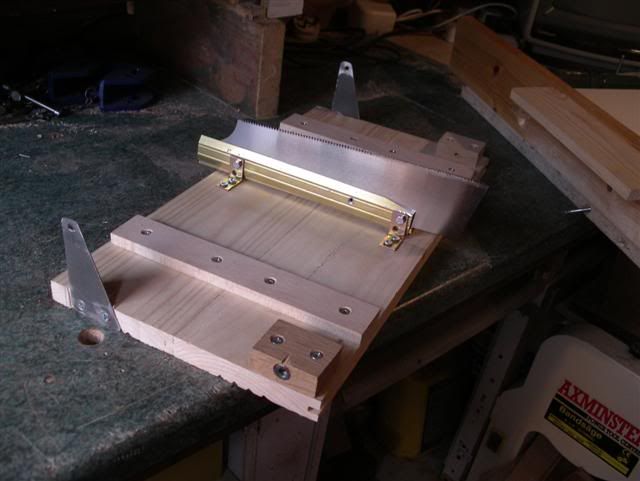
So, first I drilled two mounting holes in the blade, then mounted the blade onto a board using angle plates and some alluminium stiffening pieces. (Sorry no WIP).

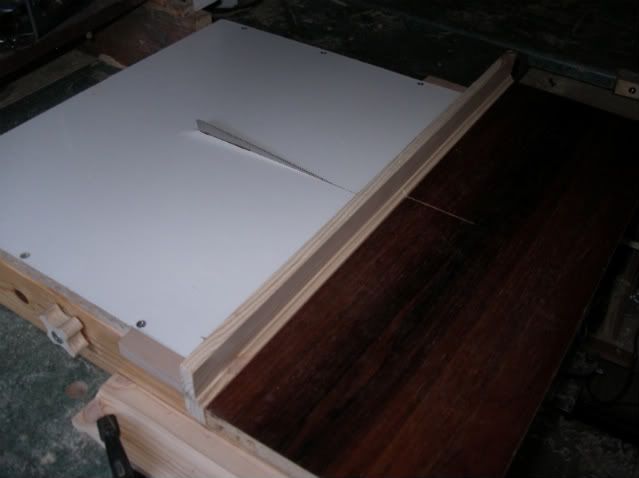
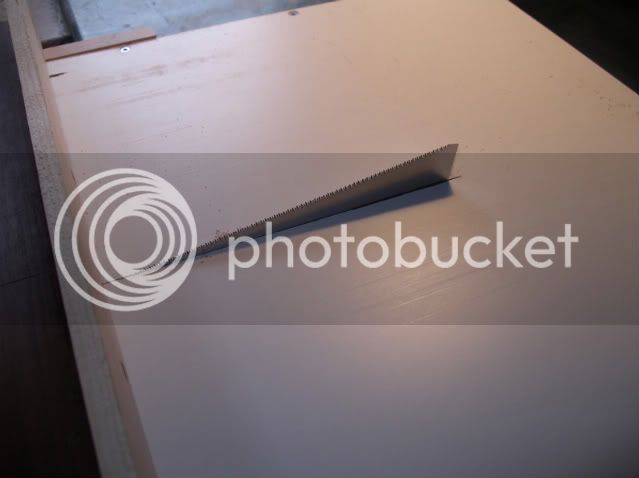
Then built the table and cut a kerf slot in the centre. This top is supported by side pieces to give clearance for the blade mounting board and mechanism. Two swivel brackets were fabricated and fitted to the blade mounting board in line with the front (near) end of the blade as a pivot.

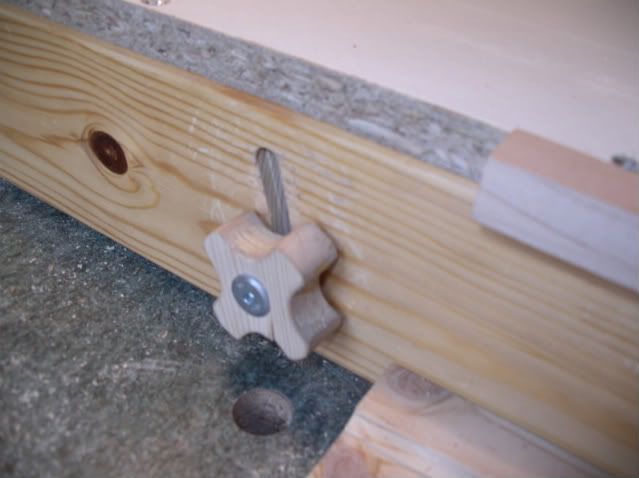
The side pieces were slotted to take M5 bolts/knobs to allow for vertical adjustment of the back of the blade (far end). This allows the blade to drop below the table, and rise to 30mm at the tip. The height adjustment bolts are threaded into mounting blocks holding thread inserts.

Then a sliding fence was made up - rather than ploughing mitre slots I fitted side bars to slide along the sides of the table - first I made sure the table and blade were all square to each other. The fence is fitted to a sliding board to give plenty of support and stability when sliding the fence forward.

Finally a couple of pieces of softwood were fitted along the bottom of the side pieces to facilitate clamping the whole thing to the bench - this is essential.
IMGP2919.jpg


IMGP2917.jpg


IMGP2918.jpg


IMGP2916.jpg


I hope you enjoyed that? (Thanks for heads up on Bridge City Mailee)

Dave
 
Hey no problem Dave. Nice to see a man after my own heart. I enjoy making jigs almost as much as making my projects too. Glad to be of help. :wink:
 
=D>

I've watched the video several times and have drawn up some plans to build one. I was going to order some blades and get to work on it. But after seeing yours i think i can make one a bit differently.

Thanks for sharing
 
Thanks for your comments.

Mailee - :D I certainly do have a lot of fun from making jigs - but I guess many on here would think it a waste of time/space :cry:

PS - I finally made the kerf/slot measure - though I'll be honest I used 9Fingers/Bob's idea, and in this case the key is having a good sliding dovetail - mine's a just tad slack.

Woodsworth - thanks! If you need any more pics or have any questions just ask - this is a very simple solution but works well. I could give more photos/detail of the tilting mechanism if it helps.

Tigerhellmaker - fascinating - I will give it a try! It should be possible as all the cuts are vertical and of the same depth. Though I am not sure if I have a piece of scrap that will work

Dave
 
Oh no, think i need to make some squiggle wood now !

Thanks for the post Dave, that should give you hours and hours of fun :wink:

Simon
 
John,

thanks for the encouragement.

I am not sure from your comment if you have seen the original Joint Master Pro from Bridge City Tools.

Take a look at
http://www.bridgecitytools.com/Categories/Woodworking+Tools/Jointmaker+/

There are also some great videos on Utube.

at about $1200 their's is much more flexible - you will soon see why I have called this one the "poor man's" version.

:cry: :cry:

Dave
 
I have seen the original, a month or two ago. I am still impressed by your version, however!

 
Hi Dave, I would like to try and make one of these, would it possible to see a picture of the mounting/raising system? Cheers.
 
Byron and John,

thanks for the interest, here are some further details and photos:

Firstly it has to be said that my target was one of simplicity!

This first picture shows how the blade is mounted vertically on the blade mounting board. The blade is sandwiched between two pieces of alluminium carpet threshold :oops: and held in place with four small right-angle brackets. Clearly the most important considerations are that the blade is truly vertical and square with the board.

IMGP2976Small.jpg


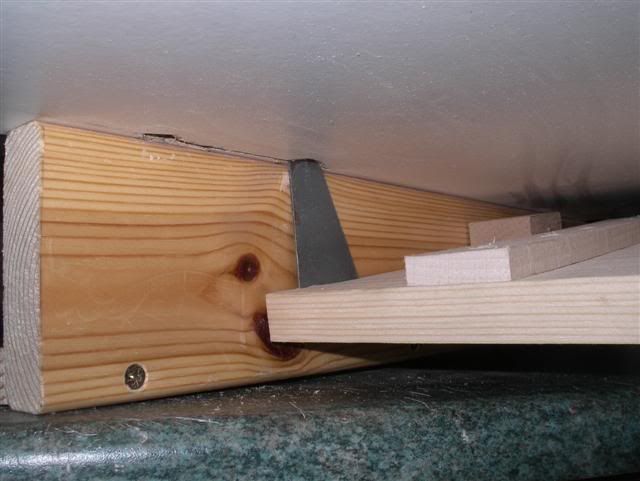
This next image shows two things: firstly the flat metal bracket (lower left) used as the pivot fulcrum, and secondly the simple wooden block (lower right) each holding a threaded insert. There are two pivot brackets and two wooden blocks. The height of the pivot brackets and their fore-and-aft position are critical relative to the heel of the blade - such that when in the down position the blade is fully below the table, but still allowing maximum use of the length of the blade when it is raised.
IMGP2977Small.jpg


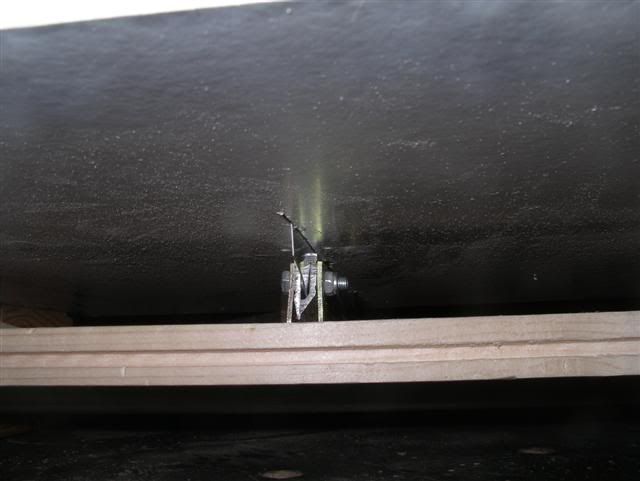
The saw table is placed over the top of the blade mounting board such that the pivot brackets enter slots cut in the table. The pivot mechanism is two 5mm machine screws threaded into 4mm holes drilled horizontally into the edges of the table so that the machine screws pass through the upper hole in each bracket - a simple but effective pivot which relies upon the screw being a good threaded fit into the table. (Viewed from the underside of the upper table)

IMGP2986Small.jpg


Here are a couple of views of the underside of the table showing the blade mountings and the blade penetrating the table.

IMGP2985Small.jpg

IMGP2983Small.jpg


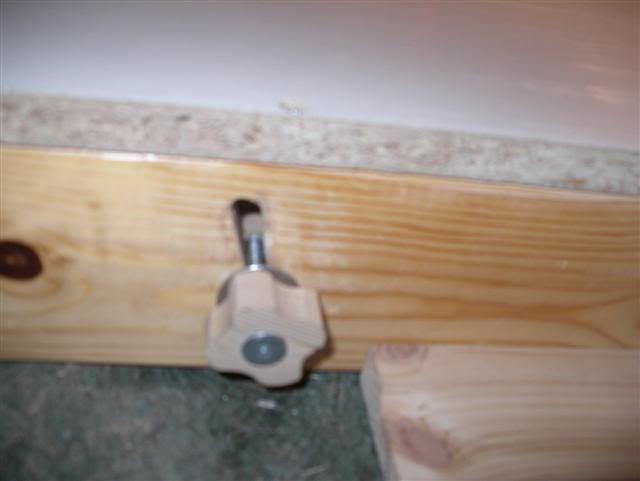
Then finally, after setting the blade height, the knobs (which run in radiused slots in the side supports) on either side are tightened. It should be easy to add an adjustable stop, but perhaps a little more difficult (but not impossible) to design an incremental mechanism

IMGP2981Small.jpg


Hope that explains it in more detail, have fun :D

Regards

Dave
 
Dave,

That is superb work - thanks for the extra pictures, it all makes perfect sense now, I'll have to have a rummage around to find a suitable piece of metal to mount the blade.. I have an old axminster kumagaro saw that'll be perfect for this.

Cheers,
 
Great report. Why did you use a Japanese saw in your poor mans version? Wouldn't a western saw that you could resharpen work just as well? I can see why bridge city tools used a Japanese saw because they want to sell replacements and most people wanting a jog like this probably don't want the bother of resharpening a saw blade. But is there any other advantage of the Japanese saw over a western one?
 
Gerard Scanlan":1upa1zxb said:
Great report. Why did you use a Japanese saw in your poor mans version? Wouldn't a western saw that you could resharpen work just as well? I can see why bridge city tools used a Japanese saw because they want to sell replacements and most people wanting a jog like this probably don't want the bother of resharpening a saw blade. But is there any other advantage of the Japanese saw over a western one?

You need to use a pull saw because that is what you are doing. You are pushing the wood, but it is upside down and having the same effect as pulling the saw through the wood.
 
I know this is an old thread, but every time someone mentions the joint master I want one. I wouldn't pay that much for one, unless I won the lottery, but if it was £200 or less I would just hit the buy button. Not that it matters as I don't think they ever made one for sale and they discontinued the cheaper version.
 
Geordie Joe":2fmikal7 said:
Gerard Scanlan":2fmikal7 said:
Great report. Why did you use a Japanese saw in your poor mans version? Wouldn't a western saw that you could resharpen work just as well? I can see why bridge city tools used a Japanese saw because they want to sell replacements and most people wanting a jog like this probably don't want the bother of resharpening a saw blade. But is there any other advantage of the Japanese saw over a western one?

You need to use a pull saw because that is what you are doing. You are pushing the wood, but it is upside down and having the same effect as pulling the saw through the wood.


That doesn't really make sense you could mount the saw blade either way around
 
I would thing the thin kerf and razor sharp teeth of a Jap saw make it far more suited to this task than a western style saw.
 
Back
Top