MDF wardrobes

UKworkshop.co.uk

Help Support UKworkshop.co.uk:

This site may earn a commission from merchant affiliate links, including eBay, Amazon, and others.

chippy1970

Established Member
Joined
3 Jun 2007
Messages
3,027
Reaction score
1
Location
London
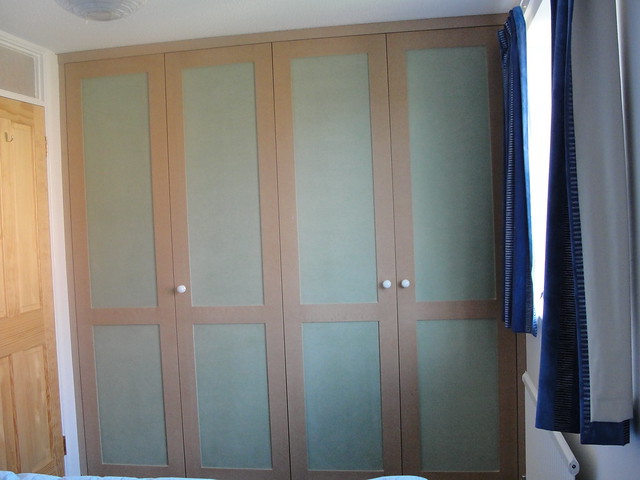
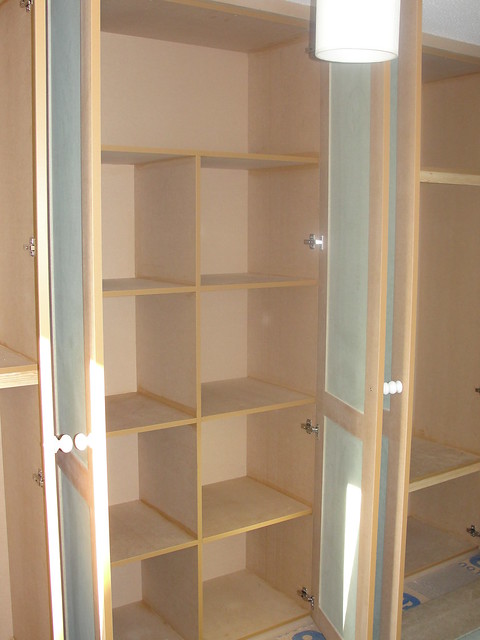
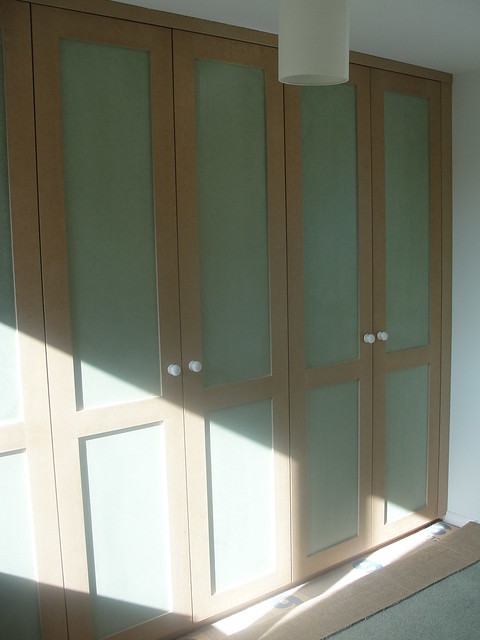
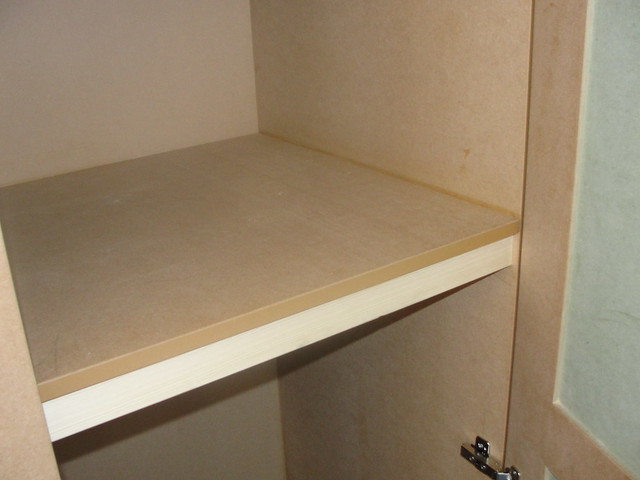
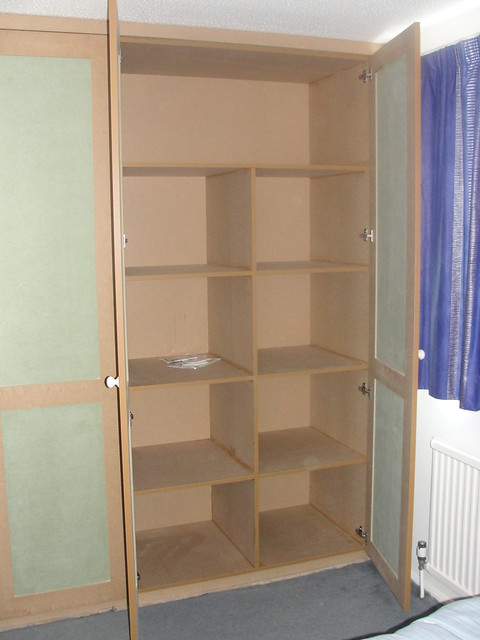
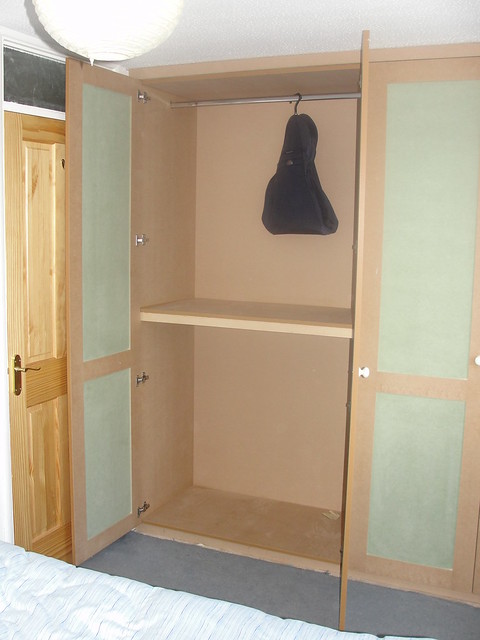
Here's some pics of some wardrobes I built over the last week for a customer they're in two seperate rooms one with two and the other room has three wardrobes. Carcases all in 18mm mdf with shaker doors in 22mm MR/mdf with 6mm panels. For a change I didn't bother cutting up all the sheet goods myself I used Cutwrights online cutting list. I had all the mdf cut to size leaving me the job of cutting all 400+ biscuit slots and putting it all together with Spax M screws and glue. I also had all the exposed edges treated with prep tape to save the painter any hassle you may be able to see this on some of the shelves. I also had the doors made by Cut wrights which I normally do myself but for the price they did them it wasn't worth my while messing about.

All the biscuiting was done with my new toy I treated myself to a Mafell LNF20 biscuit jointer what a difference to my old Axminster one :lol:.

I tried out a new method of doing all my infills on this job, I decided to make up long lengths of 6mm mdf glued and pinned to 18mm to form an L shape this is then scribed and slid down the sides and tops of the carcases and screwed behind the hinge clips. This worked really well as I found that with a few notches for shelves etc I could temporarily fix these to the inside of the carcase for scribing then you can just run two bits of 18mm mdf with a pencil down the wall to mark the scribe job done. I over hung the top infill just a little to form a sort of cornice.
6169477355_df405a9e03_z.jpg
6170012142_056f118657_z.jpg

6169476299_b0138f4ff1_z.jpg
6169475849_be87203ecc_z.jpg

6170010604_58a10e90cd_z.jpg
6170010102_c3fcc209cd_z.jpg
 
That turned out well, were did you get that idea about the scribes :?: :wink: :wink:

Looks like they made a good job on the doors, certainly worth the price you told me, does it look like they put them through a drum or belt sander as I always find the sanding one of the longest jobs

J
 
:D

Yeah they run them through a sander I didn't check them but was told they end up 21mm thick after sanding. They edged the doors with tape as well.
 
Very nice Chris. I usually get my MDF cut by my local timber yard, but there's been a change of panel-saw guy recently and the new man isn't so fastidious - definitely not millimetre-perfect any more :(

Interesting to see that Cutwrights will make up the doors and tape the edges as well - that's a real time-saver. Are they local to you, or did they deliver? And what sort of lead-time do they work to?

TIA, Pete
 
Peter

Yeah they are in Hanworth just up the road from me probably not far from you either as your in West London google them, you can register with them and do your cut list online then I just pay over the phone. They use a computer controlled beam saw so its all very accurate. I ordered it all on Wednesday morning and the mdf was ready for collection Friday morning and I picked up the doors on Tuesday. They send you a text when its ready , very good idea and they also deliver if you need it.

Years ago I would get all my stuff cut up by a yard but Im fussy and it was never mm perfect thats one reason I bought a TS55 saw and started doing it all myself but with my small 4m x 4m workshop I find its not worth the hassle anymore. I had it all cut up and just had to do a bit of biscuiting etc then put it all together on site.

Chris
 
Thanks Chris - Yes, Hanworth's not a million miles away from me, but probably not close enough that I'd want to collect either, lol! Like yourself I work out a pretty small workshop and I've been spoiled a bit as I have a terrific timber yard literally 5 minutes away from me that for the last ten years have done millimeter-perfect board cutting, just this last job that went a bit awry; nothing I couldn't sort out, but just unusually sloppy from them. Plus they're only a small yard so can't carry that much variety of stock...

Anyway, I'll take a closer look at CutWrights - many thanks for posting your thoughts here. One last cheeky question if I may - can I ask what the doors cost you, all-in? No worries if you prefer not to say, but it'd be useful to have a rough guide-price per door - I have a few wardrobes coming up ;)

Thanks again, Peter
 
Can you tell me more about the scribing method,i cannot picture what you are saying ,thanks.
 
If I get a chance I will post a drawing.

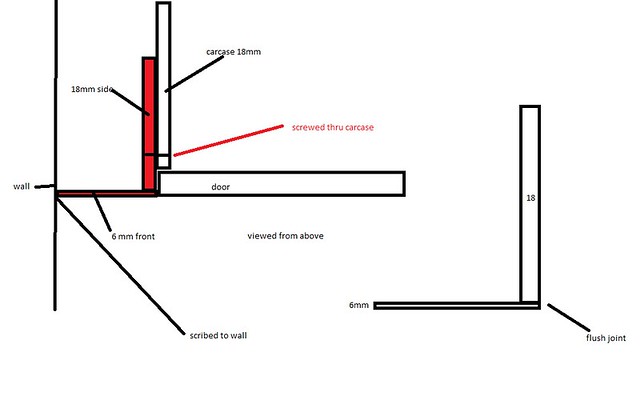
It's pretty straight forward imagine you are looking down from the top of the unit say at the leftside for instance. You would have a backwards L shape made up of a strip of 18 mm and the front in 6mm. The 18 fixes to the carcase and you scribe the 6 to the wall. Doing it this way allows you to move the 18 in and out until its flush with your doors or wherever you want it before fixing it

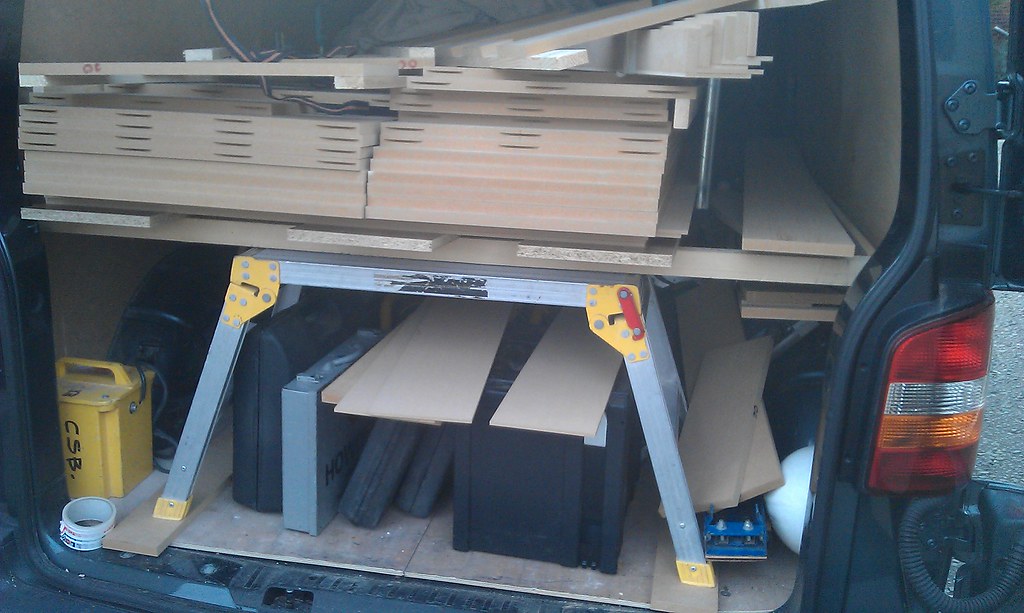
Here is a pic of all the gear loaded in the van you can see the infills on the right at the top.

6191964758_30e4a9ea57_b.jpg
 
Chippy was asking me how I dealt with 18mm doors and the small gap behind when using concealed hinges and the need for the scribe panels at the side to be flush with the door face.
By making an "L" shape you can fine adjust the position of the scribe in/out to align with the doors and having the leg of the "L" in 6mm material makes it easy to fine tune the fit of the scribe with a block plane. Teh 18mm leg of teh "L" is fixed to the outside of teh carcase with a few screws which can be hidden behind the hinge mounting plates.
J
 
Thankyou both but still cannot picture it,any chance of an sketch up ,cheers.
 
had a PM from Chipz so here for anyone else who cannot quite grasp it is a very quick drawing I did in paint.

6200530697_10bebe027a_z.jpg
 
Hi. I have been reading about the L shaped scribing method and want to give it a go on a wardrobe I am building for my mother-in-law. One quick question. If I screw the 18mm vertical section from the inside of the cabinet, how does the 6mm horizontal part of the L actually fix to the wall? Or does it just sit there flush to the wall but not actually attached? Surely if anyone accidentally put any pressure on them they would break or collapse.

Many thanks for you help

Toby
 
The 6mm panel fits close to the wall and is finished with a bead of decorators caulk. The panel shouldn't be very wide so little danger of anyone leaning against it. If you need to make a wider infill piece then use thicker material. I make the L shaped piece by gluing and pinning the two pieces of mdf together.
 
Apologies for resurrecting an old thread but I have some questions about wardrobes that are relevant to this thread. I am about to start building some in-built wardrobes in my house and it will be the first time I have tackled a project this big.
I was wondering, once you have built wardrobes such as the ones shown in this thread, do you attach them to the wall at the back and If so what do you use for the task?
Also, when adding infill to the sides and the top of the wardrobes, how do you attach them without the screws showing?
Sorry if I am showing my ignorance through these questions.

Cheers,

Andy
 
Andy I don't fix mine at the back I just screw down thru the base into the plinth that's fixed to the floor. Also through the sides and top with packing.

The infil sides are just screwed and filled but if you cannot fill then hide the screws behind the Blum hinges.

Sent from my HTC One using Tapatalk
 
Thank you,

Sorry for asking more questions, but what would you use to attach the carcass to the plynth? Or would you just screw straight in?

Cheers,

Andy
 
Just screw straight through the base. I prefer a solid plinth but you can use adjustable legs the same as a kitchen

Sent from my Hudl HT7S3 using Tapatalk
 

Latest posts

Back
Top